advertisement


Speakers: MUN17-3W

Having spent 30 years teaching technology with proper wood machines available its been a real pain having to go buy the same machines for home use now I have retired. I would rather spend money on a 30 year old Startrite / Wadkin Bursgreen table saw ,have to move it , refurbish it and then use it than buy a flimsy modern piece of junk. Same with the Bandsaw, Planer thicknesser, Belt sander, lathe milling machine. Did I say I liked toys to play with?
I totally agree - except for the bit about being happy to move these old machines. :oops:
 
I've accidentally bought some router bits for a 1/2" shank. If anyone has use for them just let me know.

They're just a straight cut bit with two carbide tipped blades, nothing fancy
 
But high quality tools make a significant difference, even for a beginner. I see three broad levels of quality: (1) hobbyist, (2) trade, and (3) premium. Unless the tool is intended for non-critical jobs, then nothing less that trade quality will do for me. I'm reminded of the first table and mitre saws I bought. They lasted all of two months before I bit the bullet and bought a Dewalt DW-744 and Makita LS-1013. Fifteen-plus years and countless jobs later, they still cut straight, clean and true.

Whilst it is easy to blame a poor workman for a crappy job, poor tools can also be source of constant frustration. Buy cheap, buy twice.
I was watching a YouTube video where a woodworker type had received criticism in relation to having tools above his technical ability. "All the gear, no idea" type comments.

He embraced it basically; his position is that excellent tools make up for shortcomings and, to an extent, the less skilled you are, the better tools you might need.

I'm not sure where I fit on that scale but I can see his point! It's a bit like rubbish golfers having forgiving clubs...
 
Nice tools are nicer and easier to use. If you can afford them why wouldn’t you. I bought the biggest 18v Hitachi/Hikoki pistol combi drill, overkill for a hobbyist, I’m not a tradie? Probably in many people’s eyes, but it’s awesome, does most of the jobs I’d get an SDS out for and I don’t regret spending a penny.

IMHO if you can afford decent tools, just go for it. You will rarely regret it.
 
I don't have any regrets, other than sometimes wishing I bought slightly fancier equivalents! My circular saw for example can take several cuts to get through anything upwards of 20mm, depending on material.

On the subject of tools I just bought an electric planer... It's awesome! I might need to wait for warmer weather due to the volume of dust/shavings, but I think between some chisels and this thing I should end up with a decent enough result. It's so much easier to take an extra mm or two off braces and so on; I should have bought one ages ago.
 
But high quality tools make a significant difference, even for a beginner. I see three broad levels of quality: (1) hobbyist, (2) trade, and (3) premium. Unless the tool is intended for non-critical jobs, then nothing less that trade quality will do for me. I'm reminded of the first table and mitre saws I bought. They lasted all of two months before I bit the bullet and bought a Dewalt DW-744 and Makita LS-1013. Fifteen-plus years and countless jobs later, they still cut straight, clean and true.

Whilst it is easy to blame a poor workman for a crappy job, poor tools can also be source of constant frustration. Buy cheap, buy twice.
Absolutely agree, and part of my justification (mainly towards myself...) for sinking thousands into buying tools I in all honesty do not use that frequently and might never make the most of.

However, they are expected to last a lifetime; everything is bought lightly used or on sale so the depreciation for me is limited; even the 10+ year things have spares readily available; all the tools are a joy to use when I use them; a smooth router/saw feels safer and more comfortable to use; effective dust collection means I can work indoors without making a big mess etc.
 
I don't have any regrets, other than sometimes wishing I bought slightly fancier equivalents! My circular saw for example can take several cuts to get through anything upwards of 20mm, depending on material.
If the saw cannot make the cut in one pass, it is not fit for that purpose. It is practically impossible to make a clean cut with multiple passes of a hand-held circular saw. Not to mention dangerous.
 
I bought a decent track saw a couple of years back, still finding out what can be done with it, but well worthwhile!

You can never under estimate the value of good quality blades to get a good finish!
 
If the saw cannot make the cut in one pass, it is not fit for that purpose. It is practically impossible to make a clean cut with multiple passes of a hand-held circular saw. Not to mention dangerous.
I'd be interested to hear the science behind multiple passes being dangerous - it's the first I've heard of it! I thought it was actually considered safer than one thicker cut.

I'm not disputing it's likely a cleaner cut mind.

Progress has slowed a little on these (again...). I've been a bit preoccupied with building a new desk out of an elm slab... Quite a bit of work!
 
I'd be interested to hear the science behind multiple passes being dangerous - it's the first I've heard of it! I thought it was actually considered safer than one thicker cut.
My supposition is based on free-hand (trackless) cuts where you need to position the blade in the partially cut kerf before starting the saw. My technique might be completely different from yours, but I do recall having to do this cutting a 4x4 post. Having to position the stationary blade in the partial cut before starting the saw felt dangerous to me. It would be quite different and a whole lot safer with a saw track.
 
Understood James! I'm using a homemade track jig which I run a circular saw tight along for straight cuts. Generally it's the whole pass in one go multiple times, i.e the saw is always up at full speed before entering the cut.

Agreed on starting a cut from a 'standing start' - I wouldn't brave it.
 
This has gone a little quiet as I've been busy finishing off this desk. That's almost out of the way now, just one supporting leg at the front corner in case anyone sits on it and I can get back to cabinet making / ruining.


Doing this definitely made me think I might be missing a trick with the cabinetry... I know hardwoods aren't always considered good speaker building material but it's so much nicer to work with. I found it much easier to get a nice finish than with veneer as well.
 
Last edited:
This has gone a little quiet as I've been busy finishing off this desk. That's almost out of the way now, just one supporting leg at the front corner in case anyone sits on it and I can get back to cabinet making / ruining.

Doing this definitely made me think I might be missing a trick with the cabinetry... I know hardwoods aren't always considered good speaker building material but it's so much nicer to work with. I found it much easier to get a nice finish than with veneer as well.
That is a stunning desk. I love natural hardwoods. Every Ergo loudspeaker except for the last one (E-X) was clad in solid Sapele. I have also built a few E-IXs with Walnut, Oak and New Zealand Rimu (softwood). Your design just needs to accommodate natural movement with humidity changes.
 
Thank you James, it's not perfect but definitely adds a bit of interest to the decor. That's the first time I've tried working with elm and I'm quite impressed - it's got a lot of character, compared to oak for example.

I've asked my local lumber man if he has any chunks big enough to use for the front section of the mid / treble cabinets - I would definitely prefer to craft these from hardwood and epoxy rather rather than ply, if I can help it.
You can always buy an old scruffy Ercol table , Once sanded you end up with some lovely Elm approx 25mm thick. Trouble is the planks are only circa 100mm wide but they are nicely glued together.
 
First bit of glue-up complete tonight.


This mostly went without any hiccups although the top of one has slipped a little during clamping. I've levelled with around 2mm of resin and it's flattened out nicely so shouldn't be an issue for veneering.

Next up I'm going to cut some oak battens and attach to the rear and corners of the cabinet to give the rear baffle something to attach to. For this I'm using threaded inserts and bolts on the basis that if it all goes wrong you won't see it anyway.

I'm hopeful that my flush router bit is long enough to deal with the over-cut i've left on all sides of the front baffle. I did this intentionally however that was before it grew to a 50mm baffle... If not it's a sanding job which would be a lot of work.
 
Last edited:
A little more progress this afternoon. For one speaker I've cut the oak battens for the rear baffle mount, and used wood glue to fit these 20mm from the edge of the cabinet sides. This should leave me a small piece to trim off as the rear baffle material is 19mm thick. I made my first real error of the project, whereby the cut-out for the hypex module is a little too close to the edge of the cabinet. It's therefore too tight to fit in a wider oak batten which I'd use to secure the rear to. As a result it might mean having to use wood screws rather than the threaded inserts as intended. Another option would be to use one bolt in each corner and supplement it with wood screws down the sides...


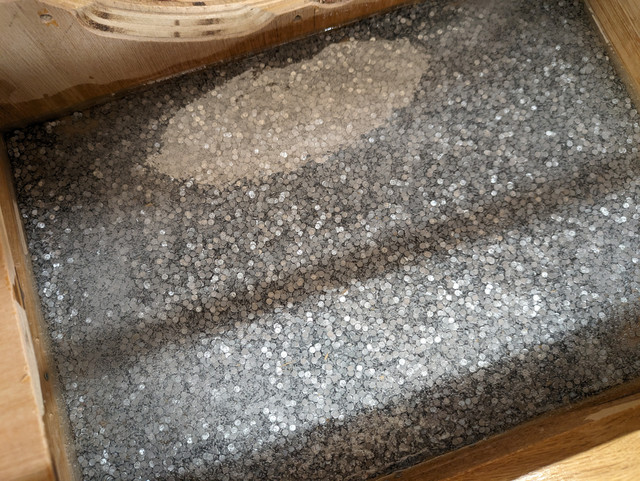
I've also attempted the first resin pour with the atabites mixed into it. These are going to be very heavy! There's no issues so far other than some air bubbles but as no one's going to see inside other than me I'm not going to bother popping them. 10mm of the resin mix on the top of the cabinet is about all which can fit in without impeding the driver bolts, however a much thicker pour could be done on the sides or bottom if required. The aim is for roughly 20mm thickness of material in total, excluding the damping materials. This will keep it consistent with Troel's design.

 
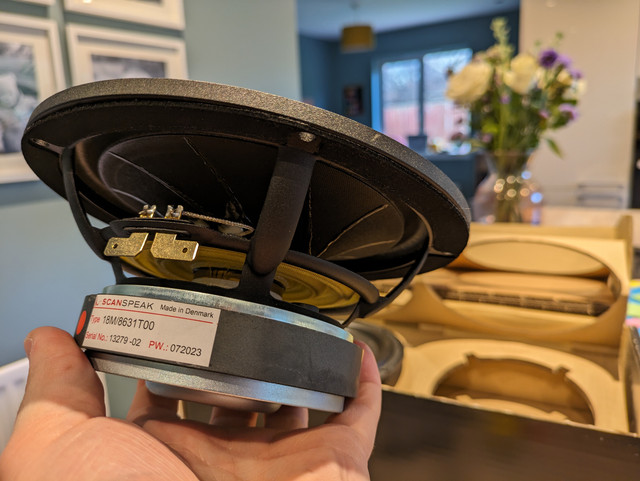
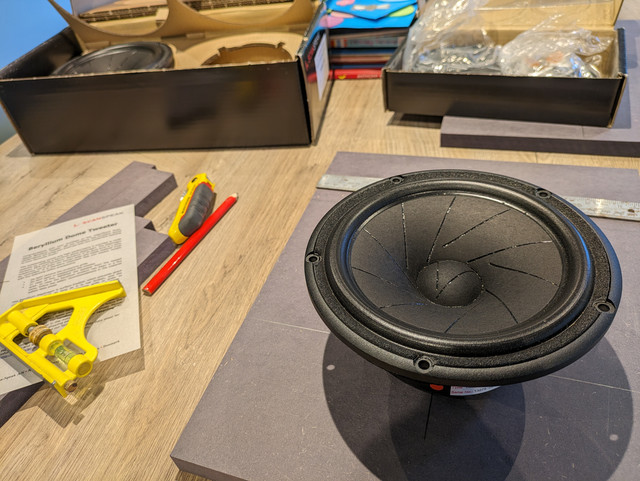
It's mostly a waiting game now with the main cabinets, so a start was made tonight on the upper cabinet. This mostly entailed admiring the construction of the drivers!


advertisement


Back
Top