
You are using an out of date browser. It may not display this or other websites correctly.
You should upgrade or use an alternative browser.
You should upgrade or use an alternative browser.
Resurrection ... of the E-IVs
- Thread starter quincy
- Start date
James
Lord of the Erg\o/s
I use and recommend plain upholstery-grade leather, which should be around 1mm thick. You won't need full grain; corrected grain is fine. It should have a bit of stretch to mould itself (with contact adhesive) to the shaped baffle.James … a few questions … concerning aesthetics, textured or plain leather?
The construction of the plinth and sub-plinth … is the sub-plinth glued and screwed to the chassis?
How is the main plinth attached?
The sub-plinth (part P1) is just glued on. No need for screws because there isn't much purchase with end-grain MDF, which is what it will be bonding to. Just a generous quantity of wood glue will do the job.
The main plinth (P2) is attached with bolts into threaded inserts in P1. If you look carefully at the photo, you will see P1 is cut with angled fillets in each corner. That is where I locate threaded inserts for M8 countersunk bolts. I leave the alignment of P2 to P1 until the external cladding is affixed to the chassis. That way, you can size and position P2 to be even and square relative to the whole cabinet. You can use wood screws, but these won't tolerate to too many cycles of removal if you need to tweak the XO.
James
Lord of the Erg\o/s
Quincy
You asked me to explain how the plinth is dimensioned, and assembled. I refer you to page009 of the instructions:
(1) The sub-plinth (P1) should measure 196mm wide and 304mm deep, which is exactly the same width and depth as the chassis. It fits directly to the bottom of the chassis.
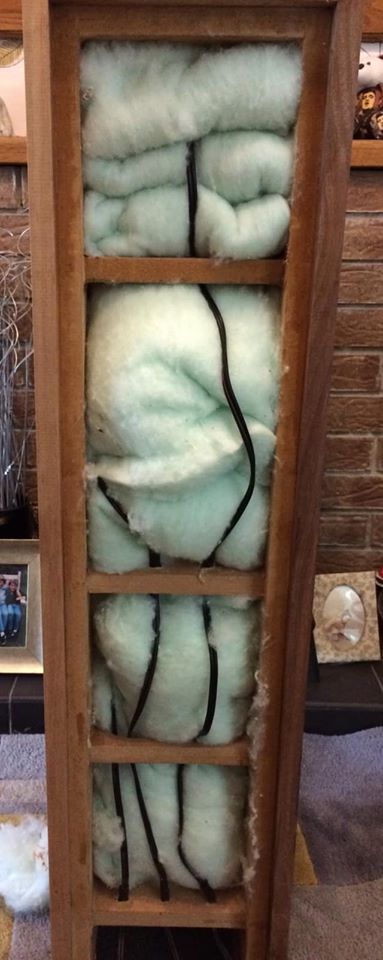
(2) The sub-plinth has a cut-out 156mm wide and 264mm deep to provide access to the XO board. There is provision at each corner of the sub-plinth for threaded inserts to be installed, so the main plinth and be bolted and unbolted at will. This is how you get access to the XO if you need to fine tune the tweeter response.
(3) The sub-plinth is glued directly to the chassis, and should be flush with it if you are dimensionally exact. I suggest you glue P1 into place only after you have shaped P2 and aligned the bolt holes. The other tip I can suggest is to over-size P2 so you can trim it down to the exact cladded dimension of the finished loudspeaker. The diagram on the bottom right shows P1 stacked on P2.
(4) Your ABW cladding overhangs the sub-plinth to create a smaller gap to the plinth. I think I made my gap 10mm. Paint the edges of P1 before installation.
I hope that clarifies your question.
James
You asked me to explain how the plinth is dimensioned, and assembled. I refer you to page009 of the instructions:
(1) The sub-plinth (P1) should measure 196mm wide and 304mm deep, which is exactly the same width and depth as the chassis. It fits directly to the bottom of the chassis.
(2) The sub-plinth has a cut-out 156mm wide and 264mm deep to provide access to the XO board. There is provision at each corner of the sub-plinth for threaded inserts to be installed, so the main plinth and be bolted and unbolted at will. This is how you get access to the XO if you need to fine tune the tweeter response.
(3) The sub-plinth is glued directly to the chassis, and should be flush with it if you are dimensionally exact. I suggest you glue P1 into place only after you have shaped P2 and aligned the bolt holes. The other tip I can suggest is to over-size P2 so you can trim it down to the exact cladded dimension of the finished loudspeaker. The diagram on the bottom right shows P1 stacked on P2.
(4) Your ABW cladding overhangs the sub-plinth to create a smaller gap to the plinth. I think I made my gap 10mm. Paint the edges of P1 before installation.
I hope that clarifies your question.
James
quincy
Somewhere East of the Lagan
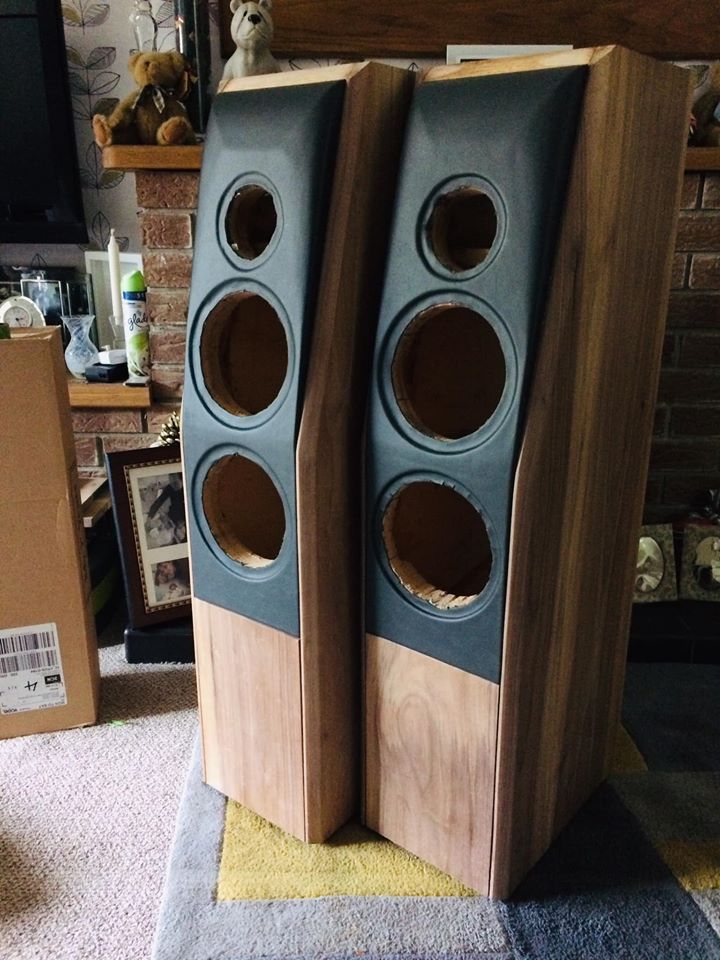
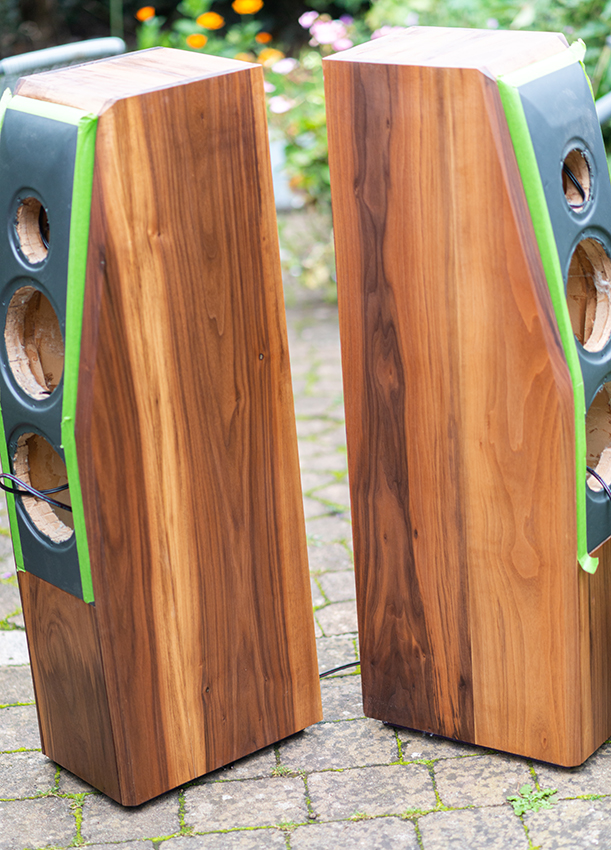
Threaded inserts arrived a month after ordering them ... I have been sanding the American Black Walnut and it really looks lovely
https://i.imgur.com/xxVUQ3i.jpg
https://i.imgur.com/xxVUQ3i.jpg

quincy
Somewhere East of the Lagan
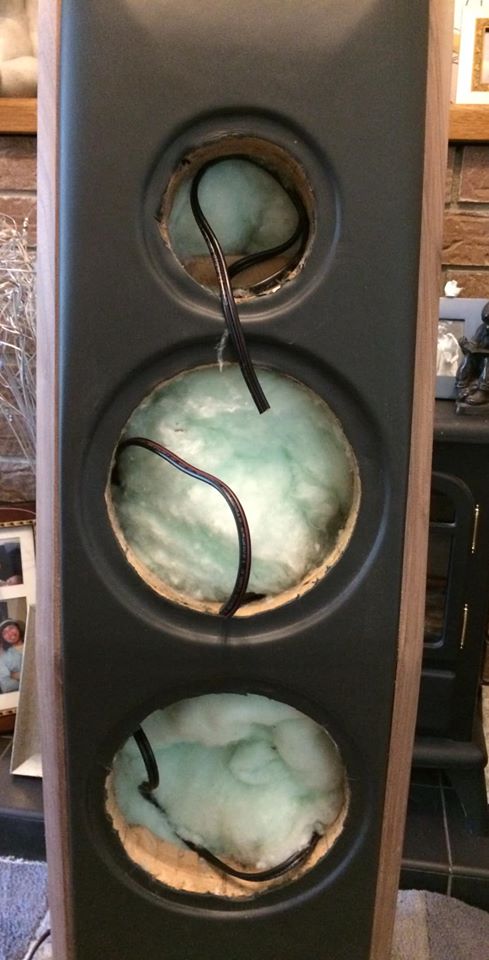
Astute observers may be wondering what are the black pieces in the tweeter rebate of the chassis on the right … I made a rookie mistake … after routering the rebate for the large drivers I forgot to adjust the depth of cut for the tweeter … it ended up as 5mm instead of 3mm … fortunately I was able to make leather shims and correct the mistake
cutting42
Arrived at B4 Hacker Ergo
Hi Quincy, here is a link to the leathering of my ErgoIIIR if that helps
https://pinkfishmedia.net/forum/threads/its-time-for-the-ergo-iiir.102730/page-10
https://pinkfishmedia.net/forum/threads/its-time-for-the-ergo-iiir.102730/page-10
quincy
Somewhere East of the Lagan
ThanksHi Quincy, here is a link to the leathering of my ErgoIIIR if that helps
https://pinkfishmedia.net/forum/threads/its-time-for-the-ergo-iiir.102730/page-10
quincy
Somewhere East of the Lagan
Nearly there with the E-IVs … next stage closing the backs and making the plinths … I have already made the plinths in mdf but I have decided to scrap them in favour of 54mm thick American Black Walnut … this has been my most challenging woodworking project ever and I amn grateful to James for his advice and encouragement and his wonderful design … I am sub-contacting the XO manufacture to Mister Tibbs ... unfortunately he will not be able to sort them out until September
martin clark
pinko bodger
Lovely to see you here again!
And such progress with a classic")
And such progress with a classic
quincy
Somewhere East of the Lagan
I would not have been able to build them without your detailed instructions and your help and encouragement ... the additional woodworking skills that I have acquired will enable me to tackle any future project ... Thanks JamesSoon, these will be the third pair of E-IVs in the world. In my estimation, they are the most handsome of my floor standing designs. Outstanding effort, Quincy.