advertisement


Making Mono - When Two Become One ?

Bear in mind, I have read this several times ( from the hoffman site) but still do not understand.

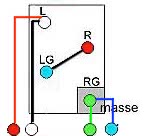
I need a diagram that is very simple - my brain doesn’t understand the words.
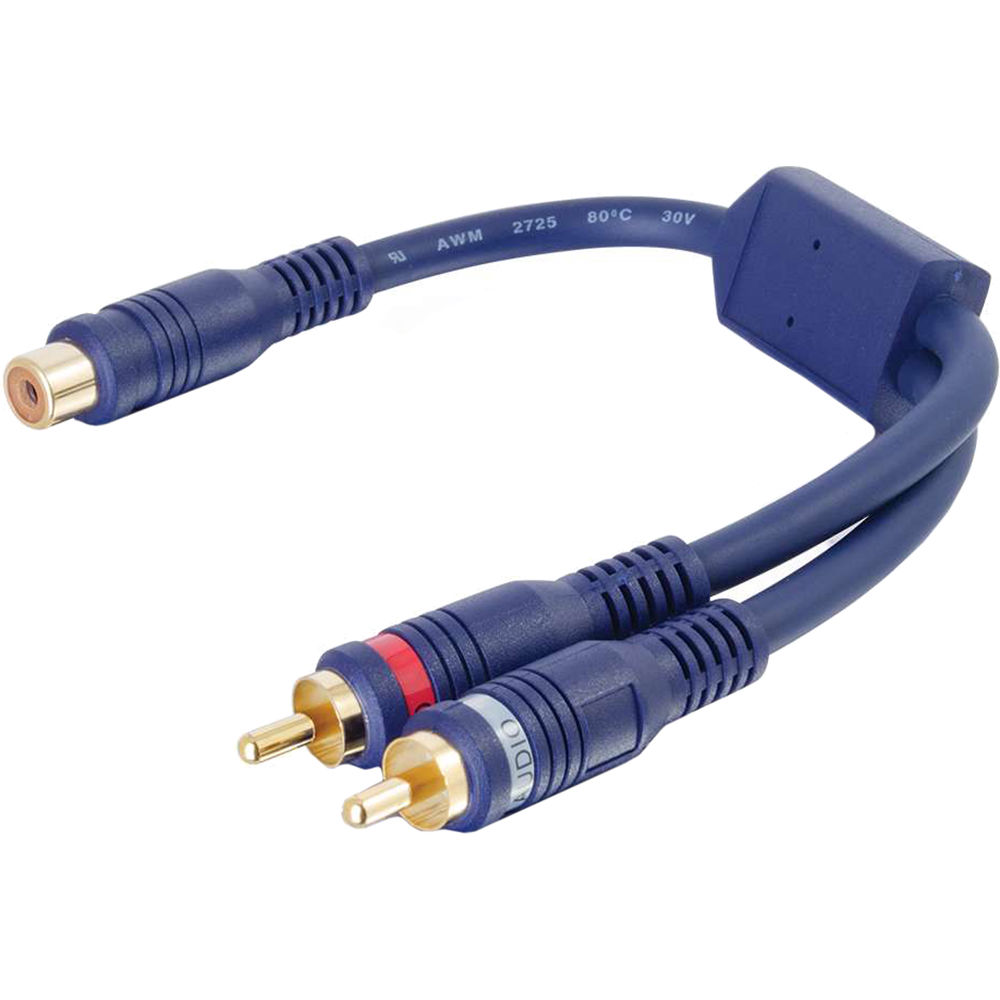
You need to buy a "double Y". The first part of it will be two female plugs on one end with a single male plug on the other. This essentially takes your stereo signal and combines the channels to one. So, plug the interconnect of your turntable in to this. Now, buy another Y cord with a single female on one and branching out to two males on the other. This is just to spread the sound out to your two speakers. Plug the female and male together and plug the two males into your system. You are now in L+R mono.”

might as well be chinese.
 
@Big Tabs, just get this…

Two inputs/ one output at the flick of a switch. Good quality at about £30.


I do not understand where it fits between turntable and amplifier

I could spend less on those Y- things If I could understand where they fit.
 
I do not understand where it fits between turntable and amplifier

I could spend less on those Y- things If I could understand where they fit.

I may have got this wrong. I thought you had two turntables and wanted to switch between them. Sorry, I should have read the whole thread before commenting.
 
You put one of these on one channel of the cable from your turntable to your amp, then the other end of it onto your amp where the turntable cable did go. So you are just taking the one channel with sound and sending the signal into both channels through this cable.

iu


I just did something similar to get a mono signal out of my tapedeck's headphone socket to go into both sides of the headphones. Connected stereo to mono and mono to stereo adaptors together betwenn the headphones and deck.

*edit: sorry, massive picture

Ah,
so the left channel out from the deck gets split to make Left and Right before it goes into the Phono Stage?

Therefore, I only need one of those things in the image? (not two)

is that correct?
 
I may have got this wrong. I thought you had two turntables and wanted to switch between them. Sorry, I should have read the whole thread before commenting.

I do have 2 turntables, but I have one that has detachable headshells, I want to use a makeshift mono cartridge now and again, with the least faff. And cost.
Amplifier doesn’t have a mono switch.
 
Here's a dodgy quick fag packet diagram - apologies for the quality but maybe it helps?

6mdZ3Vd.jpg


Plug the two cables together using the single RCA connector each cable has.

Plug the L and R RCA connector on one side to your deck. Plus the L and R RCA connector on the other side to your amp.
 
Ah,
so the left channel out from the deck gets split to make Left and Right before it goes into the Phono Stage?

Therefore, I only need one of those things in the image? (not two)

is that correct?

That's it. One becomes two :D

... or you could use two of them (the second one with male and female ends reversed from the photo) connected together and plug both channels of your turntable cable into one of them. Maybe that's better for grounding and things?
 
Last edited:
The two 'y' connectors are a mirror image. The RCA male plugs on the tonearm go to female RCA on the connecting piece. Single female RCA plug of this piece goes to male RCA on the other one. This has a pair of male RCAs so can go into phono stage.
 
@Craig B

It didn’t work.

on the cartridge I wired Red to Blue

I then only connected the green and white to the tonearm pins, nothing on Red/Blue cartridge pins.

The result was just Left Chanel / speaker with sound with a mono record, nothing from the Right speaker.
My fault, I did mention this back in post #7 on page 1 of this thread, but I should have laid it out more clearly.

Alternatively, this can all be solved at the headshell end using nothing more than a large paper clip and a small pair of side cutters.

Goals:
  • Fit both the white and red positive headshell wire tags onto the white pin.
  • Fit both the green and blue negative headshell wire tags onto the green pin.
Steps:
  1. Cut the white wire tag down to half length (after first inserting a length of large paper clip wire into the tag such that it doesn't get crushed when you snip through with the side cutters)
  2. Cut the green wire tag down to half length (as above).
  3. Fit the cut down white wire tag onto the white pin and then fit the uncut red wire tag on behind that.
  4. Fit the cut down green wire tag onto the green pin and then fit the uncut blue wire tag on behind that.
What is nice about this method is that the mounted cartridge does all, with the same clean mono signal going to each channel of your amp. No need to faff about with Y-connectors down the amp end when you want to go back to stereo listening; simply plug in one of your other cartridges. The L and R RCA plugs remain connected to the amp as normal.
 
Last edited:
My fault, I did mention this back in post #7 on page 1 of this thread, but I should have laid it out more clearly.

Alternatively, this can all be solved at the headshell end using nothing more than a large paper clip and a small pair of side cutters.

Goals:
  • Fit both the white and blue headshell wire tags onto the white pin.
  • Fit both the green and red headshell wire tags onto the green pin.
Steps:
  1. Cut the white wire tag down to half length (after first inserting a length of large paper clip wire into the tag such that it doesn't get crushed when you snip through with the side cutters)
  2. Cut the green wire tag down to half length (as above).
  3. Fit the cut down white wire tag onto the white pin and then fit the uncut blue wire tag on behind that.
  4. Fit the cut down green wire tag onto the green pin and then fit the uncut red wire tag on behind that.
What is nice about this method is that the mounted cartridge does all, with the same clean mono signal going to each channel of your amp. No need to faff about with Y-connectors down the amp end when you want to go back to stereo listening; simply plug in one of your other cartridges. The L and R RCA plugs remain connected to the amp as normal.

Okay, I am going to draw this into a diagram so I can follow the instructions, hopefully it will make more sense when I have a picture, not words.
I have already had to use a paperclip to prise open the cart/headshell tags, so understand that bit.

The idea that it can all be solved within the cartridge/headshell is far more appealing than some crazy Y-connector business that I have to do in addition to changing the cartridge over when I want to go Mono.
I hear you, man, all of those Y-connector posts were giving me a dull headache (copyright @deebster) yesterday evening.

I'll see about putting up a drawing a bit later today when I am back at my gaff with a proper mouse in hand.
 
I hear you, man, all of those Y-connector posts were giving me a dull headache (copyright @deebster) yesterday evening.

I'll see about putting up a drawing a bit later today when I am back at my gaff with a proper mouse in hand.

That will be useful.

I tried to do what you indicated.

First attempt > nothing, no sound (no hum either)
Second attempt > same.

Set up as both negatives and both positives wired together at the cartridge end as per dead basic that I did before, yep okay.

I think my head is getting around it a little.
Took all the leads off -
Took all the strapping wires off.

as I figure it, if I just strap the pins to the pins in the headshell end adjoining the tonearm linking point (NOT cartridge) neg. to neg. - pos. to pos. and just have 2 leads from the Cartridge > One Pos. One Neg. from either Left or Right (but both from the same side) then I just have one side of the groove split between R. & L. channels.

Is that on the correct path?
My bad, I was thinking negatives with negatives, positives with positives, but I failed to match the positive colours together and the negative colours together as I typed. I'll just claim force of habit here.

What you are proposing sounds a bit more difficult to achieve.

Just to recap, if you still have blue strapped to red across the cartridge pins then connect both positive headshell wires (white and red) to white cartridge pin, and connect both negative headshell wires (green and blue) to green cartridge pin.

cablage.jpg


Sorry for the inconvenience.

in the diagram, I assume the box is the cartridge and that white/red at the tonearm end are strapped -and the blue/green at the tonearm end are strapped?
If so then I am mostly there.

Tomorrow I will have a go at strapping the Red and Blue on the cartridge.
- there only needs to be 2 headshell leads, one going from White to White/Red , The second from Green to Green/Blue (Cartridge to Headshell Pins)

No Y Connector required.

It sounds pretty good anyways, and I have the brand new AT VM95C (conical) now on the MONO cartridge, which sounds better than the old (25 yrs?) cartridge I was using.
 
in the diagram, I assume the box is the cartridge and that white/red at the tonearm end are strapped -and the blue/green at the tonearm end are strapped?
Yes, the box is the back of the cartridge. In the drawing, the coloured dots below the box represent the headshell wires. The white/red leads are both connected to the white cartridge pin. The blue/green leads are both connected to the green cartridge pin (again with one tag of each pair shortened such that two tags can be slid on). The lines drawn up to the white and green pins should have been doubled to represent two wires going to each single pin.
Tomorrow I will have a go at strapping the Red and Blue on the cartridge.
If the red and blue pins on the cartridge weren't strapped previously then that would explain the no sound. Or, do you mean on the new AT-VM95C?
- there only needs to be 2 headshell leads, one going from White to White/Red , The second from Green to Green/Blue (Cartridge to Headshell Pins)
All four leads are connected, but only to two of the cartridge pins. With the cartridge strapped between blue and red, white becomes the single positive connection and green becomes the single negative connection. Therefore, both positive wires (white/red) go to white, and both negative wires (green/blue) go to green. When strapped one after the other (i.e. in series) it is as though there is but one big coil within the cartridge, rather than two smaller ones (one for each channel within the budget AT models).
No Y Connector required.
Correct.
 
“- there only needs to be 2 headshell leads, one going from White to White/Red , The second from Green to Green/Blue (Cartridge to Headshell Pins)”


Much easier to do this at the cartridge end with one tag of each pair of leads shortened. All four leads as per normal at the back inside the headshell.

?

Why is it easier to do it with 4 leads rather than 2?

I don’t get that.


The diagram you put up only shows 2 leads/connecting wires
 
I was just editing my previous post when you posted yours.

Have another read of mine. It's a bit wordy but I hope mostly jargon free.

Here's an updated diagram.

Think of the 4 coloured circles along the bottom as though they are the connections within the headshell.

Series-Mono.jpg
 
Last edited:


advertisement


Back
Top