
nostromo
pfm Member
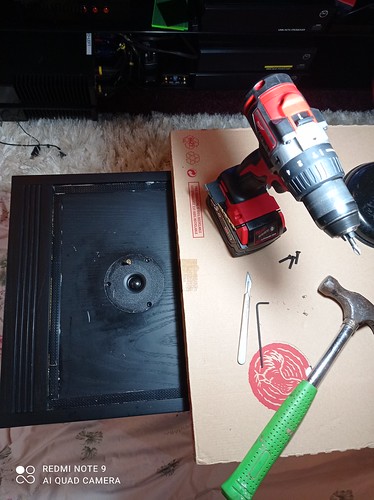
I thought someone maybe interested in seeing how I replace the tweeters in my Linn Isobariks. I've done this procedure several times over years including on Kans Mk2. As I stated on the recent Isobarik thread, I blew the left hand channel front facing tweeter about 2 weeks ago after getting carried away with the volume (over position 90!) on some heavy rock music. The Willys returned from the business trip last Monday and I had a matched pair of Hiquaphon OW-1 tweeters delivered on the Tuesday...nice to see a fitting kit included (the first time I've seen this) comprising of some gasket tape, screws and even some solder...a nice touch.
It's easy to tell if the tweeter is blown, but just in case it was the amp, I swapped channels from the other tweeter and even did a resistance test (zero ohms) on the terminals for that tweeter ( I run active, there is no crossover in the speaker and each driver has it's own terminals, see pic below).
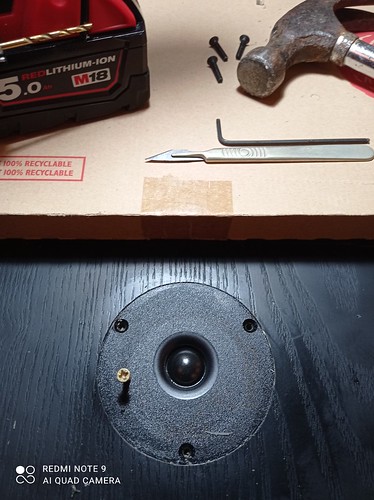
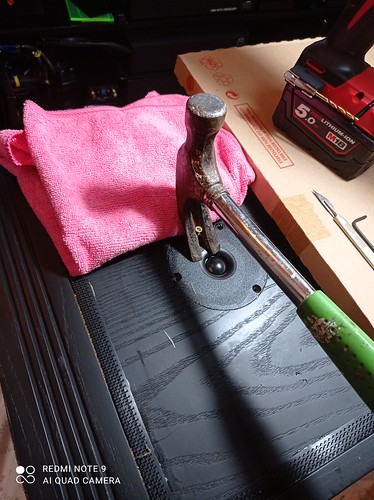
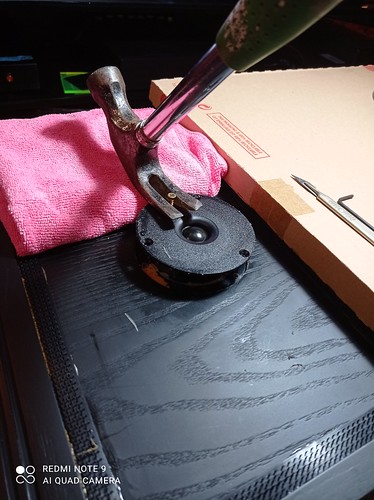
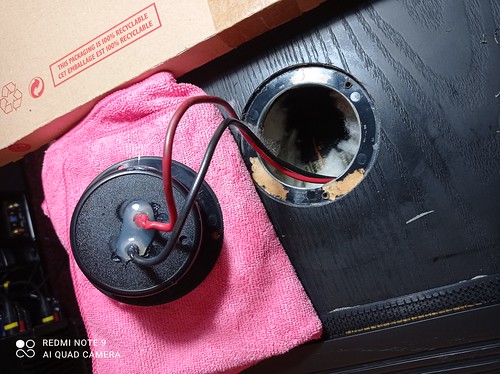
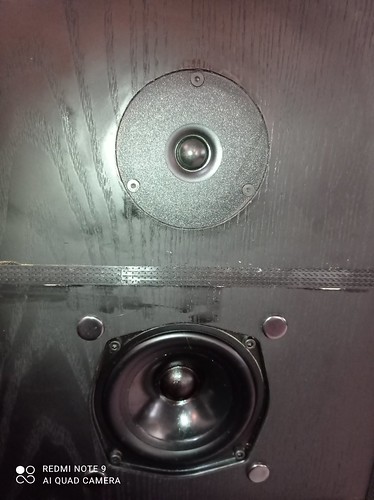
I lugged the bugger off the stand and onto it's back, removed foam grill and place a sheet over it much like an operating theatre, then a boxed kitchen cupboard door I had lying about in the shed. Remove the three Allen key screws, score around the tweeter with a scalpel (craft knife) to break the silicone sealant (Dow 785N clear) and screw about 1 cm from the edge of the tweeter as small screw. Use a cloth covered piece of wood for the claw hammer head and pull the screw up slowly. Removed the hot glue with a knife and pliers and de-solder. Clean up the hole and remove as much old silicone as easily possible. I tried to clean the wire ends of the solder but that proved too difficult so I opted to cut off about 1 cm from each wire. Soldered the new tweeters to the wires (I forgot to use the hot glue, but I think that's a bit OTT, but Linn did use it). Placed a thin bead of silicone on the lip of the hole all the way around and placed the tweeter back, screwed down carefully, remove any excess silicone. Clear up and place the speaker back on its stand and connect all the wires and have a good Hoover around the room....Job done! I allow overnight for the silicone to cure before playing it...I did check the resistance on the tweeter terminals (5.6 Ohms) once finished.
Comments/suggestions appreciated.
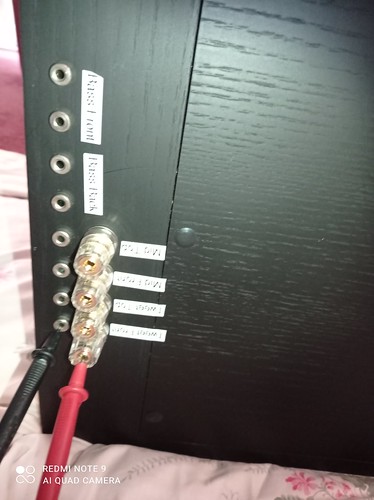
It's easy to tell if the tweeter is blown, but just in case it was the amp, I swapped channels from the other tweeter and even did a resistance test (zero ohms) on the terminals for that tweeter ( I run active, there is no crossover in the speaker and each driver has it's own terminals, see pic below).
I lugged the bugger off the stand and onto it's back, removed foam grill and place a sheet over it much like an operating theatre, then a boxed kitchen cupboard door I had lying about in the shed. Remove the three Allen key screws, score around the tweeter with a scalpel (craft knife) to break the silicone sealant (Dow 785N clear) and screw about 1 cm from the edge of the tweeter as small screw. Use a cloth covered piece of wood for the claw hammer head and pull the screw up slowly. Removed the hot glue with a knife and pliers and de-solder. Clean up the hole and remove as much old silicone as easily possible. I tried to clean the wire ends of the solder but that proved too difficult so I opted to cut off about 1 cm from each wire. Soldered the new tweeters to the wires (I forgot to use the hot glue, but I think that's a bit OTT, but Linn did use it). Placed a thin bead of silicone on the lip of the hole all the way around and placed the tweeter back, screwed down carefully, remove any excess silicone. Clear up and place the speaker back on its stand and connect all the wires and have a good Hoover around the room....Job done! I allow overnight for the silicone to cure before playing it...I did check the resistance on the tweeter terminals (5.6 Ohms) once finished.
Comments/suggestions appreciated.
 ), they are faster and tighter, less flabby.