
Well have been down a rabbit hole of research and putting my peak esr meter to test.... IMG_5009 by Vintage Audio, on Flickr
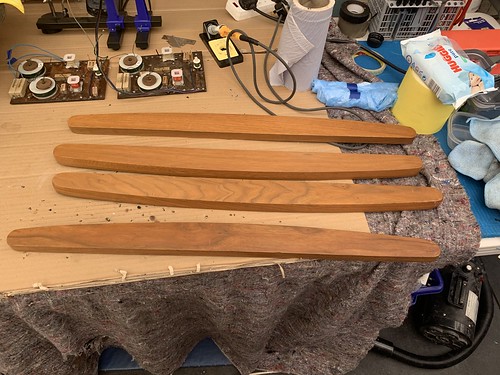
Crossovers removed,cheeks getting some sanding love and danish oil...
 IMG_4869 by Vintage Audio, on Flickr
The cabinet tops have the original holes prior to mirror imaging and general fade so both speakers will get filled and primed and sprayed....
 IMG_4718 by Vintage Audio, on Flickr
 IMG_4988 by Vintage Audio, on Flickr
Side cheeks came up lovely.....
 IMG_4987 by Vintage Audio, on Flickr
 IMG_4990 by Vintage Audio, on Flickr
 IMG_4999 by Vintage Audio, on Flickr
Armour back on, and new all matching screws...
 IMG_4994 by Vintage Audio, on Flickr
 IMG_5012 by Vintage Audio, on Flickr
Ended up using fancy capacitors from hifi collective,certainly not top run but an expensive learning curve £120 .
Think i may well explore changing out the sand cast resistors and potentially the 80uf capacitors that control the midbass,i cheaped out and used a electrolytic as per factory £2.78 each vs £32.99 each for the film upgrade which i will have to remotely mount due to the size ...
Awaiting proper woofer foams from usa so presently using them with the aftermarket woofers in and not the advent originals in.
Sounds a lot better with the fandangle caps....
IMG_5009 by Vintage Audio, on FlickrCrossovers removed,cheeks getting some sanding love and danish oil...
IMG_4869 by Vintage Audio, on FlickrThe cabinet tops have the original holes prior to mirror imaging and general fade so both speakers will get filled and primed and sprayed....
IMG_4718 by Vintage Audio, on FlickrIMG_4988 by Vintage Audio, on FlickrSide cheeks came up lovely.....
IMG_4987 by Vintage Audio, on FlickrIMG_4990 by Vintage Audio, on FlickrIMG_4999 by Vintage Audio, on FlickrArmour back on, and new all matching screws...
IMG_4994 by Vintage Audio, on FlickrIMG_5012 by Vintage Audio, on Flickr Ended up using fancy capacitors from hifi collective,certainly not top run but an expensive learning curve £120 .
Think i may well explore changing out the sand cast resistors and potentially the 80uf capacitors that control the midbass,i cheaped out and used a electrolytic as per factory £2.78 each vs £32.99 each for the film upgrade which i will have to remotely mount due to the size ...
Awaiting proper woofer foams from usa so presently using them with the aftermarket woofers in and not the advent originals in.
Sounds a lot better with the fandangle caps....
")


