Mike Hanson
Trying to understand...
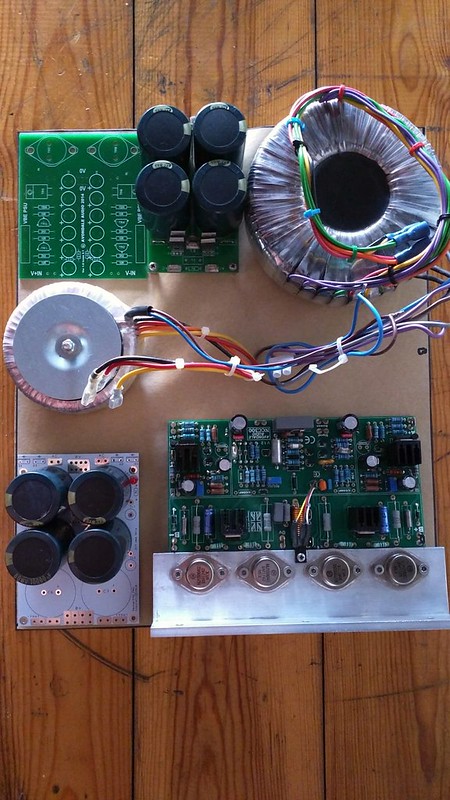
After fumbling through various builds, and learning lots along the way, I finally decided to assemble my NCC300 monos.
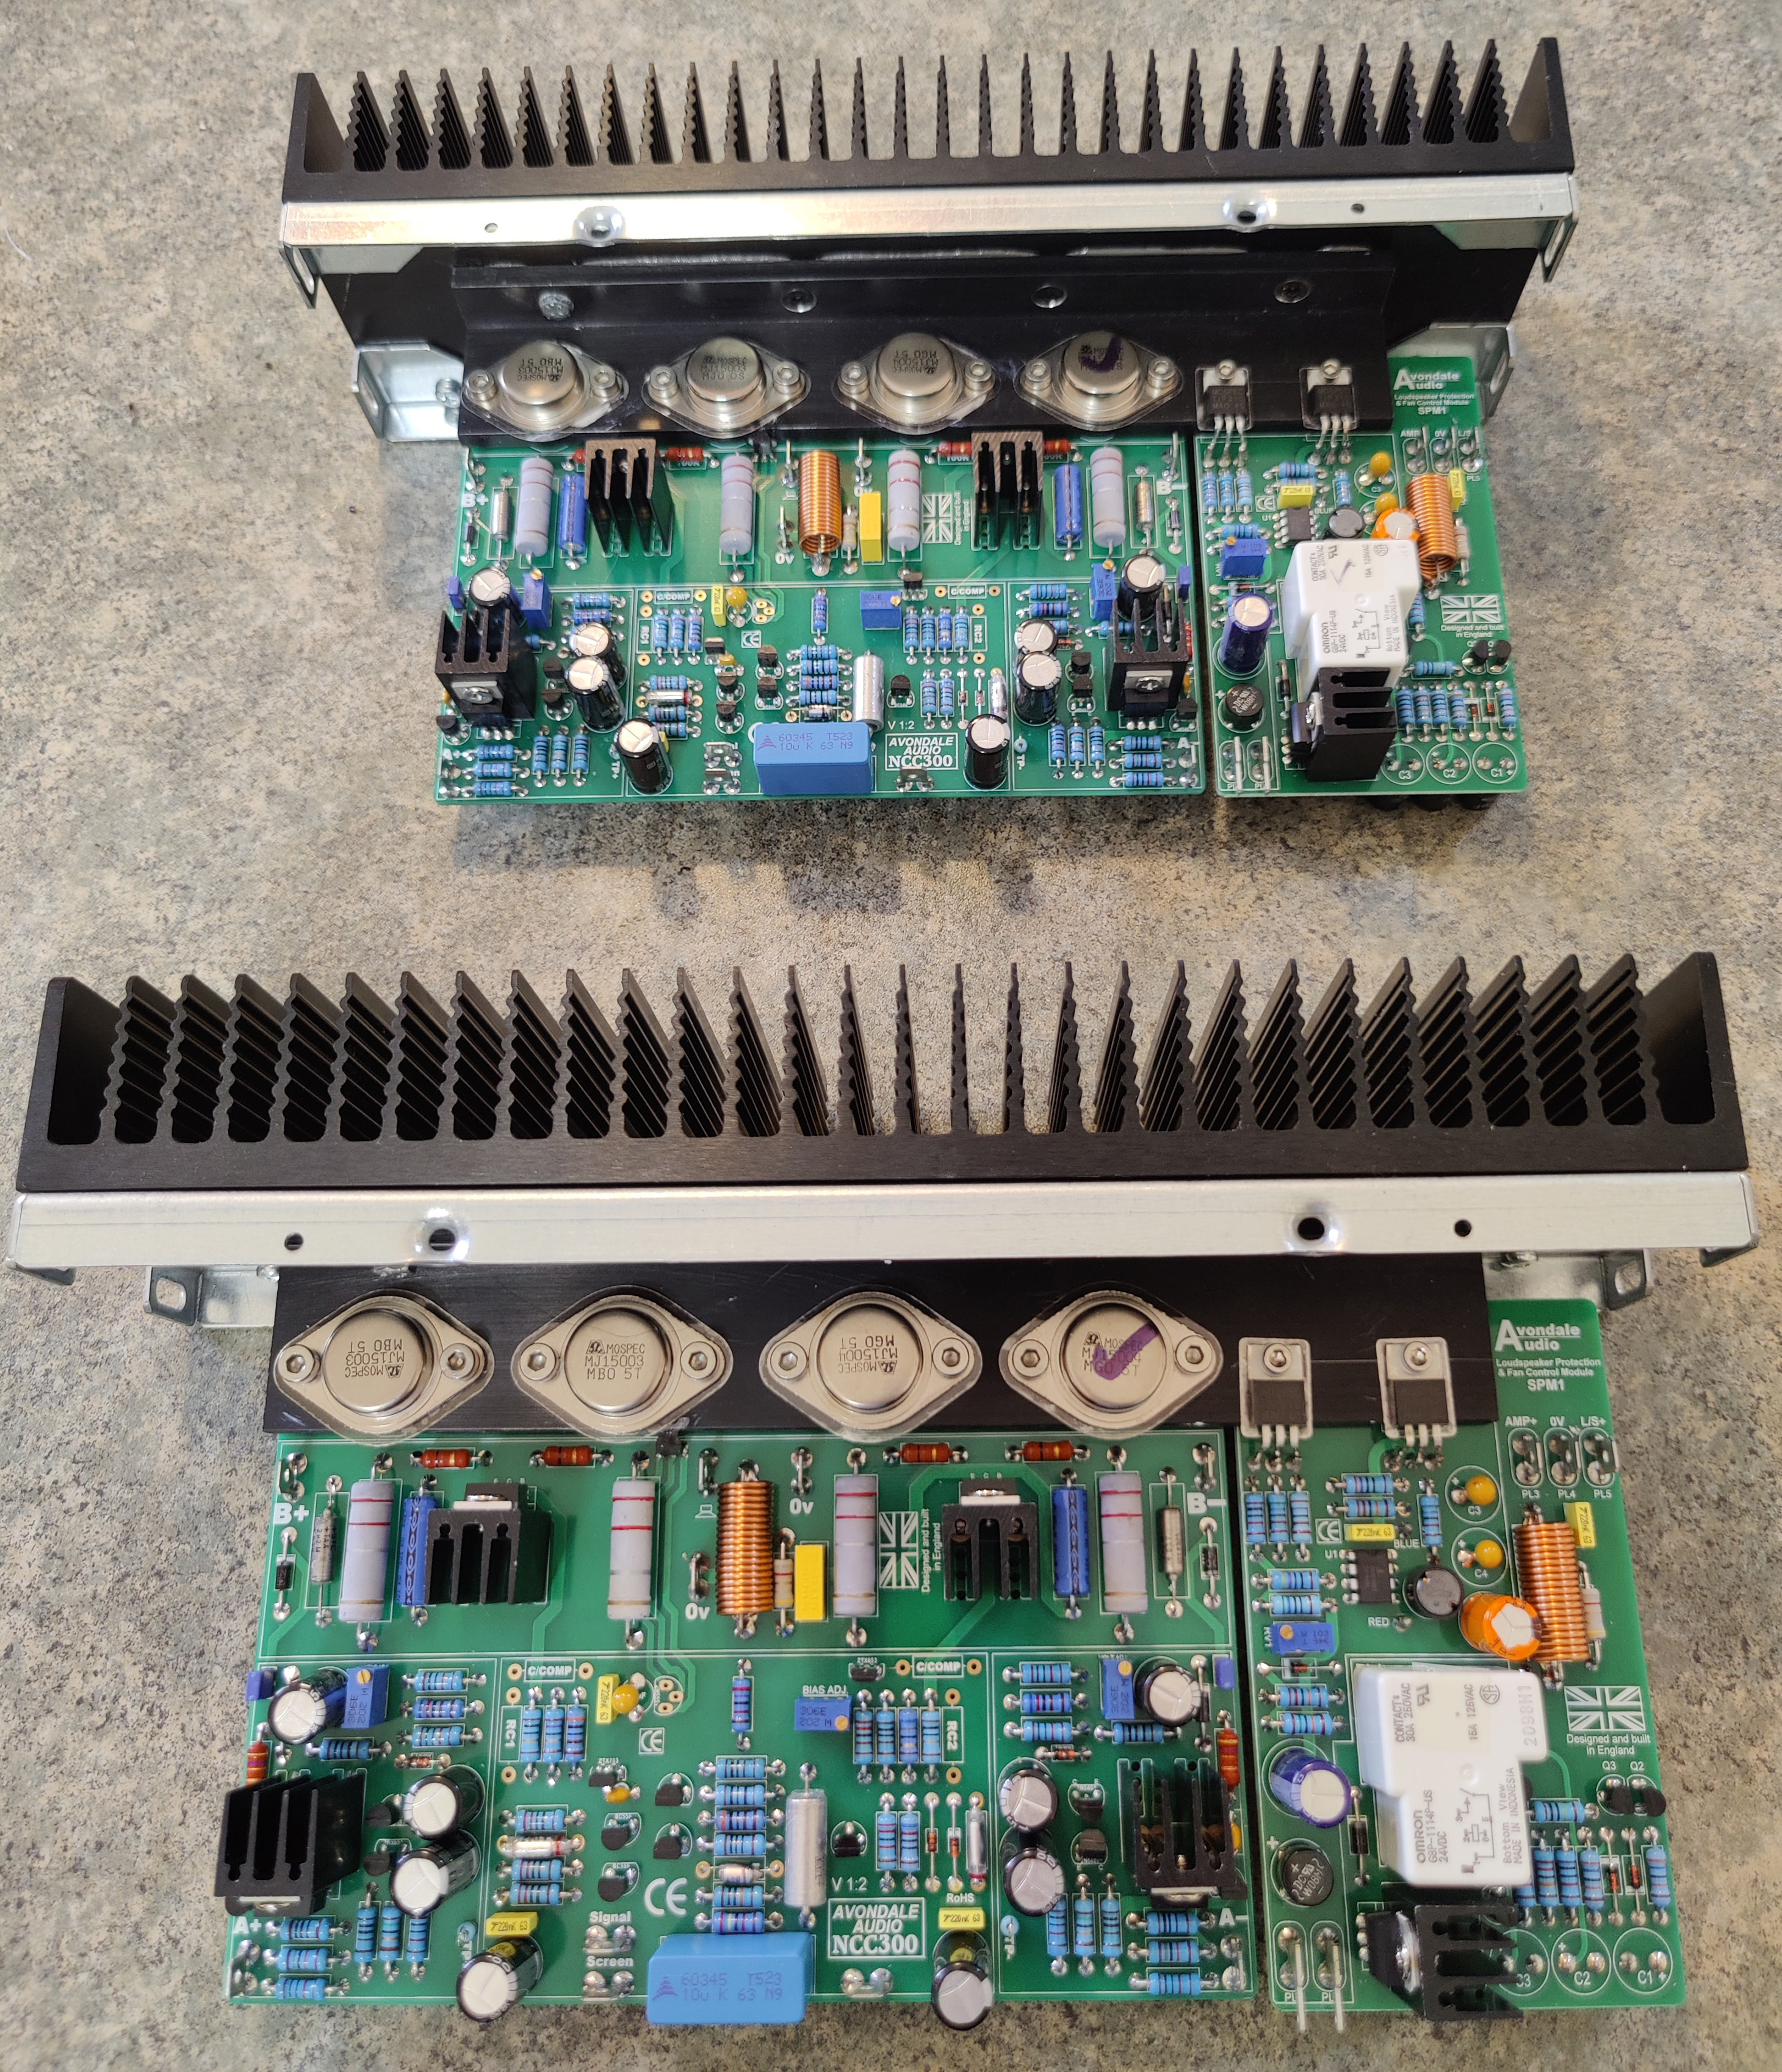
The NCC300s are on "T" heat spreaders, designed to clamp on the side of the case. Many others are putting these into repurposed Naim NAP135 and NAP180 cases, with a square tube vented by a fan. Instead, I'm using a Modushop Dissipante 2U with the big heatsinks on the sides. I've never tapped holes before, so that was an interesting learning experience. I had a bit of discarded aluminum, so I was able to practice on that first.
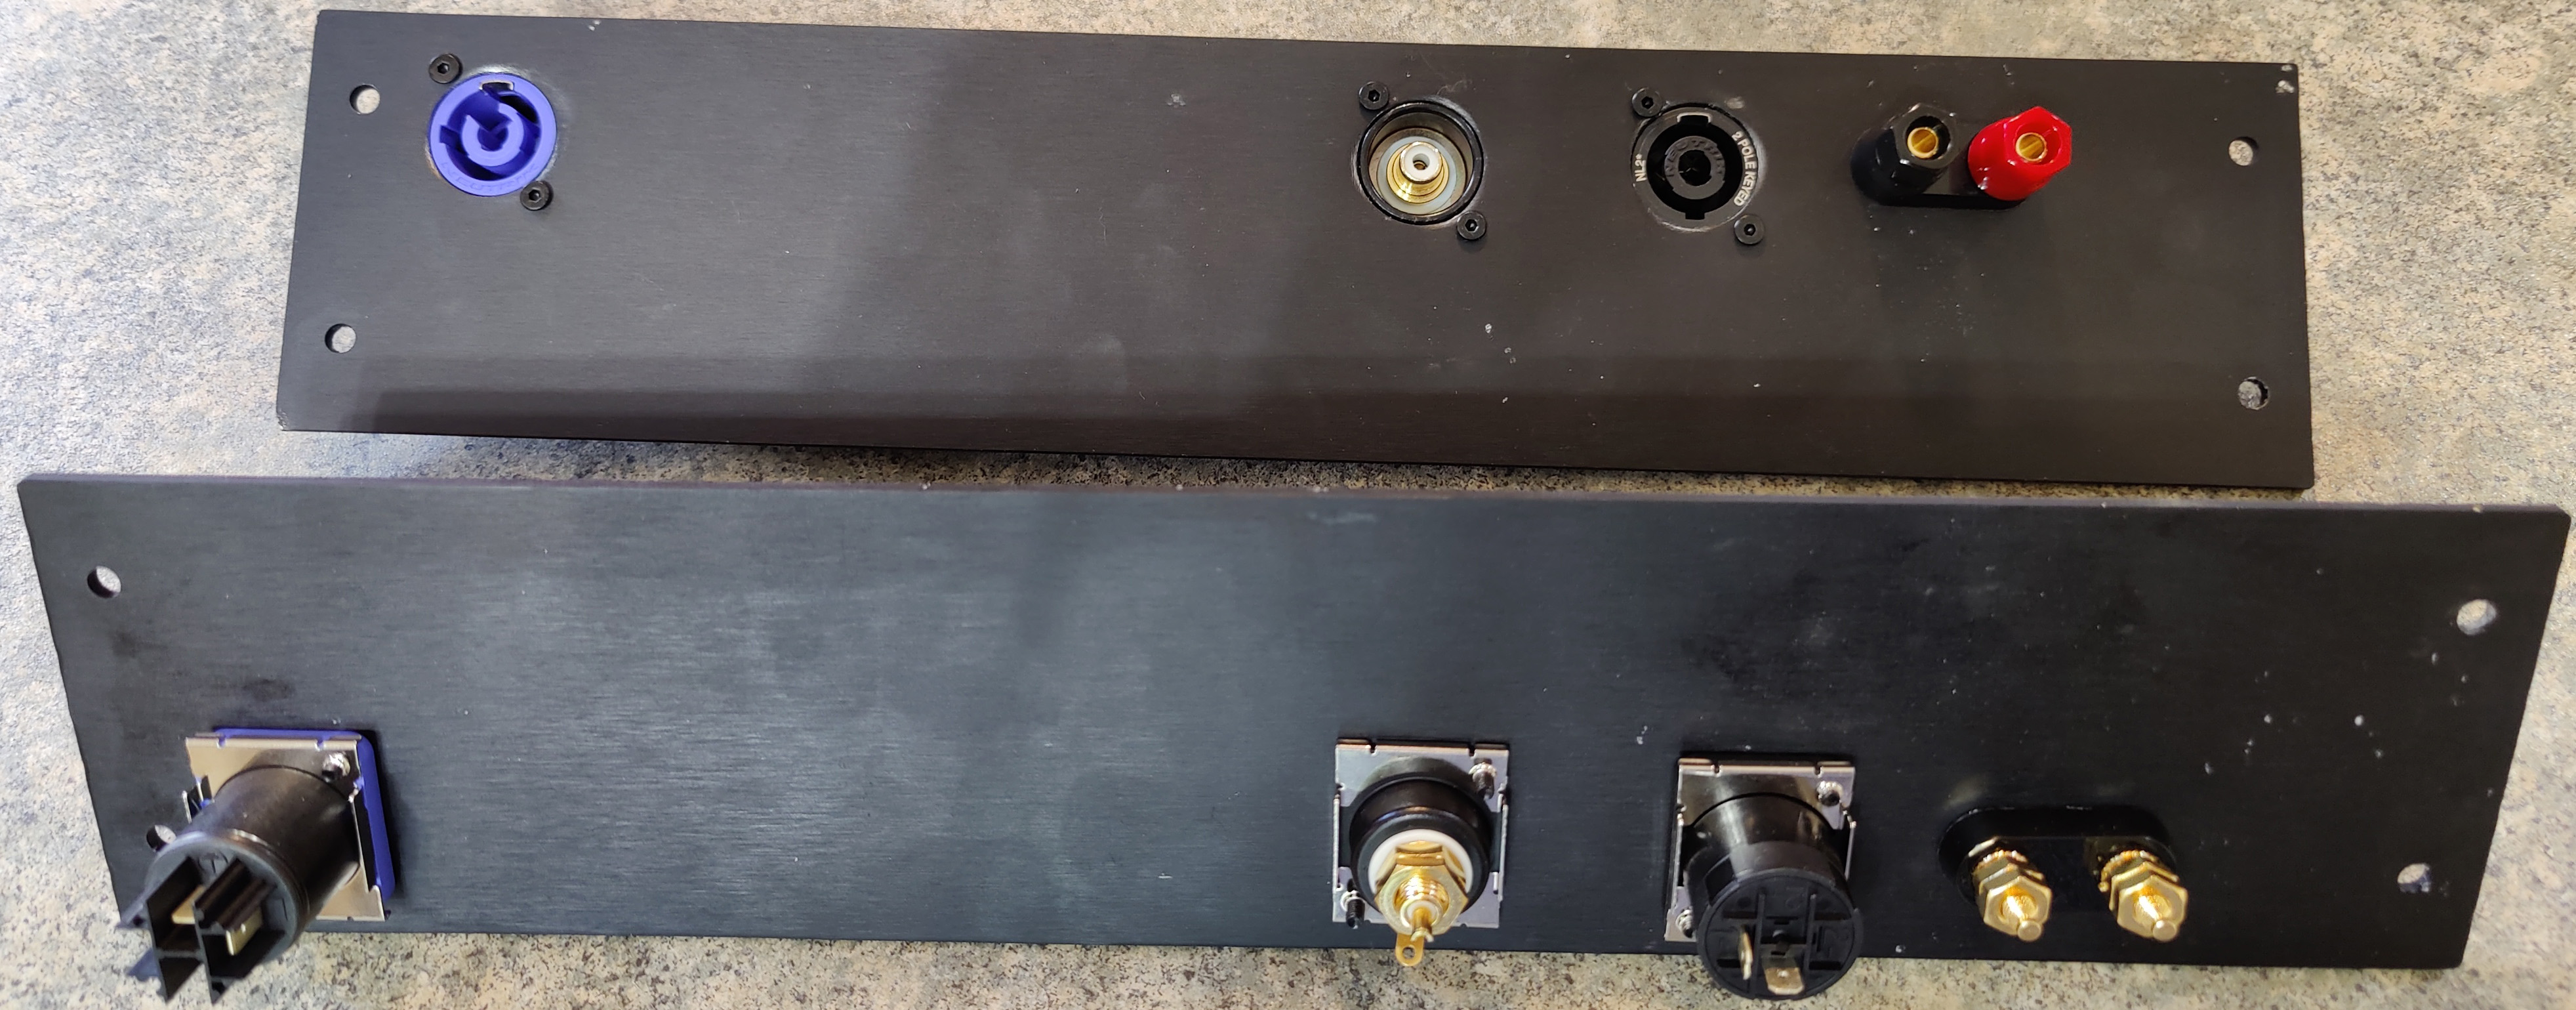
Today I drilled and punched the holes in the rear panel, and installed the connectors. I really like Neutrik for their quality and ease of use, so I'm using PowerCON for the mains, SpeakON for the output, and the corresponding RCA connector for the input.
I prefer using the knockout punch, rather than trying to drill a clean hole that big. The hole is remarkably precise, and it lets me mount the connectors inside, using the little Neutrik clips with some M3 screws. The resulting appearance is very tidy.
I also added a set of binding posts, in case the speaker cables aren't terminated with SpeakONs. I believe these are from Keystone.

I'll probably drill the holes for the switches in the front panels tomorrow. I'll post more pictures as I progress.
The NCC300s are on "T" heat spreaders, designed to clamp on the side of the case. Many others are putting these into repurposed Naim NAP135 and NAP180 cases, with a square tube vented by a fan. Instead, I'm using a Modushop Dissipante 2U with the big heatsinks on the sides. I've never tapped holes before, so that was an interesting learning experience. I had a bit of discarded aluminum, so I was able to practice on that first.
Today I drilled and punched the holes in the rear panel, and installed the connectors. I really like Neutrik for their quality and ease of use, so I'm using PowerCON for the mains, SpeakON for the output, and the corresponding RCA connector for the input.
I prefer using the knockout punch, rather than trying to drill a clean hole that big. The hole is remarkably precise, and it lets me mount the connectors inside, using the little Neutrik clips with some M3 screws. The resulting appearance is very tidy.
I also added a set of binding posts, in case the speaker cables aren't terminated with SpeakONs. I believe these are from Keystone.
I'll probably drill the holes for the switches in the front panels tomorrow. I'll post more pictures as I progress.
Last edited:
")