advertisement


Another Thorens TD124 overhaul

Mike P

Trade: Pickwell Audio
I seem to be doing a lot of TD124's recently, this is my third in the last couple of months.

The latest one is owned by @schneiderhan (aka Matt) of this parish. Matt explained that it had a full rebuild service at Schopper in 2010 so it ought to be pretty much sorted and would probably only need a quick service. "No problem" I said...

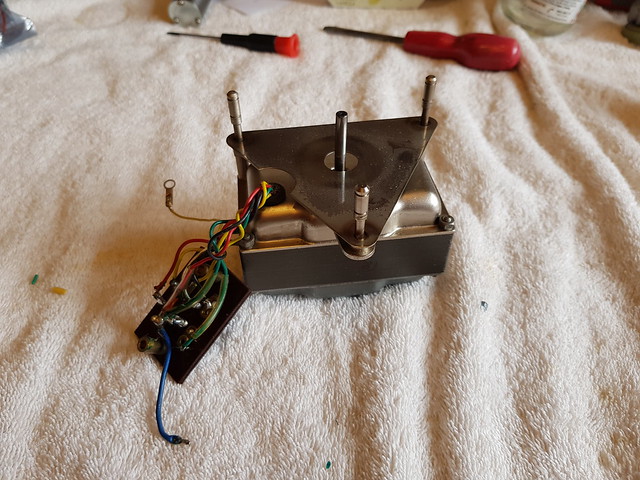
20240215_163853 by Michael Pickwell, on Flickr

When I got the TD124 on the bench the first thing I did was to remove the platter (alloy platter) together with the spindle. Straight away I noticed that the ball at the bottom of the spindle was in a terrible state!

20240203_114422 by Michael Pickwell, on Flickr

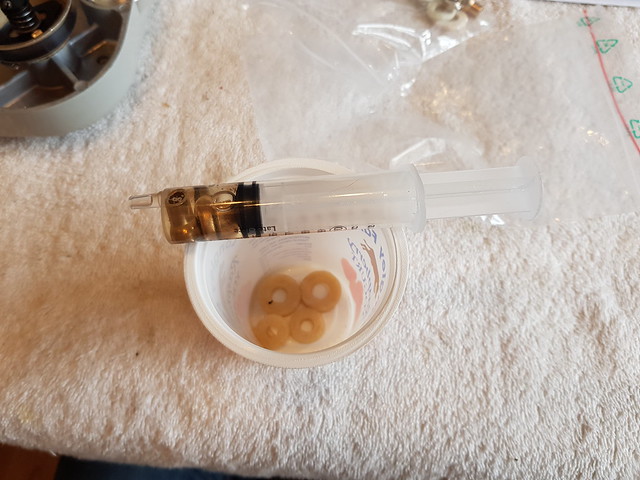
Hmm...I wonder why they didn't replace the ball? Anyway no bother, the knackered ball was removed and replaced with a lovely grade 5 ceramic ball.

Of course given the state of the original ball it was no surprise that the thrust pad was also toast, despite being replaced in 2010. The original bearing cap and gasket had ben replaced too but the original bearing cap is very poor in my opinion and I recommend to Matt that this be upgraded to a better bearing cap from Audiosilente. Matt agreed so on it went including a new thrust pad.
 
Last edited:
The motor pulley and stepped pulley were covered in the usual black deposits from a standard black rubber belt. This is one of the major advantages of our bluebelt, which does not shed like this.

20240212_103558 by Michael Pickwell, on Flickr

The motor pulley and stepped pulley were removed and the running surfaces highly polished.
 
Last edited:
The spark suppressor cap had been replaced by Schopper but they'd fitted an Rifa PME series which are in my experience unreliable and should be avoided. I therefore removed it and replaced it with a modern MKP type.

The original neon bulbs are very dim and almost useless in bright daylight. I like to replace these with a brighter LED bulb which makes the strobe markings easy to read even in daylight.

The idler wheel washer was a homemade DIY jobbie cut from what looks like nylon sheet. It was replaced with one of my new PTFE idler washers.

20240215_112814 by Michael Pickwell, on Flickr
 
Nice job!

To be fair to Schopper the bill above is for a motor rebuild and chassis restoration so the bearing refurb might not have been included, but I'd have thought the wiring would have been replaced if degraded.
 
The motor had been rebuilt at Schopper (as evidenced by screws and nuts instead of rivets) but when I stripped the motor down I found that the inferior machined type motor bushes had been used rather than the better pressed powder type. I therefore recommended to Matt that these get replaced with a set from Audiosilente. In fairness to Schopper their service may have predated the Audiosilente bushes being on the market.

20240212_103715 by Michael Pickwell, on Flickr

20240212_111234 (1) by Michael Pickwell, on Flickr

The soldered connections of the motor windings to the connections board were very poor and all had to be redone. There was also more green goo to deal with.

The motor was rebuilt with the new A.S. bushes, a new thrust pad, new felt washers, a new grade 5 ceramic ball and one of my stainless motor fastener kits.

The new bushes were vacuum loaded with top spec fully synthetic oil of the correct specification before fitting them.

20240214_103553 by Michael Pickwell, on Flickr
 
Last edited:
The mains flex had been converted to a 3-core type with safety earth (a very good thing!) but the securing P-clip had been fastened with a screw that was far too long and then spaced out with a stack of fibre washers. Weird! Why not just use a screw of the right length?

20240212_100526 by Michael Pickwell, on Flickr

The connection 'choc black' had been replaced with a ceramic one even though I can't see anything wrong with the original plastic one (I have all the old bits in a bag).

Annoyingly some ham-fisted muppet had all but completely stripped the treads in the chassis of both the screw that secures the choc block and also the flex securing p-clip screw. I therefore drilled and re-tapped both to M4 and fitted new screws.

20240212_145533 (1) by Michael Pickwell, on Flickr

The cumbersome long mains lead was shorted and an inline IEC socket fitted to the now short flex. I find this far more convenient.
 
Last edited:
The deck already had a nice replacement idler wheel fitted, which I assume is an earlier version of the Audiosilente idler. However the black O-ring was rock hard.

I have spare black rings here but I've found that the softer red silicone ones are far quieter. A new red ring was therefore sourced from AS and fitted.

20240214_113346 by Michael Pickwell, on Flickr
 
The deck will be run from a 220v external bucking transformer which I built for Matt some time ago.

Something similar to this one:

20240108_200947 by Michael Pickwell, on Flickr

I find that this has two advantages: 1) The motor runs cooler and with less noise 2) Less eddy brake is needed to hold it down to the correct speed and this further reduces the noise.
 
Just to say (and somewhat shamefully) I've run this deck very little in the 8 or so years I've owned it (a little when I got it and then not at all after that) so the wear it sustained will have come from those first 5-6 years. And also before I started using it, it got an oil and all clear from another so-called restorer (who I best not mention). And the chassis wouldn't have needed much 'restoration' since the original owner told me he had bought it NOS.

Anyway a bit of an eye opener, wonderful work from Mike as ever and I am very excited about the prospect of having it back in tip-top shape. Plus the iron platter takes away that element of anxiety about speed stability as the alloy platter has to be aligned whereas the iron platter is a drop-in fit.
 
The deck will be run from a 220v external bucking transformer which I built for Matt some time ago.

Something similar to this one:

20240108_200947 by Michael Pickwell, on Flickr

I find that this has two advantages: 1) The motor runs cooler and with less noise 2) Less eddy brake is needed to hold it down to the correct speed and this further reduces the noise.
Hello Mike,
I am interested in the bucking transformer you mention as I have read that a TD124 is better running at 220V rather than 230-240v. Is this something you can supply as well as servicing TD124’s ? I have your blue belt, oil and Hanze Springs similar to yours and all made an improvement hence my interest in this. Thanks Simon
Hi Simon,

Yes I'm happy to take on servicing of a TD124 and I can build external bucking transformers like the one pictured in this thread to order. Please send me a PM if you'd like to discuss.

Best regards, Mike
 
This week I've been working on another TD124. This one is a MK1 owned by @Beadlesabout (aka Alf) .

Alf recently purchased it from Wilkinson's HiFi and sent it to me for a full overhaul.

I'm afraid I'd already got half way through the strip-down before Alf asked me if I'd mind documenting the restoration on here, so I don't have as many photos this time.

Anyway, it's a mk1 with Zamak platter and appears to be in largely untouched original condition. This is the first photo I took. I'm afraid I didn't take a photo of the topside. Alf, do you have one?

20240318_161903 by Michael Pickwell, on Flickr

Most of the usual problems were present. The main bearing cap was weeping oil as was the stepped pulley bearing well, the mushrooms were rock hard and collapsed, the spark suppressor capacitor was bulging and everything was pretty gummed up etc. Alf put the zip ties on for shipping to secure the motor because one of the three motor suspension rubbers had sheared off and the motor was flapping about.

Then the strip-down started:

20240319_115032 by Michael Pickwell, on Flickr

Followed by a bath and a good scrub.

20240319_113304 by Michael Pickwell, on Flickr
 
I think we can safely say that the spark suppressor cap across the power switch has seen better days!

20240319_110818 by Michael Pickwell, on Flickr

A lot of parts on this deck were covered in oxidation, presumably as a result of the deck being stored in a damp garage/shed/attic for a long time. I tackled this by soaking many of the parts in an acidic solution to remove the oxidation.

The switch assembly was one such parts and was removed and given a quick acid bath before being scrubbed up clean, lubricated and the contacts polished up.

Here it is reinstalled with a new modern poly capacitor.

20240319_211905 by Michael Pickwell, on Flickr


advertisement


Back
Top