advertisement


Thorens TD-124mkII motor removal/disassembly: how hard to do and is there a guide?

starbuck

pfm Member
I have a TD-124mkII with a non-spinning motor which I believe (hope) is due to being gunked up with old lubricant (strobe light is on but no rotation of motor). I wonder if anyone knows of a 'how to' guide on the process to remove from the turntable itself and disassemble/clean? Is it difficult to do, and are there any specific tips that people can pass on*?

(*on what not to do, also, as I don't want to do more harm than good)
 
Plenty of info here on pfm, e.g. my lengthy TD-124 thread and elsewhere on the web. It is a little fiddly but doable, I've done it several times now. Getting the motor pulley off can be an issue, use the best screwdriver you can find or you may screw up the heads. Dissassembly of the motor is fairly straight forward, reassembly a little more fiddly as precise alignment take some getting right (you do this with it running and aim for lowest noise/vibration). I'd not start the process until you have some suitable oil, new felt oil reservoir washers, a suitable drill for drilling the rivets out and some nuts and bolts (or rivets) to reassemble. Don't lose the tiny little ball bearing from the bottom of the rotor shaft!

6544150333_7bc0019367_b.jpg


PS Pretty much anything wrong with your motor can be fixed these days, this eBay seller makes a great quality range of replacement parts right down to new coils etc.
 
Last edited:
This site contains affiliate links for which pink fish media may be compensated.
Pretty much the same as mine. Careful disassembly and it's all working well.

I would change to a 3 core cable and earth on the chassis if it's not already done, and change the cap for a new one ( I took the old one into Maplins and they had the same spec off the shelf)
 
Thanks for the replies and advice. I will fully read the thread you linked to a bit later, Tony, when I have some more time. I notice your reference on the first page to "having enough slack" in the cabling and therefore not needing to desolder the motor, and wonder how to determine what enough slack is? Also, do you remember what size nuts/bolts are required to replace the rivots? I will order some of them along with the replacement felts before starting.
 
I just had enough wiggle-room to be able to drill the top rivets out without desoldering. It's no big deal, just desolder it if you need better access (I have since had the whole turntable fully disassembled). I had some little nuts and bolts knocking about, but having a quick look at TheAnalogueDepartment (many excellent strip-down/rebuild pics here) M2.5 x 5mm is what you want. There is a school of thought that re-riveting is better than screws, but I'm not sure how to do that so I just used the screws.

Once done it should stay done as modern oils shouldn't cake-up and solidify like 50s mineral oil. Choose your oil wisely. I'm using Schopper's, which is very thin and very free running (arguably too thin). Too thick oil and the deck starts slow and speeds up, too thin and the deck starts fast and slows down. Neither is a huge issue as the degree of strobe-drift I'm talking about here is minor and not at all audible to me, it would only irritate those with the most perfect of perfect pitch, it is a fraction of a semi-tone. When reassembling the motor obviously aim for as quiet as possible and an unloaded spin-down time with pulley fitted of 30 seconds or more and you should be good. If it judders to a stop after a few seconds something is obviously wrong with the bearing/case alignment. This can all be done and tweaked after the deck is built, I just stood mine on baked bean cans and fiddled with the motor case alignment for an hour or two until I was happy I had the quietest I could get. I was lucky in that my motor, whilst rather grubby, was in very good condition with no visible wear at all on the rotor shaft. I've got it running nice and quietly, though my deck does do the 'start fast and slow down' thing, though well serviced decks using Schopper oil seem to do this.
 
Many thanks, Tony. I'll pop an order in the felts and bolts, and in the interim will have a good read through your thread plus a few pictorial guides I found on theanalogdept site. Should keep me busy over the Christmas period.
 
Will any equivalent sized felt washer be suitable for use as a replacement for the oil reservoir? I have only been able to locate them as part of a complete kit with replacement bushings when searching for TD124 parts.

Also, in order to service and try the TD124, I plan to mount it in a DIYed Loricraft style plinth which I already have. I have a spare blank motor board to cutout and use but was wondering, given that on the Loricraft syle plinth the motor board is already decoupled using squash balls, should I also use the mushrooms on the mounting bolts of the Thorens as well? Once I have established that everything is working as it should be I plan to get a more traditional Thorens plinth for longer term use, so this is just to get me going in the mean time.
 
I'd carefully assess the condition of the motor bushings and felts and decide then how to proceed. My existing felts (pictured above) were actually fine, though I later replaced them just for the hell of it. My restoration was based around a working and clearly low-mileage motor, given yours has seized all bets are off. Get it apart, give it a good clean and lets have a look at it!

As to the mushrooms you will find much conflicting opinion, though I don't have one as I have only ever used my 124 in the lightweight Stereo Lab plinth with mushrooms.
 
Okay, have started the inspection process, the following pictures are of it exactly as I acquired it (other than having already removed the n/mint SME 3009 series II and popped that safely back in its box), warts and all, before any cleaning or servicing has been done:

https://www.flickr.com/gp/145164567@N08/w87c31

It is grubby but remarkably scratch and scuff free under all that grub as far as I can tell. The top platter is clean and flat, the bearing appears to be perfect (though obviously in need of cleaning and re-oiling). The only initial slight defects I can find, besides the already mentioned non-running motor, are a once-a-revolution light scrape from (I think) the stepped pulley and the slight crazing to the paint below the platter. The motor is stiff to turn by hand so I am hopeful for it just to be in need of strip down/clean/lube/rebuild in order to get that running again. It seems to be as I hoped when I speculatively clicked buy it now: a one careful owner from new example which just hasn't been recently used. I purchased it from the brother of the late original owner, who had just kept it unused in the sideboard in which it was originally mounted for many years after he inherited it. I may take a while to do so but I plan to update the thread as the cleaning and servicing proceeds.
 
Certainly looks decent and unmolested from that side, flip it over and show us the giblets. The paint crazing is common to pretty much all of them, it is down to overfilling the main bearing and oil oozing out and reacting with the paint. When you say slight once a rev scrape do you mean per platter rev or per step-pulley rev?

PS If it has an original belt in serviceable condition guard it with your life. The modern replacements are all varying degrees of terrible IMHO.
 
Ran out of time and light today so will take some of the underneath (hopefully) tomorrow and add them then. The slight scrape is once per revolution of the stepped pulley, and has an almost melodic ring to it as it occurs. How can you tell if the belt is still useable? Turning the motor pulley by hand seems to drive the stepped pulley okay, its how I discovered the slight scrape.
 
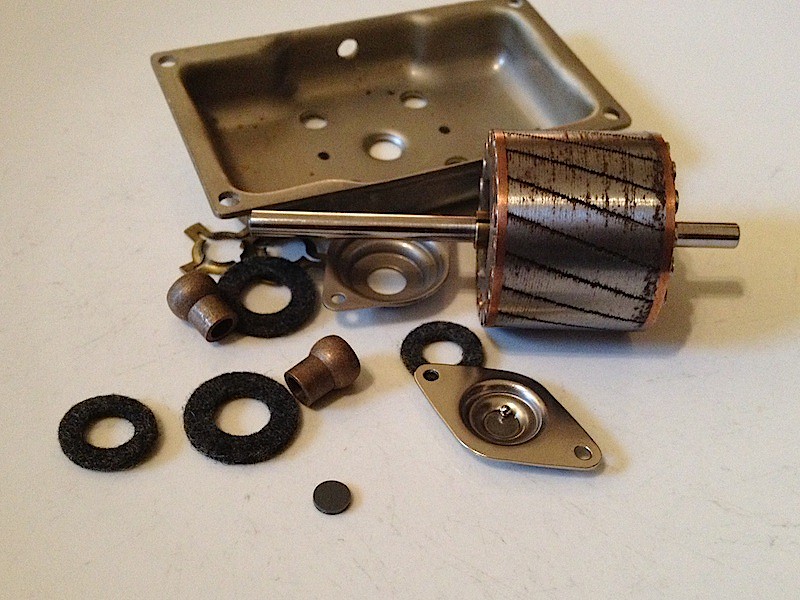
For some reason Thorens created the stepped pulley with extraordinary bell-like qualities, it can certainly ring! There are many reasons why it may do so, but I'd not worry about it at this point. The first stage is to gently dismantle the deck to the point you can properly clean and fully assess it, e.g. there may be some dirt under the step-pulley, it may be bone dry etc etc.

Remove the belt and wash it in warm soapy water, let it soak for several hours. If it is intact and not so stretched that it slips when starting the deck I'd consider it usable. The vast majority if not all modern belts made for a TD-124 are too short or too thick in cross-section. They are just noisy and wrong. I'm pretty sure there were actually two belts, but can't prove this yet, i.e. one for the large 50Hz motor spindle, and one for the smaller 60Hz spindle. Everyone who makes them now tries to do a 'one size fits all' belt which is inevitably too tight for the 50Hz pulley. With the TD-124/II that tightness always equates to noise or belt-shed (the earlier MkI step pulley design is actually a lot quieter!). Just tight enough to start the deck is right IMHO. I wish I had the resources to commision a TD-124 belt as I'm convinced I could spec a better belt for 50Hz markets than is currently available. If your belt is in nice condition I'd actually be interested to know its measurements! Anyway, don't worry about belts at this stage, that is your future hobby...
 
Thanks for the advice, Tony, maybe now is the time to rename the thread to something more expansive? I'll update and add pictures as I progress, I have a feeling it could take a while before I'm finished.
 
Depending on the condition you find and your willingness to fart around baking dirty oil etc out of the existing motor bushings I'd seriously consider the Audiosilente sintered bearing kit. I bought one last week just to be sitting on a spare set and it looks beautifully made and would save a heck of a lot of hassle in the restoration process, plus if your motor has been well used and has worn it will have far better tolerances as it is the softer bushings that take most of the wear. Not cheap compared to a couple of pieces of felt and some little screws, but I reckon it could save a lot of time, hassle, and result in a quieter and better motor build in the long run. If this had existed when I first rebuilt mine I'd definitely have used it and I'll fit it if/when I strip my motor down again (it is working beautifully quietly at present so I'm leaving it well alone!).

PS If you do go for it go for the sintered one I linked, not the bored solid bushings also available. This bearing definitely needs to be sintered, solid is just hopelessly wrong as it couldn't lubricate itself from the felts properly.
 
This site contains affiliate links for which pink fish media may be compensated.
Have hopefully now added a few photos of the "giblets" to the album linked to before: https://www.flickr.com/photos/145164567@N08/sets/72157676207761101/

One question re. idler wheel/stepped pulley contact point, is should the idler wheel be in contact with the pulley when there is no power applied to the turntable? The speed selector knob seems to function as I move through its range (albeit in need of a bit of lubrication as it is a bit clunky at present) and the idler wheel moves up and down, but at no point does it actually contact the stepped pulley, even if I gently push the idler wheel towards it.
 
Looks nice and original under there, nice sharp clean screw-heads etc so no signs of botchery etc. Choose your screwdrivers very wisely as it is all too easy to mess up those nice heads. Someone had done so to mine sadly, so being totally obsessive about such things, I've replaced a lot.

You need to be sure the deck is properly supported and clear of whatever it is resting on for it to function as intended, just plonked on a table some moving parts will be impeded. When properly mounted and level the idler should indeed touch the step pulley, though not with a huge amount of force as the platter itself applies some. The idler on mine spins with the platter off on all speeds bar 16 IIRC.

I'd definitely replace the two-core mains lead. I soldered a little eyelet to the earth core of a three core mains lead and took it to the screw where the motor earth terminates. That way you get the whole chassis taken to mains earth.

PS Be very careful when handling the deck, it is apparently very easy to damage/break the thin metal control band and they are *very* expensive to replace!
 
Thanks for the excellent advice, I'll have another look at the idler to see if something is fouling it, though the turntable was supported on soup tins only at the edge of the chassis when I was gently trying the speed selector (having read about it being possible to damage the control band you mentioned if it has become seized due to lack of use).

What would you recommend to clean the old crud/grease from the linkages before re-lubricating?
 
I use Servisol Foam Cleanser 30 to clean everything (it even works on red wine stains in carpet!), so I mainly used this and isopropyl alcohol when tackling various parts of the deck. The Servisol is good for getting grime off linkages etc as well as the paintwork. Based on the photos your deck looks very clean so I'd look for issues at this stage rather than assuming you need to strip everything down (aside from the motor). I'm certainly curious as to why the idler doesn't seem to have sufficient movement to meet the step pulley. Try and figure out what is impeding its travel.

Here is a pic from very early in my restoration process:

3096979261_15ae7c1b51_o.jpg


It shows the deck running minus the platters. Eight years ago now... a long and expensive journey lay ahead with many wrong turns!
 
This site contains affiliate links for which pink fish media may be compensated.


advertisement


Back
Top