advertisement


Pi Chrome Bumper Streamer

Seanf

pfm Member
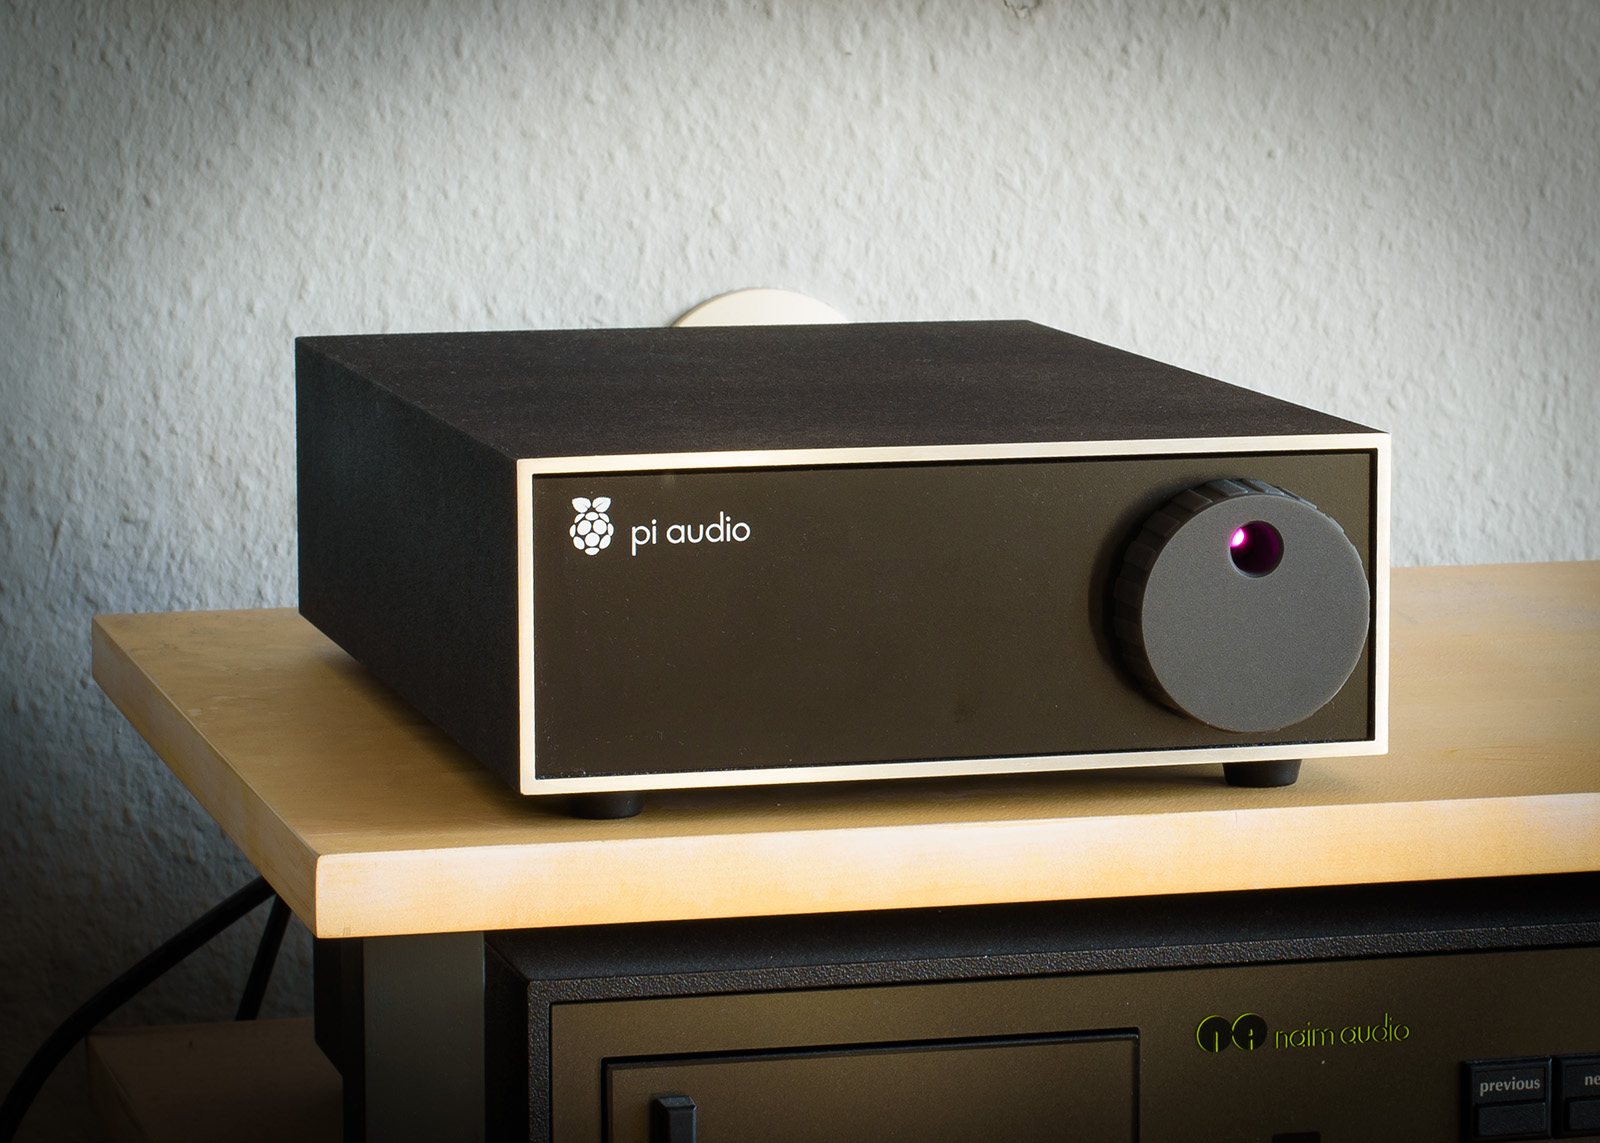
This is it – something I’ve been dabbling with on and off for over a year. I wanted to build a case to house my Raspberry Pi streamer. My gear is mostly olive Naim but I have a soft spot for the look of the chrome bumper series.
6525.jpg


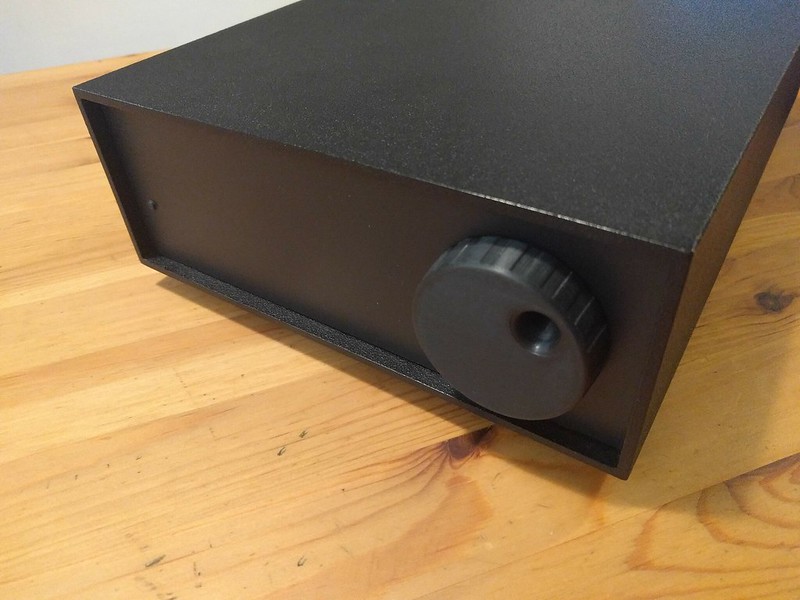
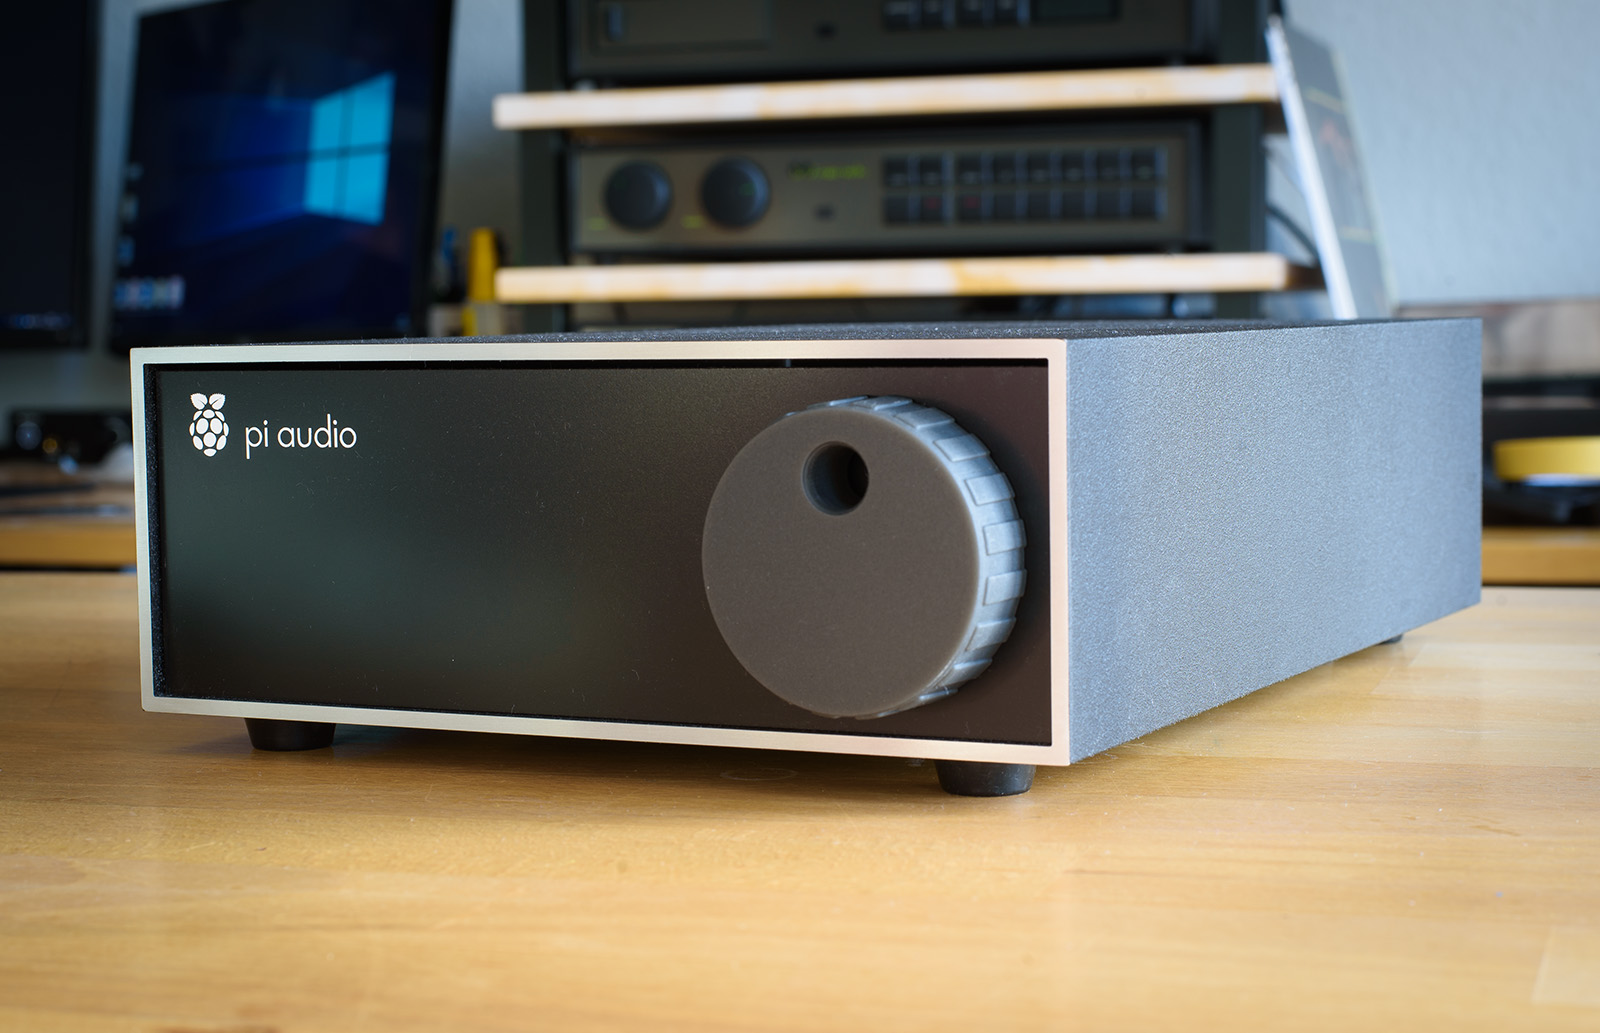
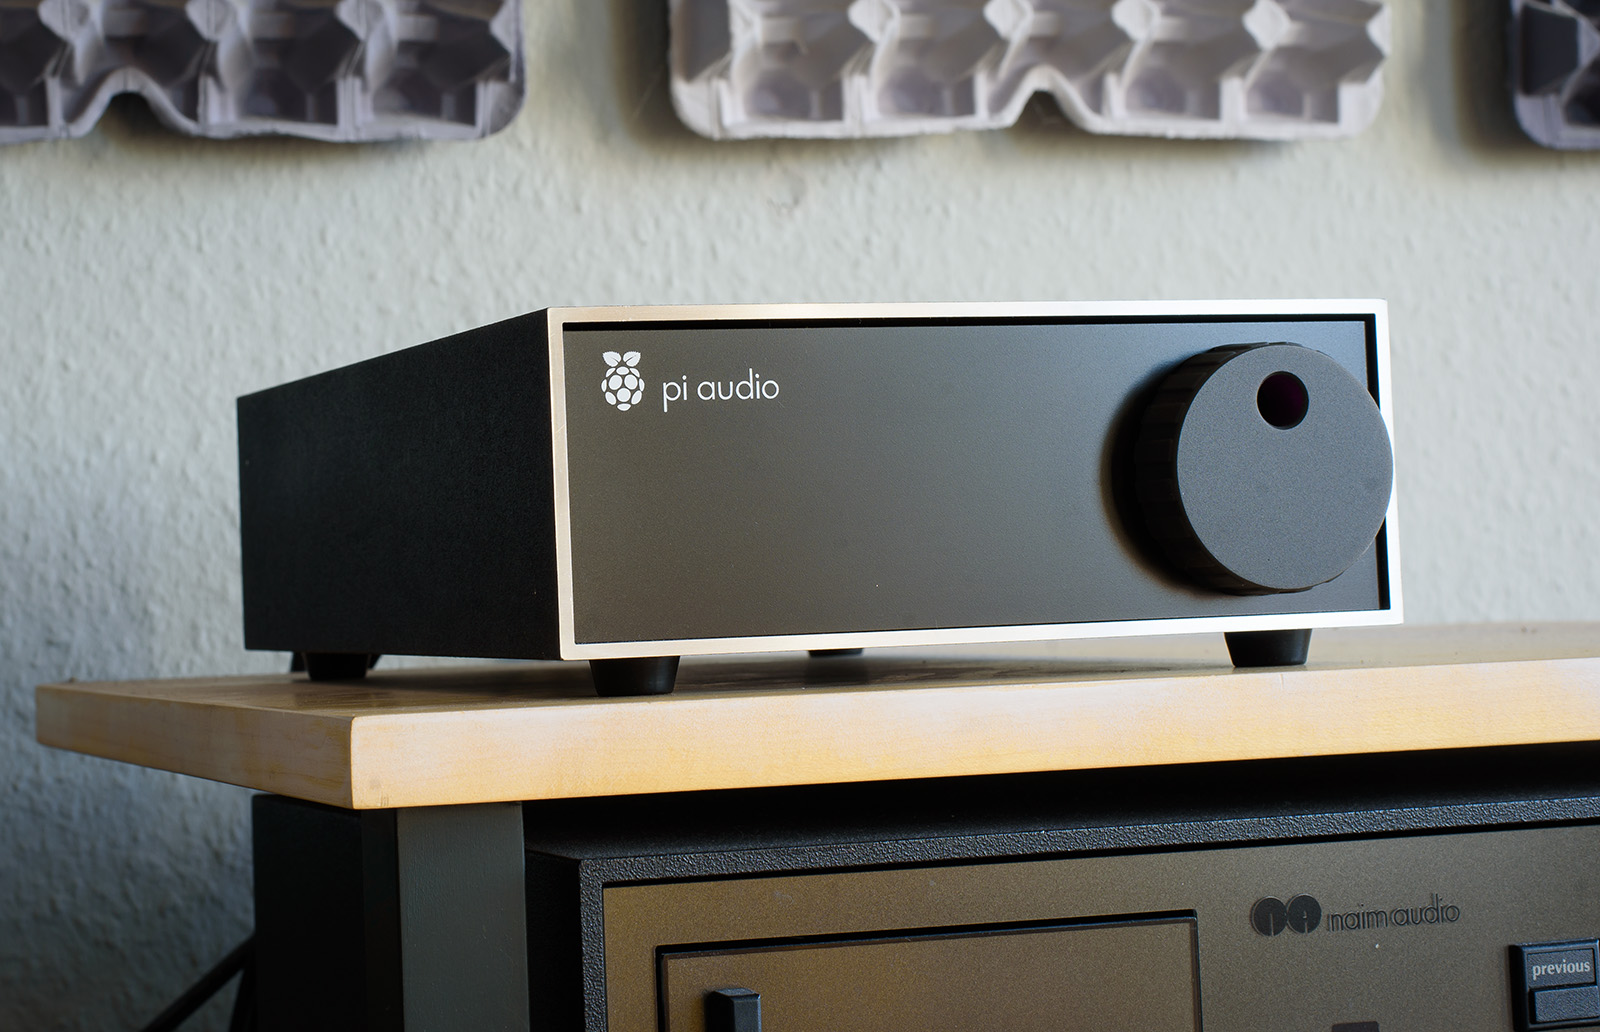
I bought the sleeve and sled second hand on ebay Germany. It’s not the real thing, just a lookey-likey. It was originally all black so I sanded the front edge down to the bare metal. The knob is of course. home-made and 3D printed.
6512.jpg


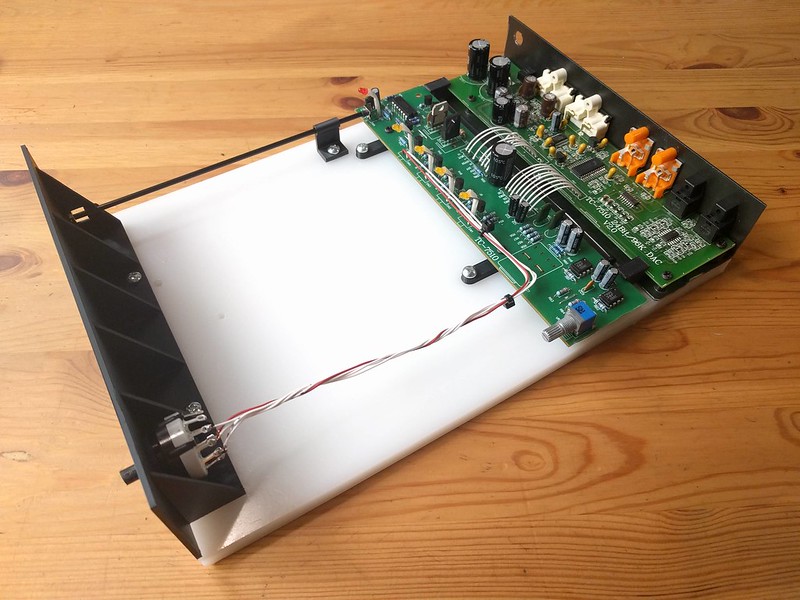
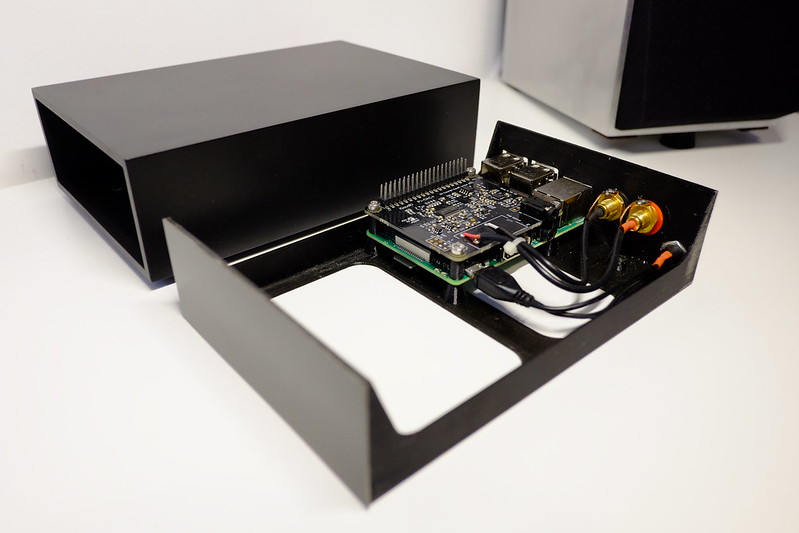
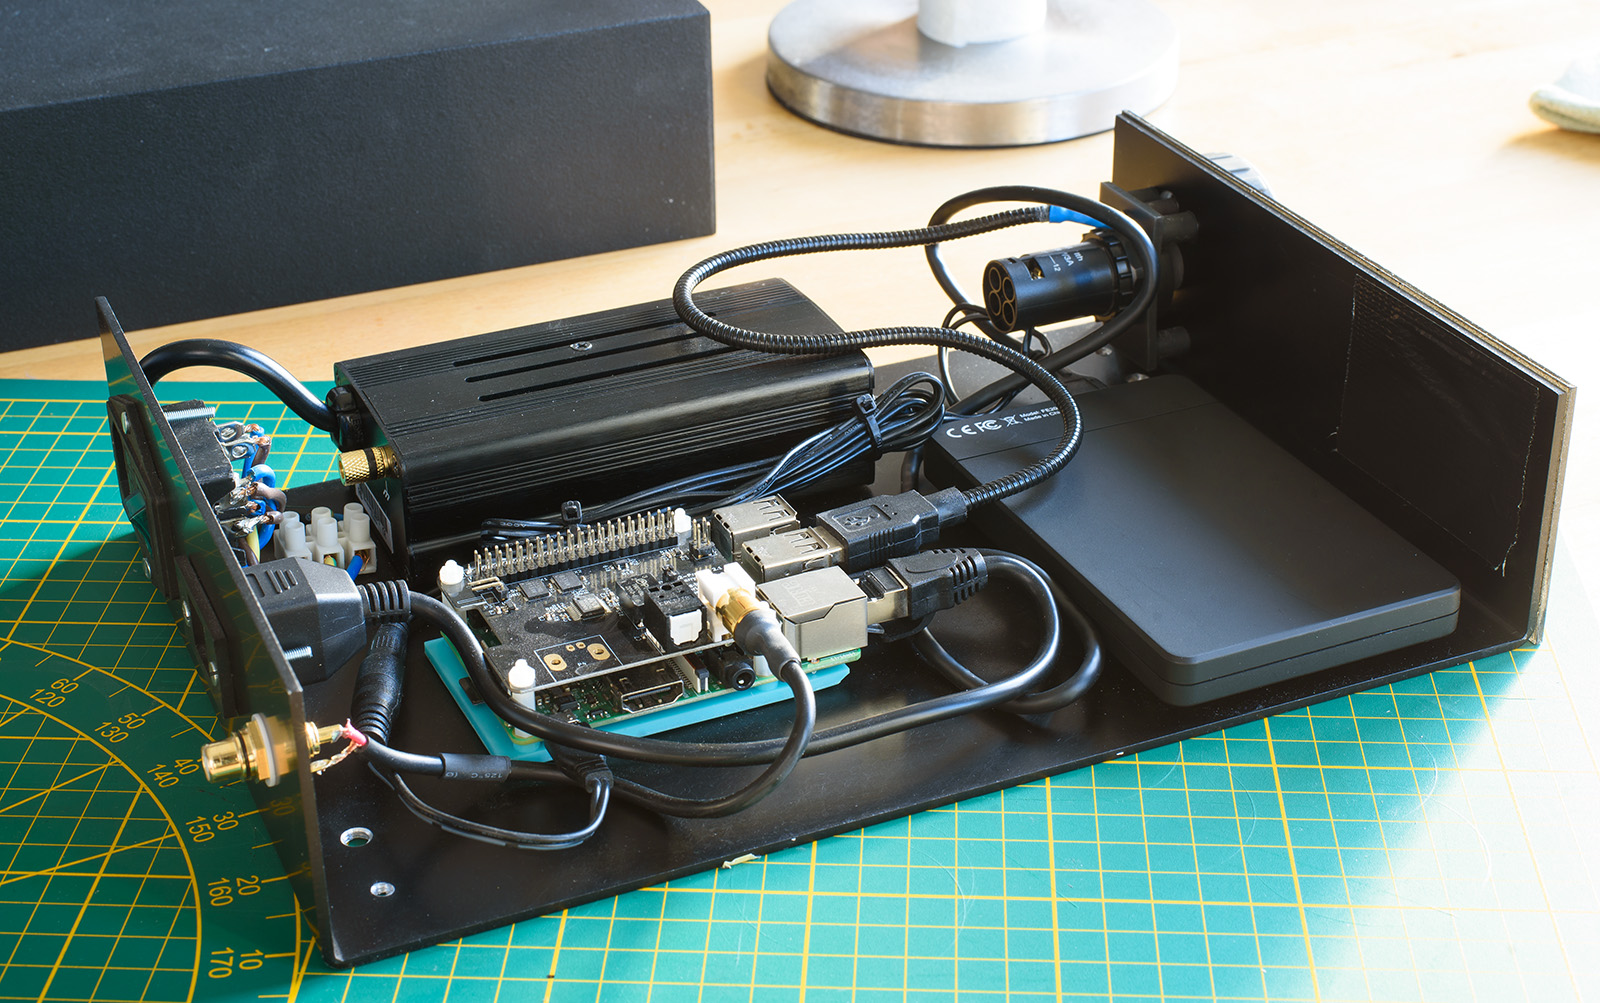
Under the bonnet is a Raspberry Pi 3B with HifiBerry Digi2 Pro HAT, powered by an Allo Nirvana SMPS. A 500gb HDD is currently connected for local FLAC files. Software is PiCorePlayer.
6520.jpg


I’ve extended the inputs and outputs of these internal devices so that they can be connected and controlled from the main case.

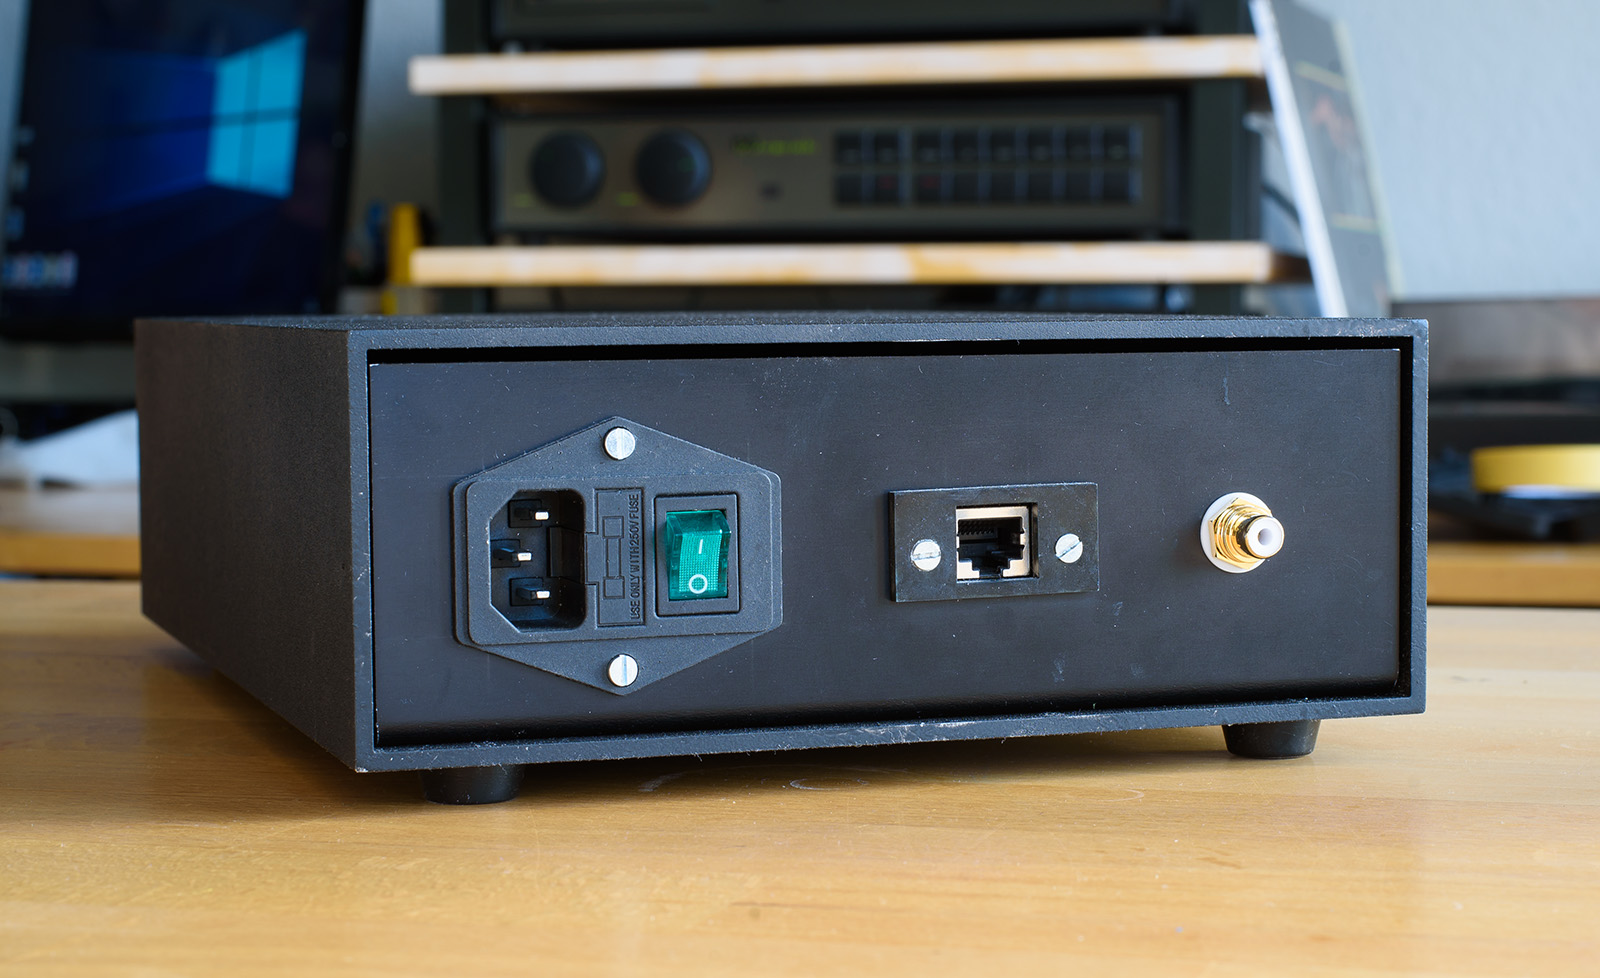
The mains input for the Allo Nirvana has been hooked up to a female IEC, so a power cable can be connected from the outside.

The LAN connection has also been extended from the Pi, though WiFi is also enabled so not totally necessary.

Digital output from the HAT is via coax, which I also extended to the back of the case. This runs directly to my RME ADI 2 DAC, then into my Naim 82/180.

The back panel is a bit messy, I might remake it eventually.
6509.jpg


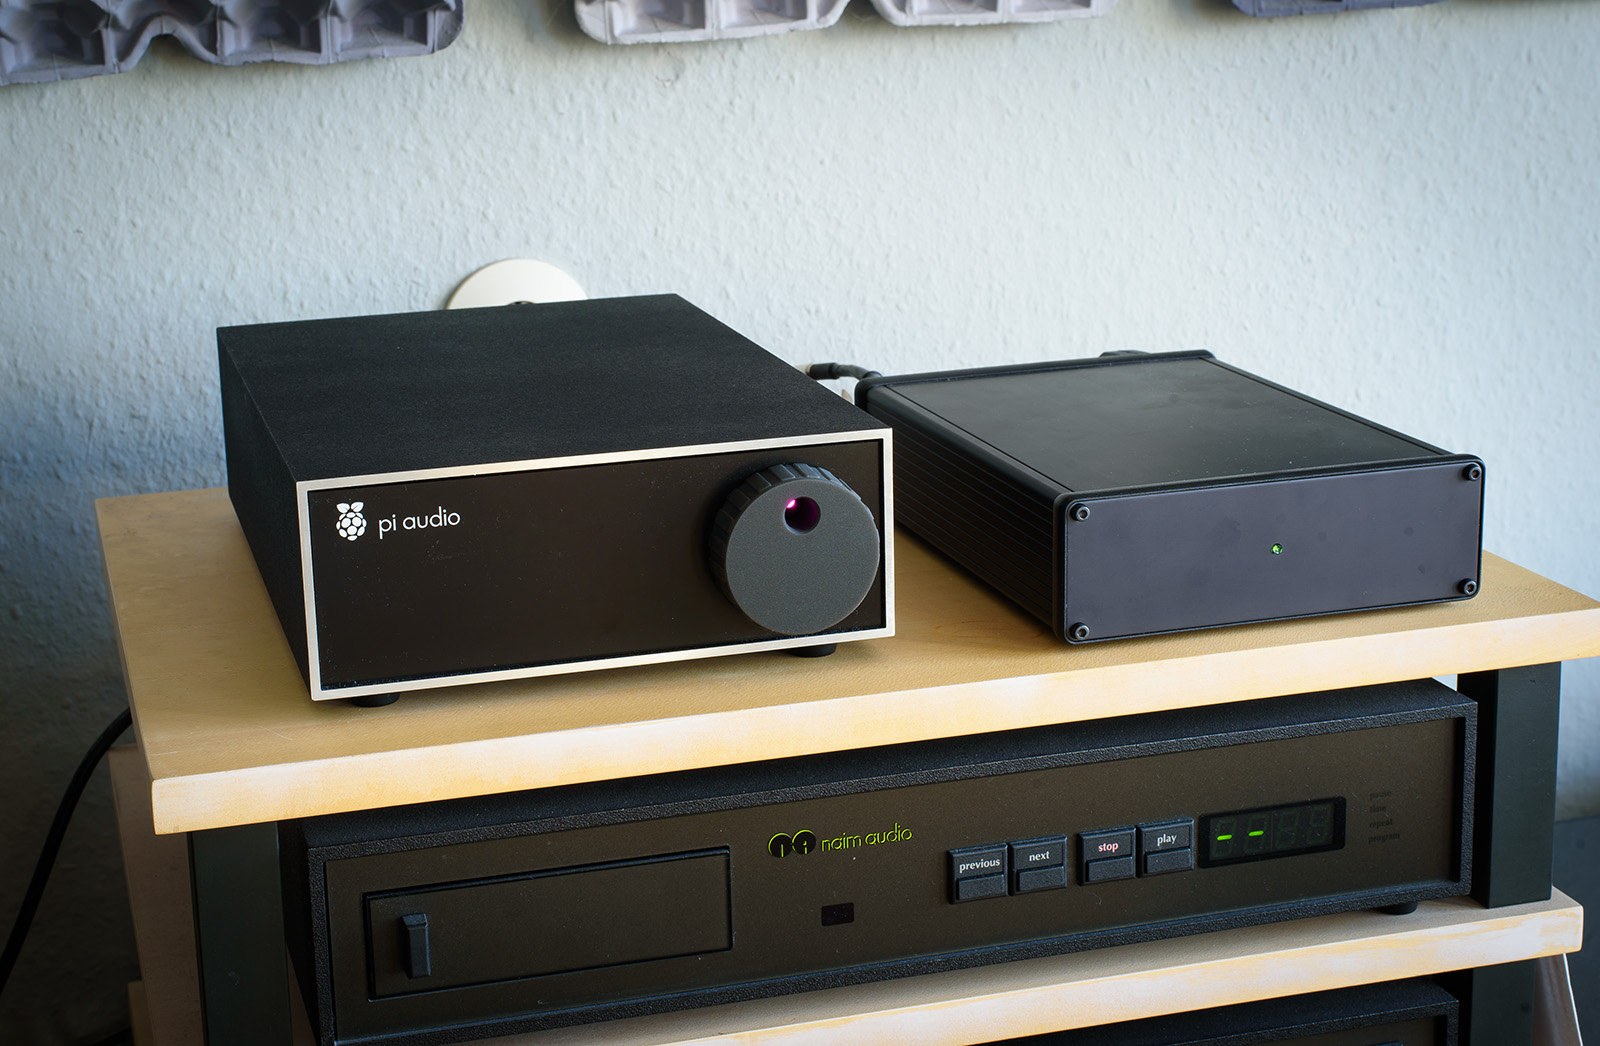
I ran the 5v output cable from the Nirvana through a simple rotary on-off switch on the front, just so I could use the ‘tractor wheel’ knob that I’ve been working on for some time, and have finally almost perfected.

There is also a cheap LED running from a Pi USB slot to the fascia, which shines through a blob of pink resin.

The switch and LED are held in place by a self-made 3D printed bracket.

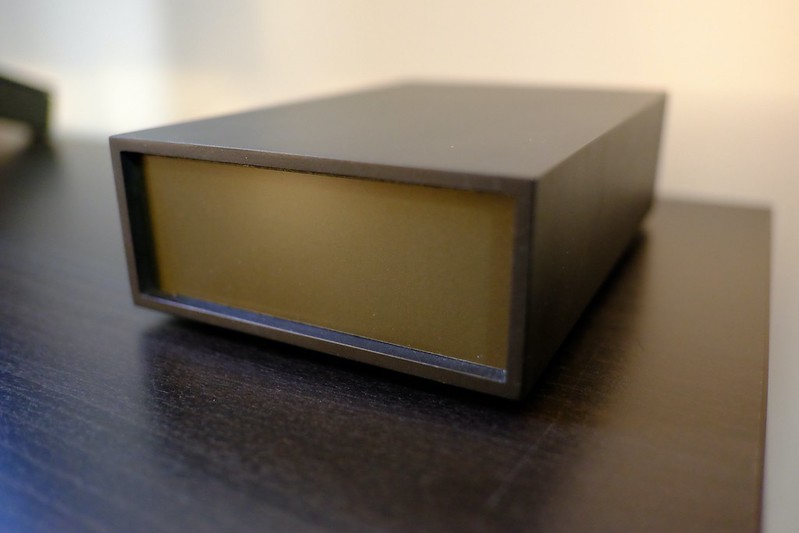
The fascia looks simple but took a lot of thought and trial and error. It had to be perfect, especially the logo. It is a piece of anti-reflective 2mm clear Plexiglas, which I ordered online, cut to the exact size and with the holes for the dial and the LED. I spray painted the back, so that from the front, the finish is perfect, with no blemishes.

The logo is cut with a plotter that I have. I was very impressed with the fine detail it can cut (right down to the serrations on the leaves). I used t-shirt heat-transfer vinyl as the material as it is easier to ‘weed’ than sticky-back vinyl. This meant it had to be ironed on, but at a rather low temperature and for just a short time, to avoid damaging the Plexiglas (I ruined a few fascias in the process).
6508.jpg


6522.jpg


I’m very happy with the outcome, it has far exceeded my expectations!
 
Very neat. I have an almost identical setup using a Raspberry Pi 3B with HifiBerry Digi2 Pro HAT in a small modushop case. Mine runs Moode software.
 
@booja30 made something similar and equally good some while ago...if my memory serves me (it probably doesn't)
He 3d printed the box too I think?

You remember correctly, though I think his was a case just for the Pi, without PSU and HDD, so quite a lot smaller. I was inspired by it to also create and print one a couple of years ago. 3D printers are great fun!
 
Very neat. I have an almost identical setup using a Raspberry Pi 3B with HifiBerry Digi2 Pro HAT in a small modushop case. Mine runs Moode software.

I've not tried Moode yet. Maybe I'll give it a go and see how it compares with PiCorePlayer. The interface looks nice, is it easy to incorporate Tidal and local drives?
 
@booja30 made something similar and equally good some while ago...if my memory serves me (it probably doesn't)
He 3d printed the box too I think?
Good memory! I did two similar projects.

The first was a Beresford DAC torn apart and modified to fit in a @flatpopely half width sleeve, and using a rotary selector instead of push buttons.
44843571064_9e7b44f832_c.jpg

43750985580_236f198e67_c.jpg


The second was an RPI streamer with an IQaudIO DAC hat in a repurposed Naim headline form factor. I originally bought an olive Headline just for the sleeve, but then decided to measure it and print my own so I wouldn't be trashing the headphone amp. The olive faceplate was cut from a NOS slimline olive NAP90 replacement panel I bought on eBay. I still have material to make another one, but I'm through my Naim phase. :)
49158722572_94dfcb1b34_c.jpg

49158211177_1498e6da88_c.jpg


BTW, @Seanf, great work on your project! I'm guessing your tractor wheel knob was SLA printed, not FDM(?) I could never get my FDM printed knobs looking presentable without lots of tedious sanding and a coat of paint.
 
Good memory! I did two similar projects.

The first was a Beresford DAC torn apart and modified to fit in a @flatpopely half width sleeve, and using a rotary selector instead of push buttons.

The second was an RPI streamer with an IQaudIO DAC hat in a repurposed Naim headline form factor. I originally bought an olive Headline just for the sleeve, but then decided to measure it and print my own so I wouldn't be trashing the headphone amp. The olive faceplate was cut from a NOS slimline olive NAP90 replacement panel I bought on eBay. I still have material to make another one, but I'm through my Naim phase. :)

BTW, @Seanf, great work on your project! I'm guessing your tractor wheel knob was SLA printed, not FDM(?) I could never get my FDM printed knobs looking presentable without lots of tedious sanding and a coat of paint.

@booja30, I'd seen the small Pi case you made and I made something similar based on yours, but haven't seen your DAC before. Looks good, and very neat internally.

Yes, my printing is all SLA. the detail it is capable of is stunning. This knob is straight from the printer, no sanding or painting required, just a wash with IPA to removed the excess liquid resin.
I had a Mars 3 printer for a little while this year and only did the test print. It was enough to realize that I didn’t have a good space for it. Not enough ventilation without being in direct sunlight. If I had a garage or something I would have kept it! Lots of potential for making intricate parts. But for what I want to do 90% of the time, my Prusa i3 is fine. For the other 10% I need to look in to online/on demand printing!
 
Last edited:
I bought myself a resin printer earlier this year and was impressed by the level of detail. But the amount of faff and smell and mess it makes is no fun, even if I used 'eco' resins. I just bought myself a Creality Ender 3 s1 and am loving it. The resin printer is going.
 
the amount of faff and smell and mess it makes is no fun

This is definitely a downside to say the least, but the detail is irresistible. I don't have a dedicated room for printing so my apartment does pong a bit despite plenty of ventilation. I've been using the printer a lot recently while trying to improve the knob, but it is not something I would normally be doing all day every day.
 
That's very nice indeed.

I'm looking to do the same. I have a 3B+ running Volumio, with the 7 inch touch screen and an SPDIF hat.

I'm trying to find a case to house the screen. I have an old and broken Linn LK amp that I may sacrifice for the case, but would prefer a Naim olive shoebox to go with my 72/140 if I could find something.

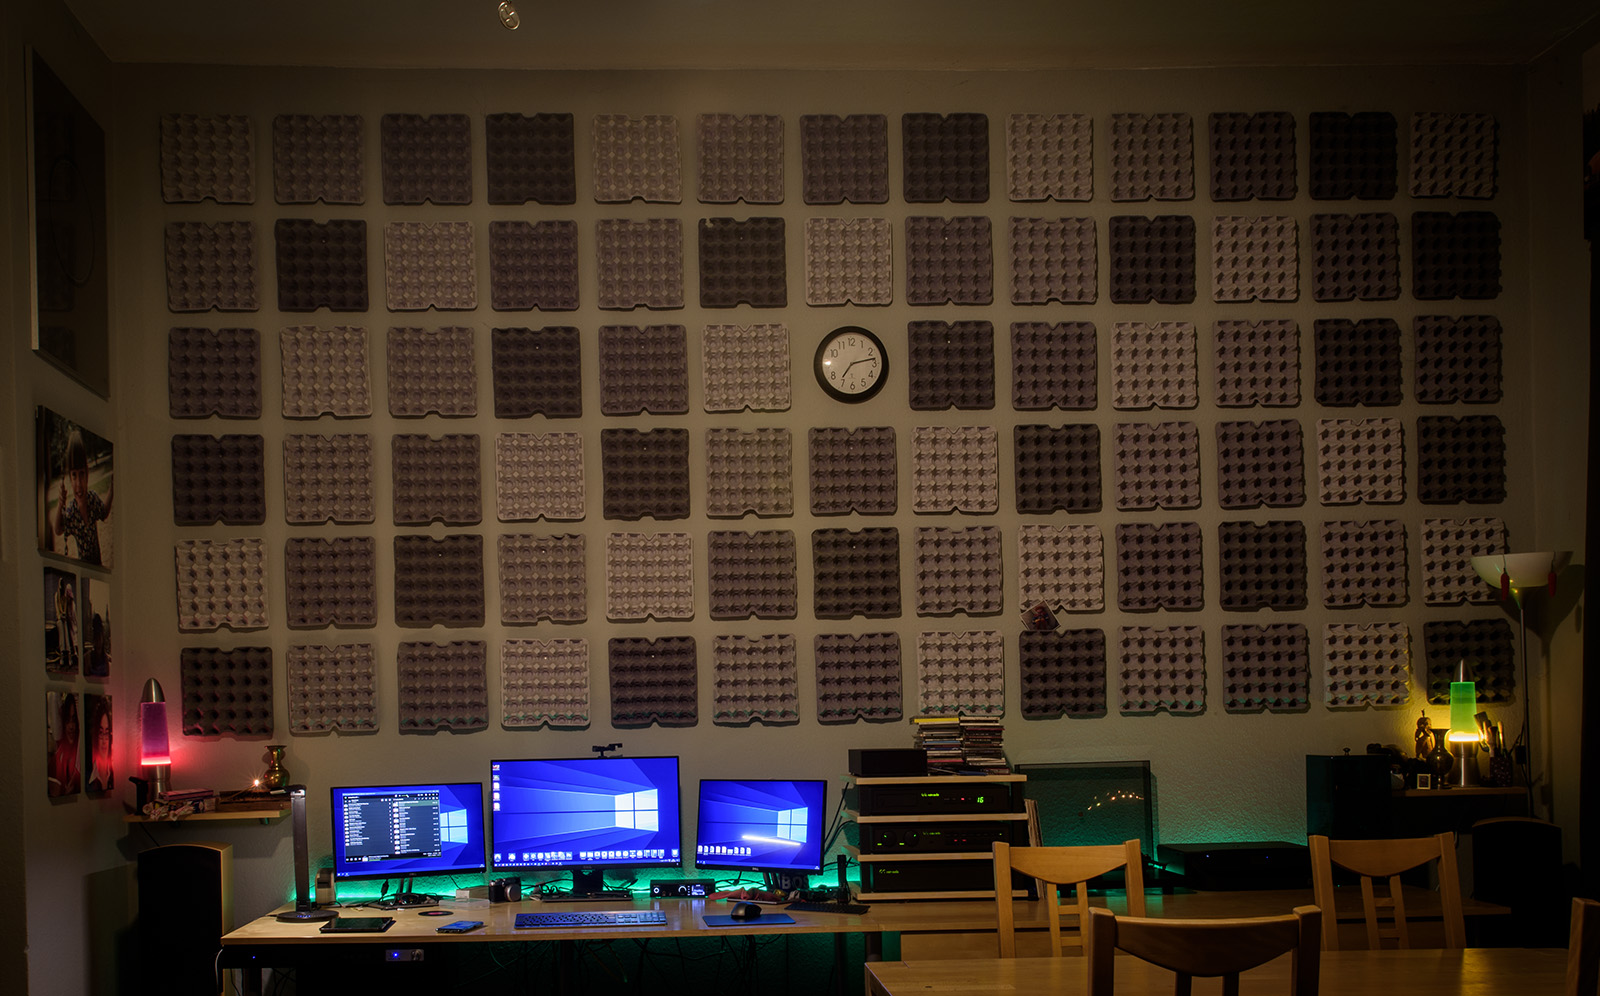
Btw - Are those egg boxes on the wall ? They look pretty cool.
 
This is it – something I’ve been dabbling with on and off for over a year. I wanted to build a case to house my Raspberry Pi streamer. My gear is mostly olive Naim but I have a soft spot for the look of the chrome bumper series.

I’m very happy with the outcome, it has far exceeded my expectations!

Great work - well impressed, particularly the very sharp logo !!!

Not a Naim fan but do love the chrome bumper styling :)
 
That's very nice indeed.

I'm looking to do the same. I have a 3B+ running Volumio, with the 7 inch touch screen and an SPDIF hat.

I'm trying to find a case to house the screen. I have an old and broken Linn LK amp that I may sacrifice for the case, but would prefer a Naim olive shoebox to go with my 72/140 if I could find something.

Btw - Are those egg boxes on the wall ? They look pretty cool.

I thought about adding a screen, I even bought a small one that would fit within the fascia but I didn't bother in the end. I use my phone or computer to operate it. Much more convenient.

I actually just bought an olive shoebox case yesterday. By coincidence, the guy I bought this case from had it up for sale. It has a third party HiCap inside but the case, fascia and illumination are original. I will repurpose the case, not sure exactly how yet, but at €150 I couldn't resist!

They are indeed egg boxes. I put them up on opposing walls to reduce the echo in this boxy room. It definitely does the job, when I took them down a few years ago to repaint them, the sound became painful, so I was glad to get them up again.

5708_2.jpg
 
Thanks Seanf.

I'm looking to put some absorbing materials on the walls behind my speakers and even have the timber cut and the insulation bought for two, four foot square traps. My plan (don't know if it will ever happen tbh), is to cover them with black speaker cloth and put a big 'Marshall' emblem and some speaker cab corner protectors on them to try and make them look like a pair of 4x12's....(although they'll be closer in size to 4x15's like Lemmy's).

The case for the screen is proving a bit problematic, as I don't think it'll fit into the Naim case.
 
Great work - well impressed, particularly the very sharp logo !!!

Not a Naim fan but do love the chrome bumper styling :)

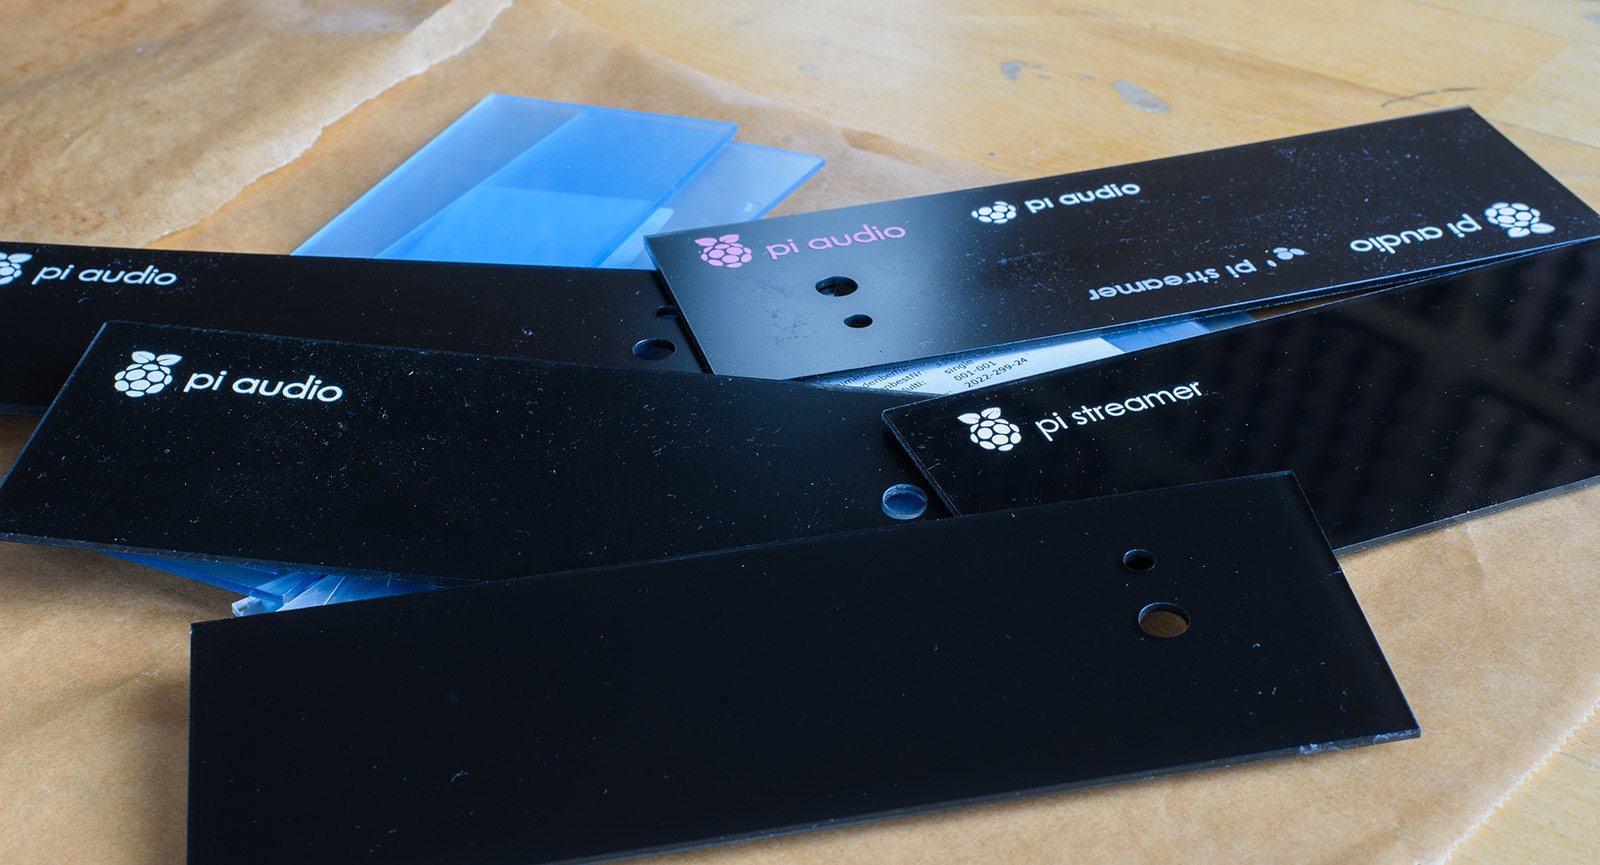
The logo is razor sharp, I was quite surprised that my plotter could cut this level of detail. Applying it to the fascia isn't easy though. It has to be ironed on and if the iron is too cold or not held long enough, it doesn't stick. If it is too hot or held too long, the fascia gets 'scarred'. Below are a few of my tests/failures. I did a glossy version too as the online shop sent the wrong plexiglas first time. It actually looks pretty nice!

6548.jpg
 
I just had a brainwave. Instead of ironing the logo, use a heat gun (used for heat-shrink tubing normally). I bought one for the wiring of this project and just realised it would be perfect for applying heat-transfer vinyl, as you have more control over how much heat is applied and you can see what you are doing.


advertisement


Back
Top