advertisement


My almost diy project

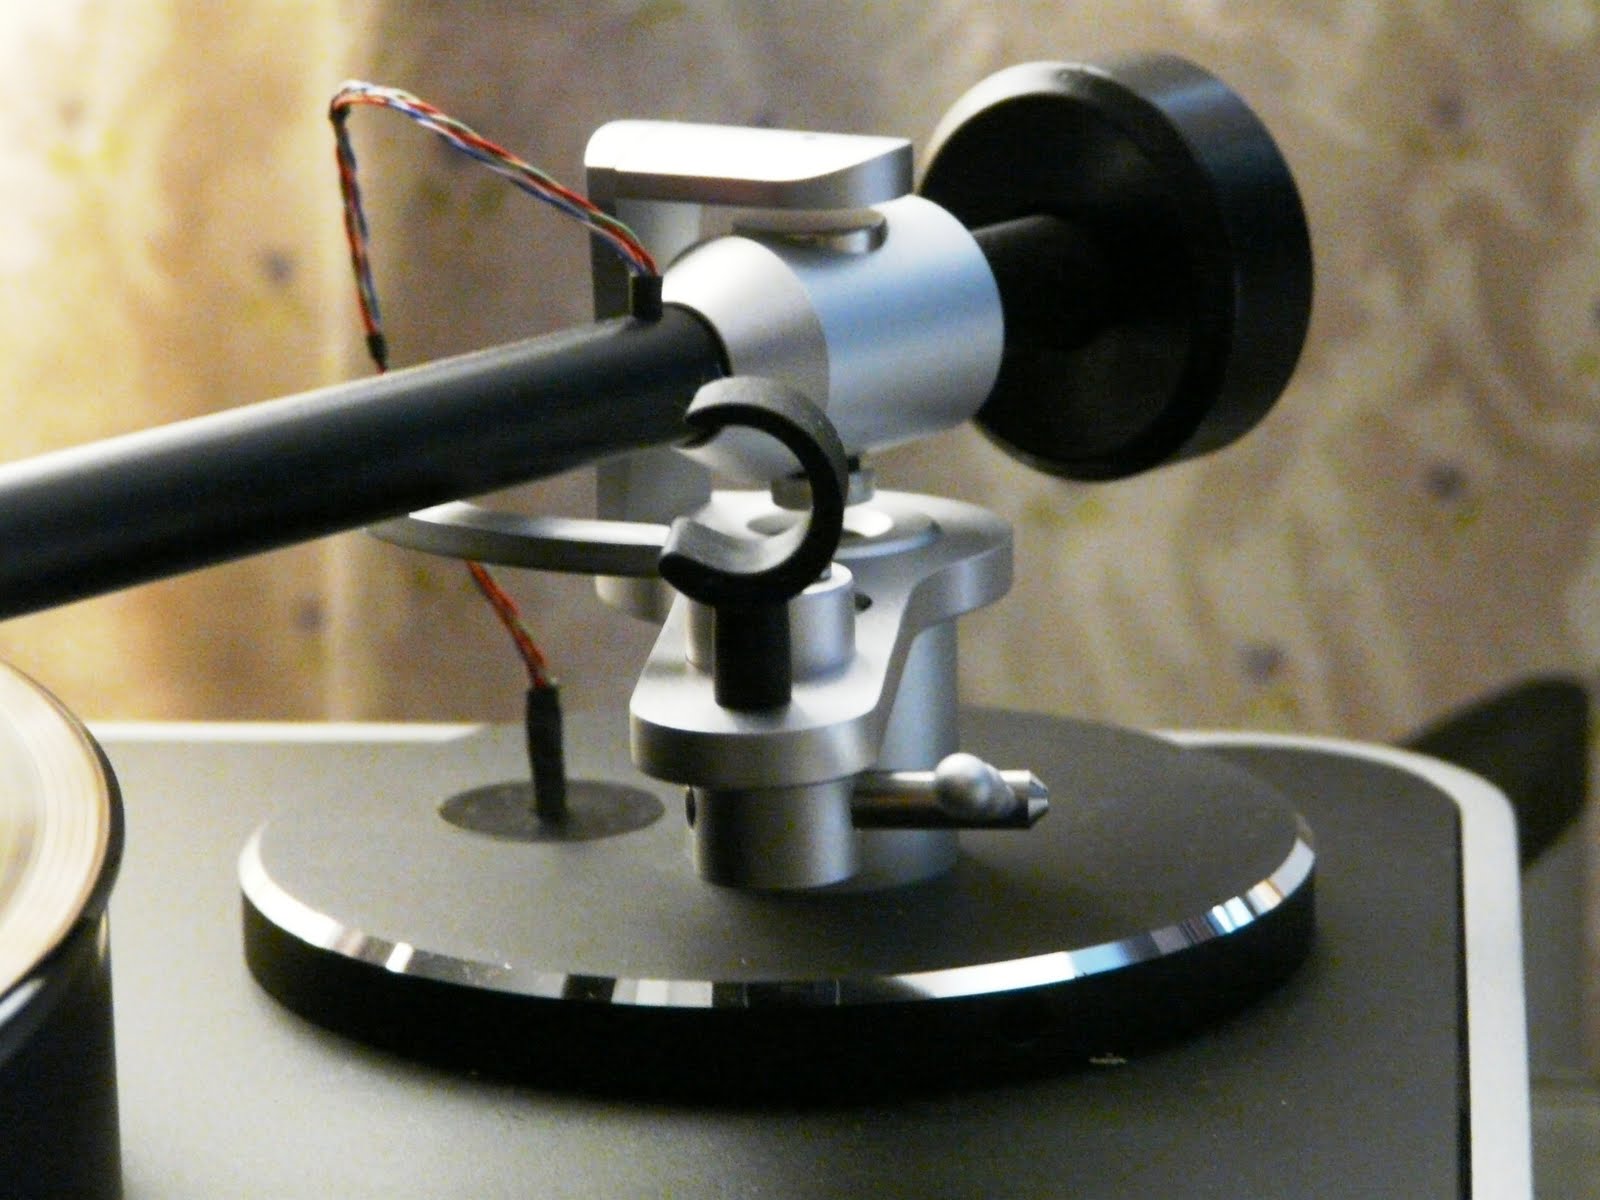
Because Cinderella cannot go to the ball I sat in bed with a CAD package and callipers and drew up a new head for the hadcock. The one thing I did not like about the Hadcock was it was loose at the contact point of the grub screw and also even though the inward tracking angle was correct for 12" it was just out when I pulled the stylus back to correct overhang... The holes on the turntable were in the right place so I think the headshell holes are slightly off... not completely awful but out enough to piss me off and would nag at me.

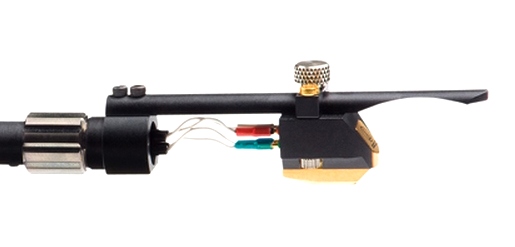
So I drew a new head-shell based on the old Koetsu ones. Slide fixings are fiddlier to get the angle right but it's originally a hadcock so fiddly goes with the territory. It can be machined from bamboo, Iroko, carbon fiber or aluminium,I can even 3d print this. CAD package says finished milled item with anodized 6061 is 6g. The stock one is 5.78g with finger lift. Wood is 4g, bamboo is 3.8g CF is 2g. This is a 10mm rectangle milled down to 3mm on the underside with a 2mm grub screw and a 6mm hole and two 3mm slot holes... Considering rebating those slots with a machined edge. I may add an additional 6mm x 10mm collet at the stub depending on interface issues in testing. 10mm of shaft to hold the arm tube.

Also toying with adding a third hole for tri-point cartridges. Unlikely I will ever go that way but at least rails allows adjustment in the head angle and the length of the arm tube. I am fiddly like that.

EDIT: Importing the file into Schaeffer's software, it comes in at €40 which is completely reasonable especially as I have other machining jobs in the pipeline. Small intricate stuff is not as expensive as bigger stuff, although I will have to manually ream the 6mm hole if I use Schaeffer, but they have yet to disappoint.

headshell first drawing by c-g., on Flickr

The engraved Kanji means "little colt", I think.

EDIT: indeed I pulled out the old plastic Denon headshell and the holes are 1.84mm out from the ones on the aluminium headshell so that really will require a headshell on rails to adjust toe in and overhang. I generally use Baerwald, I dunno why...

EDIT: I might ask J7 to implement a cardas socket and rewire as I think I have shredded the cable sleeve too much to reliably isolate from ground.
 
Another approach would be the Schroeder method which would work well with the 6mm od 4mm ID carbon fiber wand... it is not as easy to find an online machinist... The ones round here are more used to rplacing tratter parts and machining flat sections on bars always seems to yield blank looks.

m2-headshell.gif
 
Things are looking good Clive. As for the headshell, yes the small screw is a pain. For proper clamping I prefer the headshell to go over the tube rather than in it and when I fitted a Hadcock headshell to my Grace arm ( no pun intended lol ) I slit the bottom of the the headshell and made a small clamp out of aluminium. I'm sure with your facilities you could do a better job.


Yep that is a belt and braces approach for sure!

I realised I can reduce headshell weight by a few grams by milling out the centre and the back without losing too much structural rigidity which is imposed by the alloy shell anyway. I can probably do something about the collar end but part of me is thinking a rod with a slot and plate may be the way ahead the "Nanook" Schroeder and Morch approach are fantastically minimal and that is what I am seeking. At present I can mill a block into a rod but I am sure there is an off the shelf solution with existing metalwork if I look hard enough.
 
Ok have found a few online services other than Schaeffer that can machine in brass or stainless steel or ally a schroeder type headshell. As I am also building a maglev 9" tonearm based on the same carbon fibre tonearm and using no bearings and no unipivot I shall be getting my CAD foo up to speed and staying out of trubble until at least July.

In fact I can just have a tapped threaded hole drilled into the ally headshell and have it fixed at one single point, utter minimalism.

With a viv labs nelson hold-style stylus lift at the front it would be weird as hell... I am liking this

viv_nelsonhold_2.jpg
 
Here we go, a bit of time with a CAD package and working out the fastest most efficient way to make a schroeder type headshell, this can plug straight into a 6mm OD 4mm ID carbon fiber tube... I can add a thread with a grubb screw or a slip on collar. This is about as simple as it gets. Made from brass @8g rather than ally as the ally costs go way up on emachineshop....

Minimalist Headshell Design by c-g., on Flickr

Minimalist headshell design by c-g., on Flickr

Rather than faff about with the baseplate I can simply machine a single centre pivot hole into the headshell. Problem solved.

This is a lot pricier than the other design so I will see what I can do in schaeffer's software next but this is a lovely slim thing...
 
In the end I opted for a flat design. a mix of the traditional original and of the slotted single swivel. This way I get the engraving and its a LOT cheaper than the emachineshop $350 versus... let's see, 24.62€ for this with engraving and anodising... Not to scale but the geometry is right. It is held in place by four m2 grub screws. 2 left and right. It is 8mm thick and weighs 4.2g. (Image not to scale). Crosshatching is machining on the underside. This is 10mm wide x 50mm long. Tube is 6mm so 2mm each side.

Headshell by c-g., on Flickr

Ok that's it, sending off. Milk, pills, bed. Nite.
 
Clearaudio have a magnetic bearing tonearm, had one on my concept TT and was quite good.

Also think they use maglev for the platter on their higher end tables.

P1080462.JPG
 
There you go. Oddly enough that is almost exactly how I would have done it except with a puck and an embedded magnet held in a C former... If I have the energy I might just do it. If I feel like getting involved in Internet fights I shall certainly attempt it as it will just distract me away. I can sit in front of CAD for hours.

Another approach I thought of is to hang the tonearm and use a piece of wire and use attraction rather than repulsion to hold down and thus act as a pivot from above.

But first to finish this bad boy, I am so close to completion.
 
The good thing about the clearaudio one is that there is a magnet in the overhanging piece and the top of the arm pivot (the round thing on top of the arm) with twin wires going from the bottom of the arm down through the table and fixed to a knurled nut underneath.

The anti skate is set by turning the knurled nut and twisting the two wires so that a torsion force is created.

Quite a simple idea but very clever in my view, you should have fun.
 
Hello FOX, I think you can help me.
I buy on interenet a old tri-amp of ATC.
This tri-amp this modified.
The crossover frequency cuts is wrong. (100Hz and 2800HZ)
I think you have a ATC scm 100A
I want to put cuts crossover at 380 Hz and 3500 Hz (scm 50)
Can you send me pictures of Tri-amplifier? To see the differences

My email is [email protected]

Sorry for my horrible English
I am Spanish

Regards
 
hola ppnacho, no tengo ATC100s más , pero voy a escribir un correo electrónico
(lo siento por mi Google español)
 
Adjustable headshell back and all looks good.

Back from machining by c-g., on Flickr

Looks to be a good fit. Next up is to make the supporting disc underneath with three tapped holes. Now I can see it I can eyeball the thickness of the plate and drill the requisite 1mm hole for the finger lift and finish the sides... Sorry it's a bit blurry....
 
That looks real slick, you certainly have an eye for this sort of thing. I need you to give me a rundown of how to design and prepare files for someone to CNC at some point.

Stefan
 
It's just looking at how to make a thing with as few lines as possible. Efficient machining and limiting material waste. Slot cutting is easier than lathe cutting, aluminium is more suitable than brass at this end of the headshell. Thin elongation with a rigid underweight means it is visually unobtrusive. And it copies schroeder's principles to the letter.

The kanji for little colt is just a signature. I like kanji - it has implied exoticism but explicit ponyism.
 
It has been a little while as I have been concentrating on fencing, gravel paddocks, stables and other horsey things but I got some time to put in some good old CAD for the Schroeder style headshell.

I made it so the allen bolts are recessed into the headshell mount rather than cut away a channel at the side, this results in a very clean look.

Tonearrm adjuster by c-g., on Flickr

I'll clean up the edges later. Here is (a bro Pinkie Pie in situ with the headshell at the correct angle. I will use Twilight Sparkle while this gets sent off for work.
ken cantilevered)
DSC03010 by c-g., on Flickr

I must say this is really looking better than I had hoped. Its got loads of adjustability. Its really light in the armwand now. Just need to drill the side for a finger lift.

DSC03012 by c-g., on Flickr

and a view in situ

Feikherd by c-g., on Flickr

Jonathan very kindly loaned me his Dr Feikherd Protractor so I can nail the geometry and the angles of what is a whole new end of arm from the pivot onward. I have a few records for him as a result. Thanks Jonathan. I also took the time to make a tidier version of the arm mount support.
 
And it fits. Its really really really easy to mount the cart to the coin and then the coin to the head... slide it into position, align and nip up.

Nailed it by c-g., on Flickr

Almost ready I could trim the arm tube a bit I guess to get maximum travel but not all carts have the same mounting geometry and as I discovered these aluminium ones do mess with the needle to pivot ratio by a mil. Now the problem is solved. Thank you Mr Schroeder.

I am using a trashed cart at the test fitting stage... Its just a broken cantilever so I can slide the shell back a few mil...

Nailed it by c-g., on Flickr


advertisement


Back
Top