
Mike P
Trade: Pickwell Audio
There seems to be plenty of love for high end vintage CD players on PFM these days, so I thought I'd share with you some details of the refurbishment work I'm doing on a Marantz CD94 for @paolo191
@paolo191 wanted a unit in the champagne finish rather than the black finish we usually see in the UK. He actually ended up getting on from Switzerland, thanks to some kind help from @Dowser.
It's the first time I've seen a champagne finish CD94 in the flesh and it looks gorgeous!
 20210504_145700 by Michael Pickwell, on Flickr
Both @Dowser and @paolo191 had already established that the unit was working fine, so I jumped straight into taking the side cheeks and cover off.
....and straight away encountered evidence of a previous repair.
 20210504_150136 by Michael Pickwell, on Flickr
The screws that hold the righthand wooden side cheek on aren't original and had been changed for some longer and larger diameter stainless self tappers. For comparison I've included an original screw in this photo (the copper coloured one).
This is a common problem on these players and often the screws that hold the side cheeks on have stripped threads. It's caused by a combination of people doing the up too tight and also by people lifting the players by the side cheeks. Please support them from underneath when you lift them!
In this case someone had got around the issue of the stripped threads by fixing some J-nuts to the inside of the chassis, with what looks like JB weld epoxy.
 20210504_150714 by Michael Pickwell, on Flickr
Not the neatest repair perhaps, and not how I like to do it but a perfectly solid and functional repair nonetheless.
@paolo191 wanted a unit in the champagne finish rather than the black finish we usually see in the UK. He actually ended up getting on from Switzerland, thanks to some kind help from @Dowser.
It's the first time I've seen a champagne finish CD94 in the flesh and it looks gorgeous!
20210504_145700 by Michael Pickwell, on FlickrBoth @Dowser and @paolo191 had already established that the unit was working fine, so I jumped straight into taking the side cheeks and cover off.
....and straight away encountered evidence of a previous repair.
20210504_150136 by Michael Pickwell, on FlickrThe screws that hold the righthand wooden side cheek on aren't original and had been changed for some longer and larger diameter stainless self tappers. For comparison I've included an original screw in this photo (the copper coloured one).
This is a common problem on these players and often the screws that hold the side cheeks on have stripped threads. It's caused by a combination of people doing the up too tight and also by people lifting the players by the side cheeks. Please support them from underneath when you lift them!
In this case someone had got around the issue of the stripped threads by fixing some J-nuts to the inside of the chassis, with what looks like JB weld epoxy.
20210504_150714 by Michael Pickwell, on FlickrNot the neatest repair perhaps, and not how I like to do it but a perfectly solid and functional repair nonetheless.
 20210504_150601
 20210504_161916
 This stuff causes horrible corrosion to component legs and whilst it's really tedious work to remove it all it has to be done.
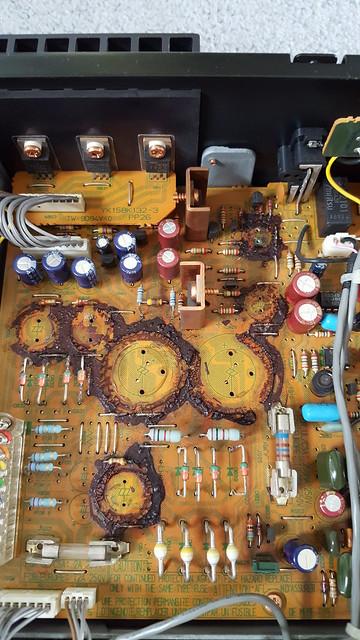 20210504_154519
 20210505_214738
 20210504_161853
 20210506_172453
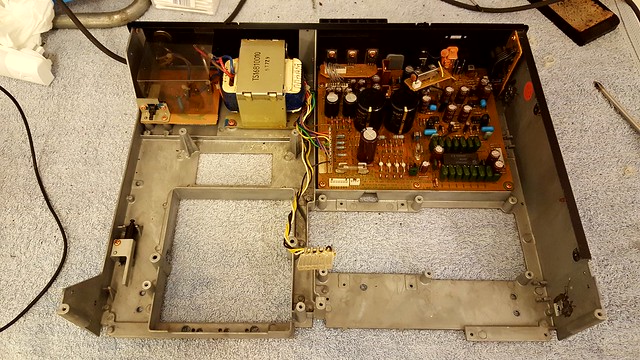 20210506_214644
 20210507_102803
 20210507_082758
 20210506_214828
 20210506_214806
 20210507_085916