advertisement


idiots guide to amp building

lo I just dismantled my case to measure up for replacing the base panel with 4mm aluminium, was surprised how flimsy it was tbh. So asides from cooling will strengthen it a fair bit
I wouldn't think you need a 4mm base plate. For example, the Dissipante case has a 1mm aluminum base, and it's very sturdy. 2mm would be PLENTY. You don't need lots of mass for heatsinking. Surface area is the trick.
 
yes the flanges do add strength but the chunky 10mm face plate could do with a base or sides to match. My first time using a diy case been spoiled by Naim and even my Rotel am has a much heavier base plate than cover.
I looked at my own Pesante base plate earlier today (and just now), and the flanges don't get screwed to anything. Their only purpose is to prevent the very thin steel plate from bending. When you change that to aluminum (perhaps 1.5mm thick), I would skip the flanges completely. Just do a rectangular plate.
 
opted for 4mm thick flat plate rather than self tapper will bolt it to the sides, might use some aluminium angle and attach to the face plate and utilise the big 10mm face plate as further heatsink plus make the case rigid. or if my measurements are correct should butt up against the faceplate might just need some thermal paste if tight enough connection
 
Yes, Naim are built like tanks, but then there's the other end of the spectrum, like NVA for example... Acrylic plastic thingys. Took me a bit of adjustment to get my head around also as I came from Naim.

...However...I have built a premp recently in an ASDA lunch box

The acrylic used by NVA is very stiff. The side panels are 20mm thick. Acrylic is brittle compared to aluminum but I have much more confidence in it's construction than many things I have cme across. I certainly don't think it is at the other end of the spectrum.
 
The acrylic used by NVA is very stiff. The side panels are 20mm thick. Acrylic is brittle compared to aluminum but I have much more confidence in it's construction than many things I have cme across. I certainly don't think it is at the other end of the spectrum.

Duly noted Sir, I stand corrected.:)
 
Below is the NCC220 module, prebuilt from Avondale with C style heatsink and threded bolt holes. If someone would enlighten me if there is an easier way to attach it to one of the 4 heat sinks from the Dissapante 4U Modushop case, I would appreciate it greatly.

I assume, mark up and drill two holes, drill right through the heat sink (between the fins) and bolt through into it from the outside with black headed bolts? These would need to be slightly bigger than the thread of the threaded holes in the NCC220 as I dont have precision tooling available.

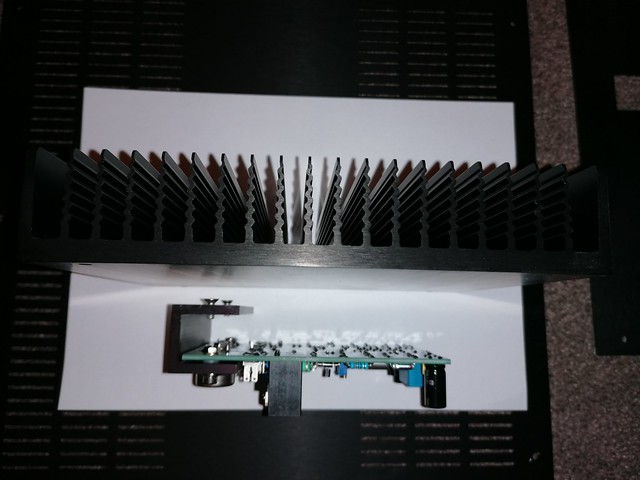
heat_sink_attachment by muchtoofast, on Flickr
 
This site contains affiliate links for which pink fish media may be compensated.
Something like this will work well:

https://www.machinemart.co.uk/p/12-piece-drill--tap-set/

NB for DIY casework you'll generally want quite small taps - M3, M4, M5, perhaps M6 is really all you want or need, for mounting things, fixing machine screws into heatsinks etc. Afterthought: PCB stand-offs are generally threaded M2.5 - so add that to the list.

That said -
Be aware that cheap taps tend to be glass-hard muck, and will therefore tend to shatter/snap-off if you look at them wrong. If you want to tap a lot of holes it could be that the right way to start is to buy machine-quality parts from the start - M3, M4, M5, one good tap handle to suit, and the right-size drills to match these taps. Might be a little more expensive - but you can buy the drill/taps pairs, one at a time, as you need them.

Whichever you choose - do a generous dab of the right lubricant to aid the cut: mineral oil into steel - but paraffin/white spirit/WD40 into aluminium.

HTH.
 
Last edited:
You only really need taps for this job so no need for the dies unless you have other uses for them.

Can't go wrong with screwfix really, they will be fine for aluminum. You have to drill the hole all the way through.

Yes I would remove the threads in the ncc heat spreader as if you don't the heat spreader might not be pulled right against the heat sink.
 
Given the C-channel is already threaded, you have two options:
  • Drill the holes through the heatsink (between two of the fins), and use longer screws to reach through from the outside into the threaded holes in the C-channel. Black screws will likely not be noticed.
  • Ream the threaded holes in the C-channel so bolts can pass through. Then drill and tap corresponding holes in the big heatsinks, and bolt them on. (It has to be bolts, rather than screws, as you will have to tighten them with a wrench.)
I would likely do the former (drilling all the way through the heatsink). Having said that, however, I just ordered a tapping set earlier today, because I have some more complicated ones to install. ;)
 
Thank you all for the brilliant responses. The consensus seems to be to remove the Ncc220 heat sink thread and tap holes in the heat sink on the case.

Martin, thanks for your advice recommendation and the link for the better quality taps, I will order those. Do you have a link to the machine quality parts to order one at a time that you mentioned? The WD40 lubricant advice is also very well received.

Mega Lord, thanks for the insight and confirming, is there no way I can save the outside shell from a through hole?

Mike, thanks for also confirming the options.

What a wonderful forum this is!
 
You need a "through" hole, because the tap will extend at least that far too get the thread tapped. You won't see it from the outside, unless you look really closely between the fins. If you use the right bolt length, it might perfectly fill the hole, making it even less visible.
 
@muchtoofast

- TBH the cheap Clarkes set, or equivalents, are fine for many such amp-building uses - I've had sim for >10yrs for similar casual use, and it holds-up really well if not abused/ used heavy-handed. Tap a heatsink here, run-through & clean-up a few existing threads there, that sort of thing. Probably all most of us / most of the use described by others above here really needs. (I have slightly reworded my post above to clarify)

Almost anything similar is definitely worth having in the tool box, given the low cost of entry, if it does the one job you really need in a pinch :)
 
Thanks Mike, I like the idea of a correct length bolt filling the hole.

Thanks also Martin, it's nice to have that kind of reassurance based on your experience.
 
in thin mild steel or soft material like aluminium almost any tap will do if treated correctly ie back it off and clean out the swarf. just get the correct size drill bit and remember most hand drills do not run perfectly concentric so allow for a slightly larger hole than anticipated. End of the day this is not structural strength so will be fine. A decent dwang helps and keep it straight easier said that done but aluminium is soft at least. Worst case it can be repaired with a helicoil that far stronger, but that a different story.

and yes before anyone says what you talking about I am a mechanical engineer to trade lol so talking from experience
 
Adding to this idiots guide to amp building thread, this weeks efforts are as follows.. I ordered these caps for the minicap 6s:

Lots of combinations to be had, couldn't get exactly what I wanted, so this was the best I could come up with to get me up and running.

8x https://eu.mouser.com/ProductDetail...CQfimexFPkA==&countrycode=GB&currencycode=GBP
4x https://www.mouser.co.uk/ProductDet...fQIBfex/K0A==&countrycode=GB&currencycode=GBP

These are what I've ordered for the Dissipante 4U pre-cut rear panel (I've linked the diy audio store page as modushop is currently down) ...for others reference, these should fit:
Neutrik RCAs
https://www.mouser.co.uk/ProductDet...D/jInfxAMmQ==&countrycode=GB&currencycode=GBP
https://www.mouser.co.uk/ProductDet...9yC6vpv98dQ==&countrycode=GB&currencycode=GBP
Power inlet for the UK
https://www.mouser.co.uk/ProductDet...HJpfzvAj0Ig==&countrycode=GB&currencycode=GBP

I've ordered the glowing green switch version of the power inlet, which is probably a mistake... extra noise??? The same switch is also available from RS at much less pence without the glowing on button.

Anyone got a recommendation for 4mm speaker sockets for rear panel? These either seem to cost loads or be cheap Far Eastern efforts built from Kit-Kat inner wrappers.

Many thanks!
 
are the rocker switch type IEC power inlet ok?
All the amps I have seen use either a fused or straight power inlet to a separate switch with soft start module.

the case I am modifying came with an illuminated stainless push button. I need to fathom out how that all works as has a small board etc to make it all work

I have no idea, but I need something to fill the IEC rocker hole in the back. So have ordered that.

Interesting that you have a circuit to control your switch etc. A bit more complex than just a resistor and led... Hmmm wonder what that is? Piccy?


advertisement


Back
Top