Sposhal
Torac Audio
Hi,
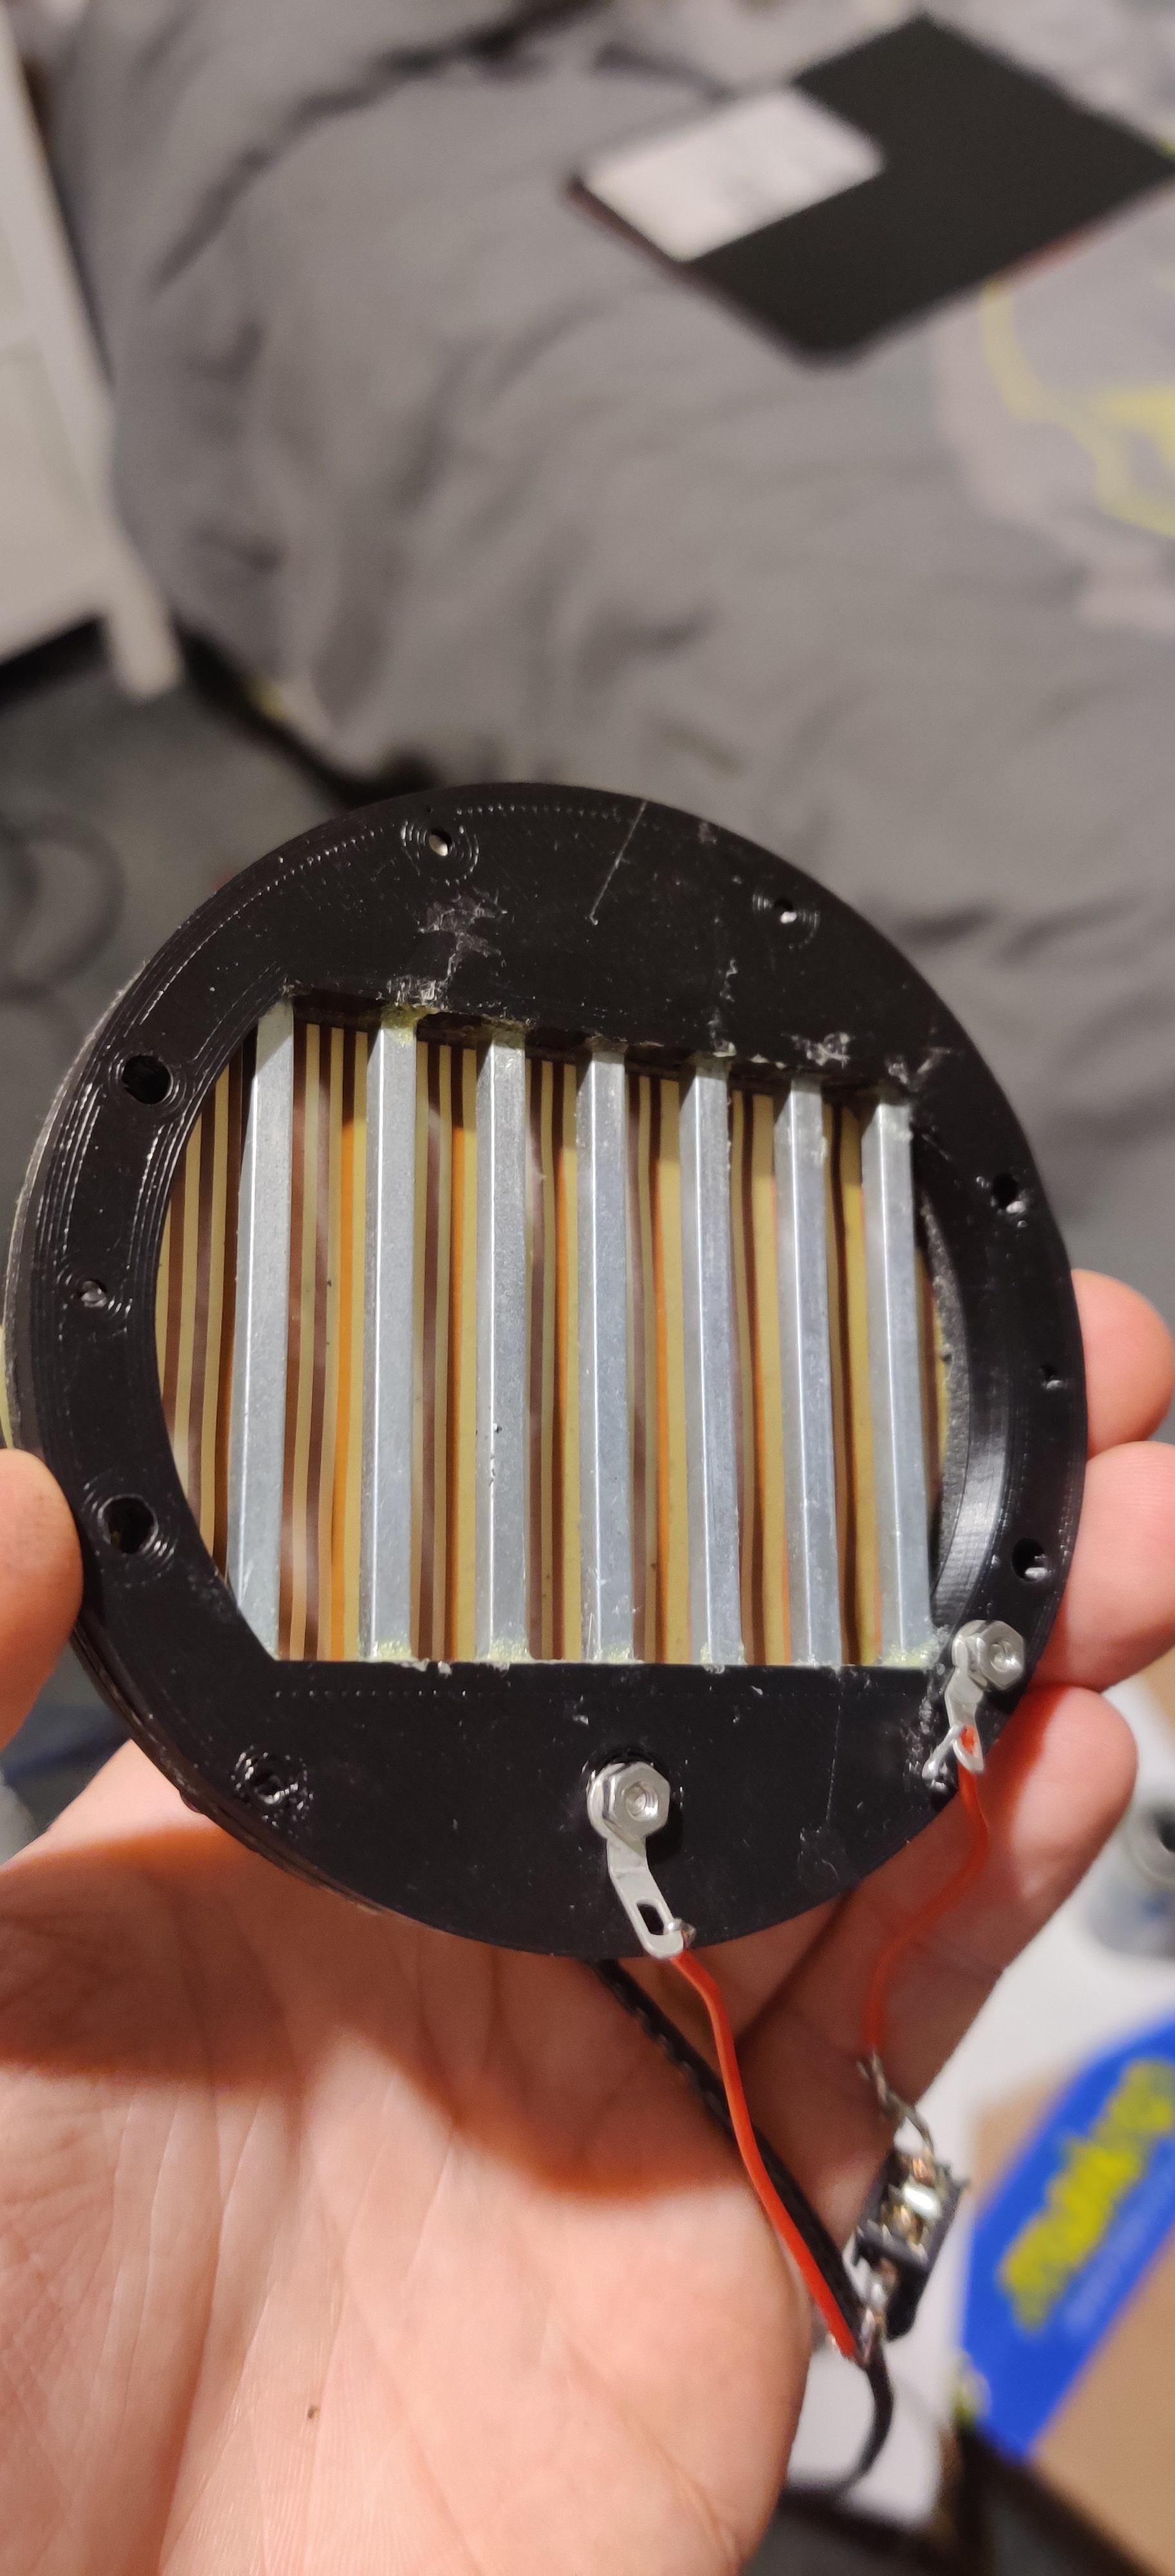
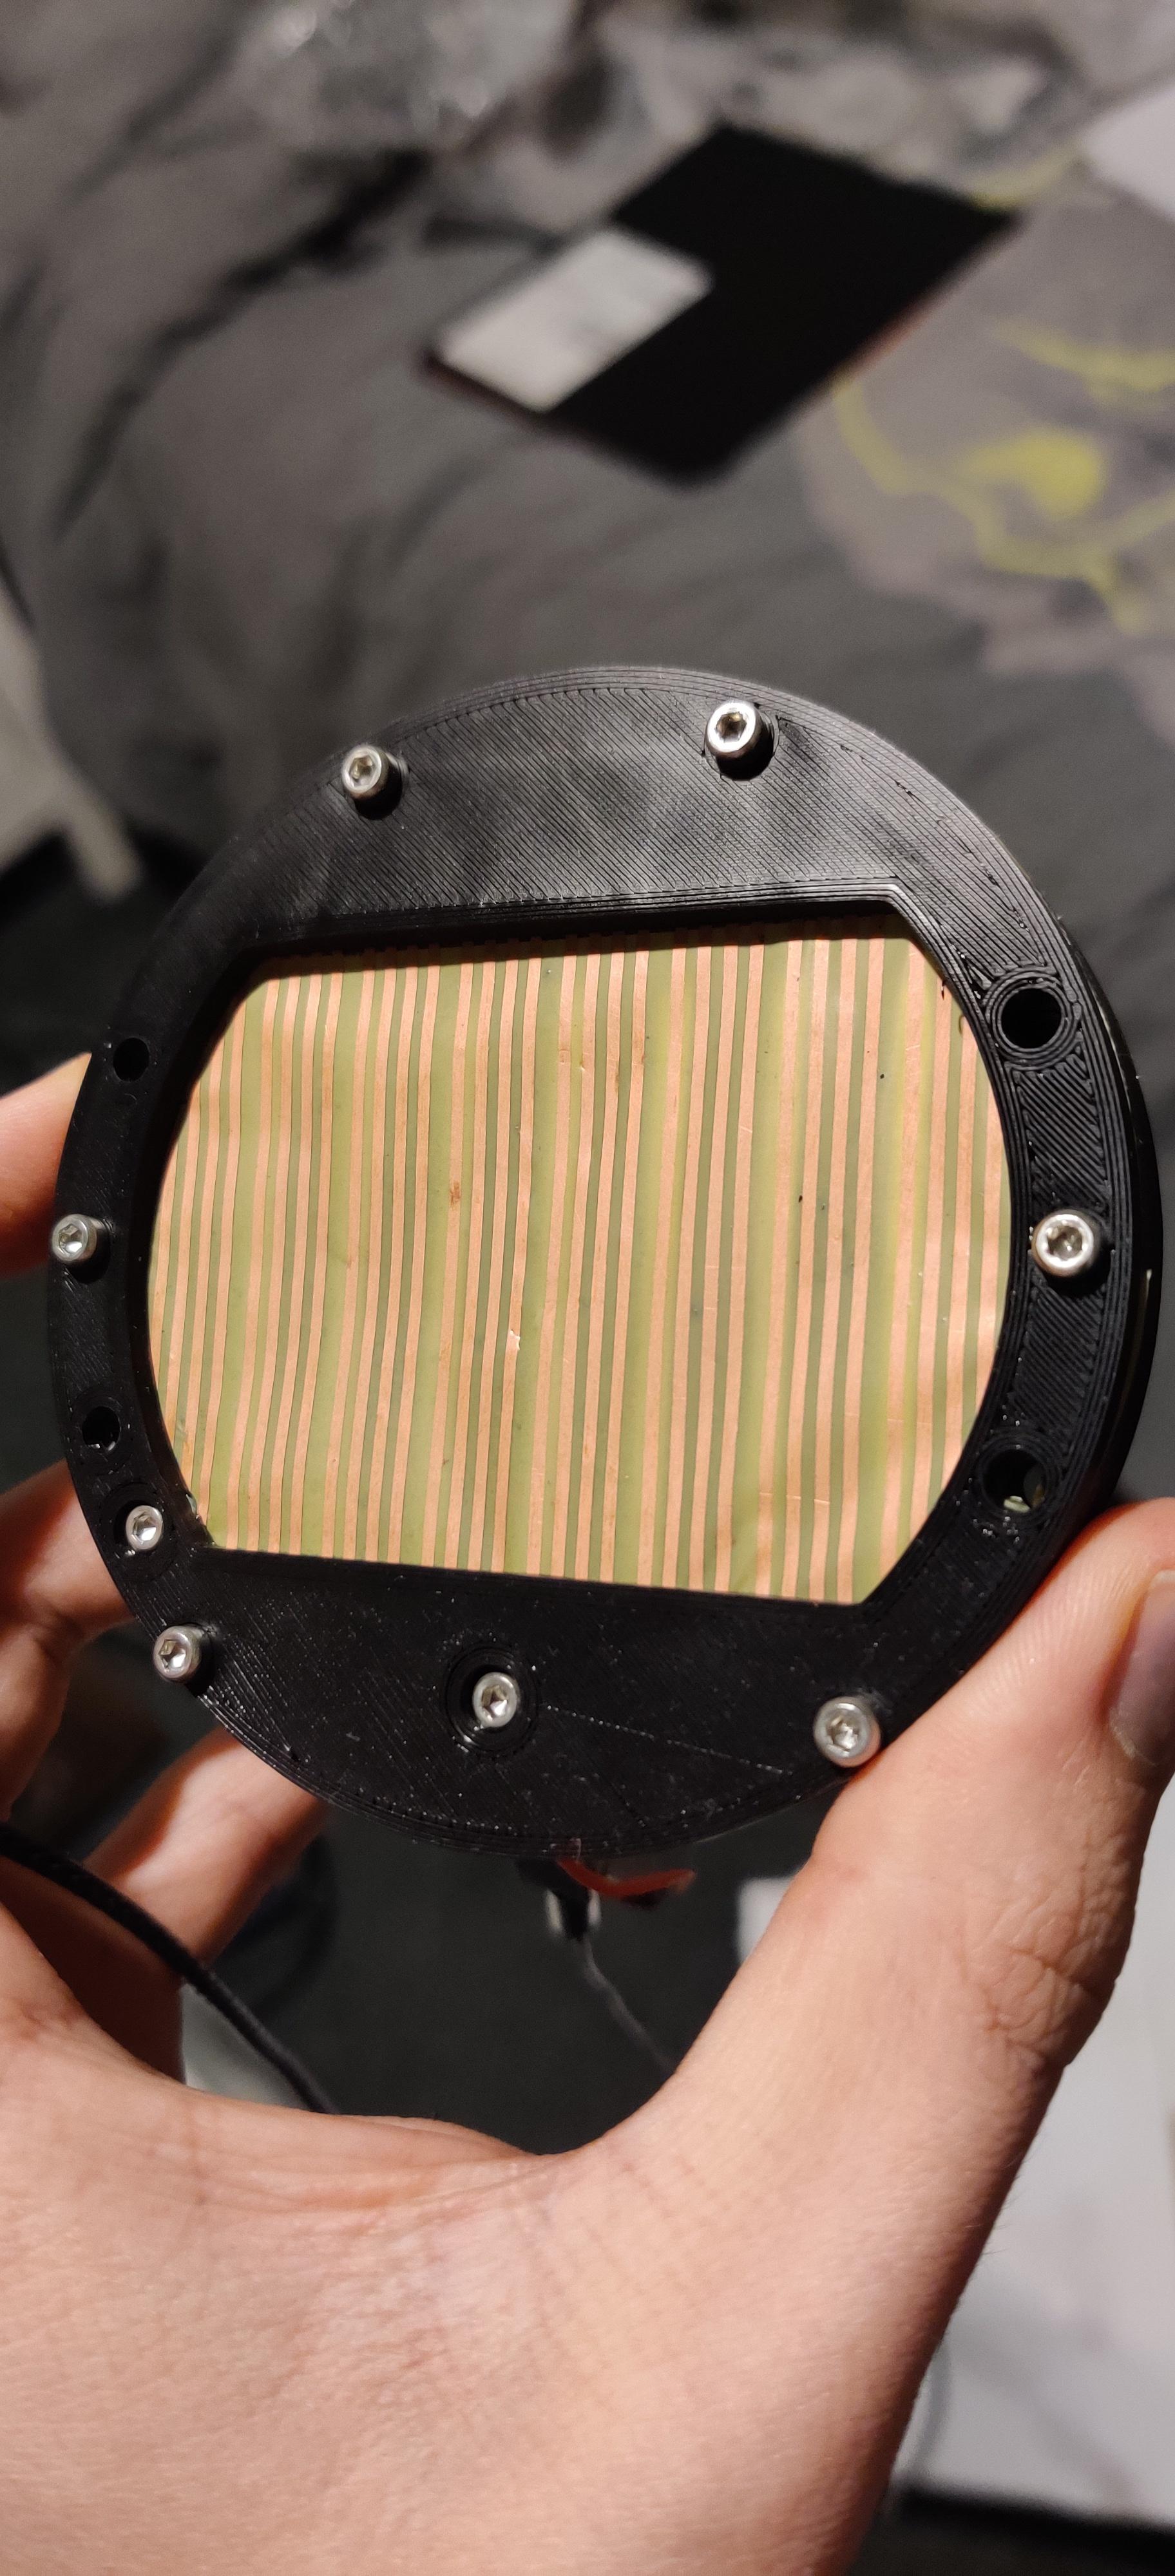
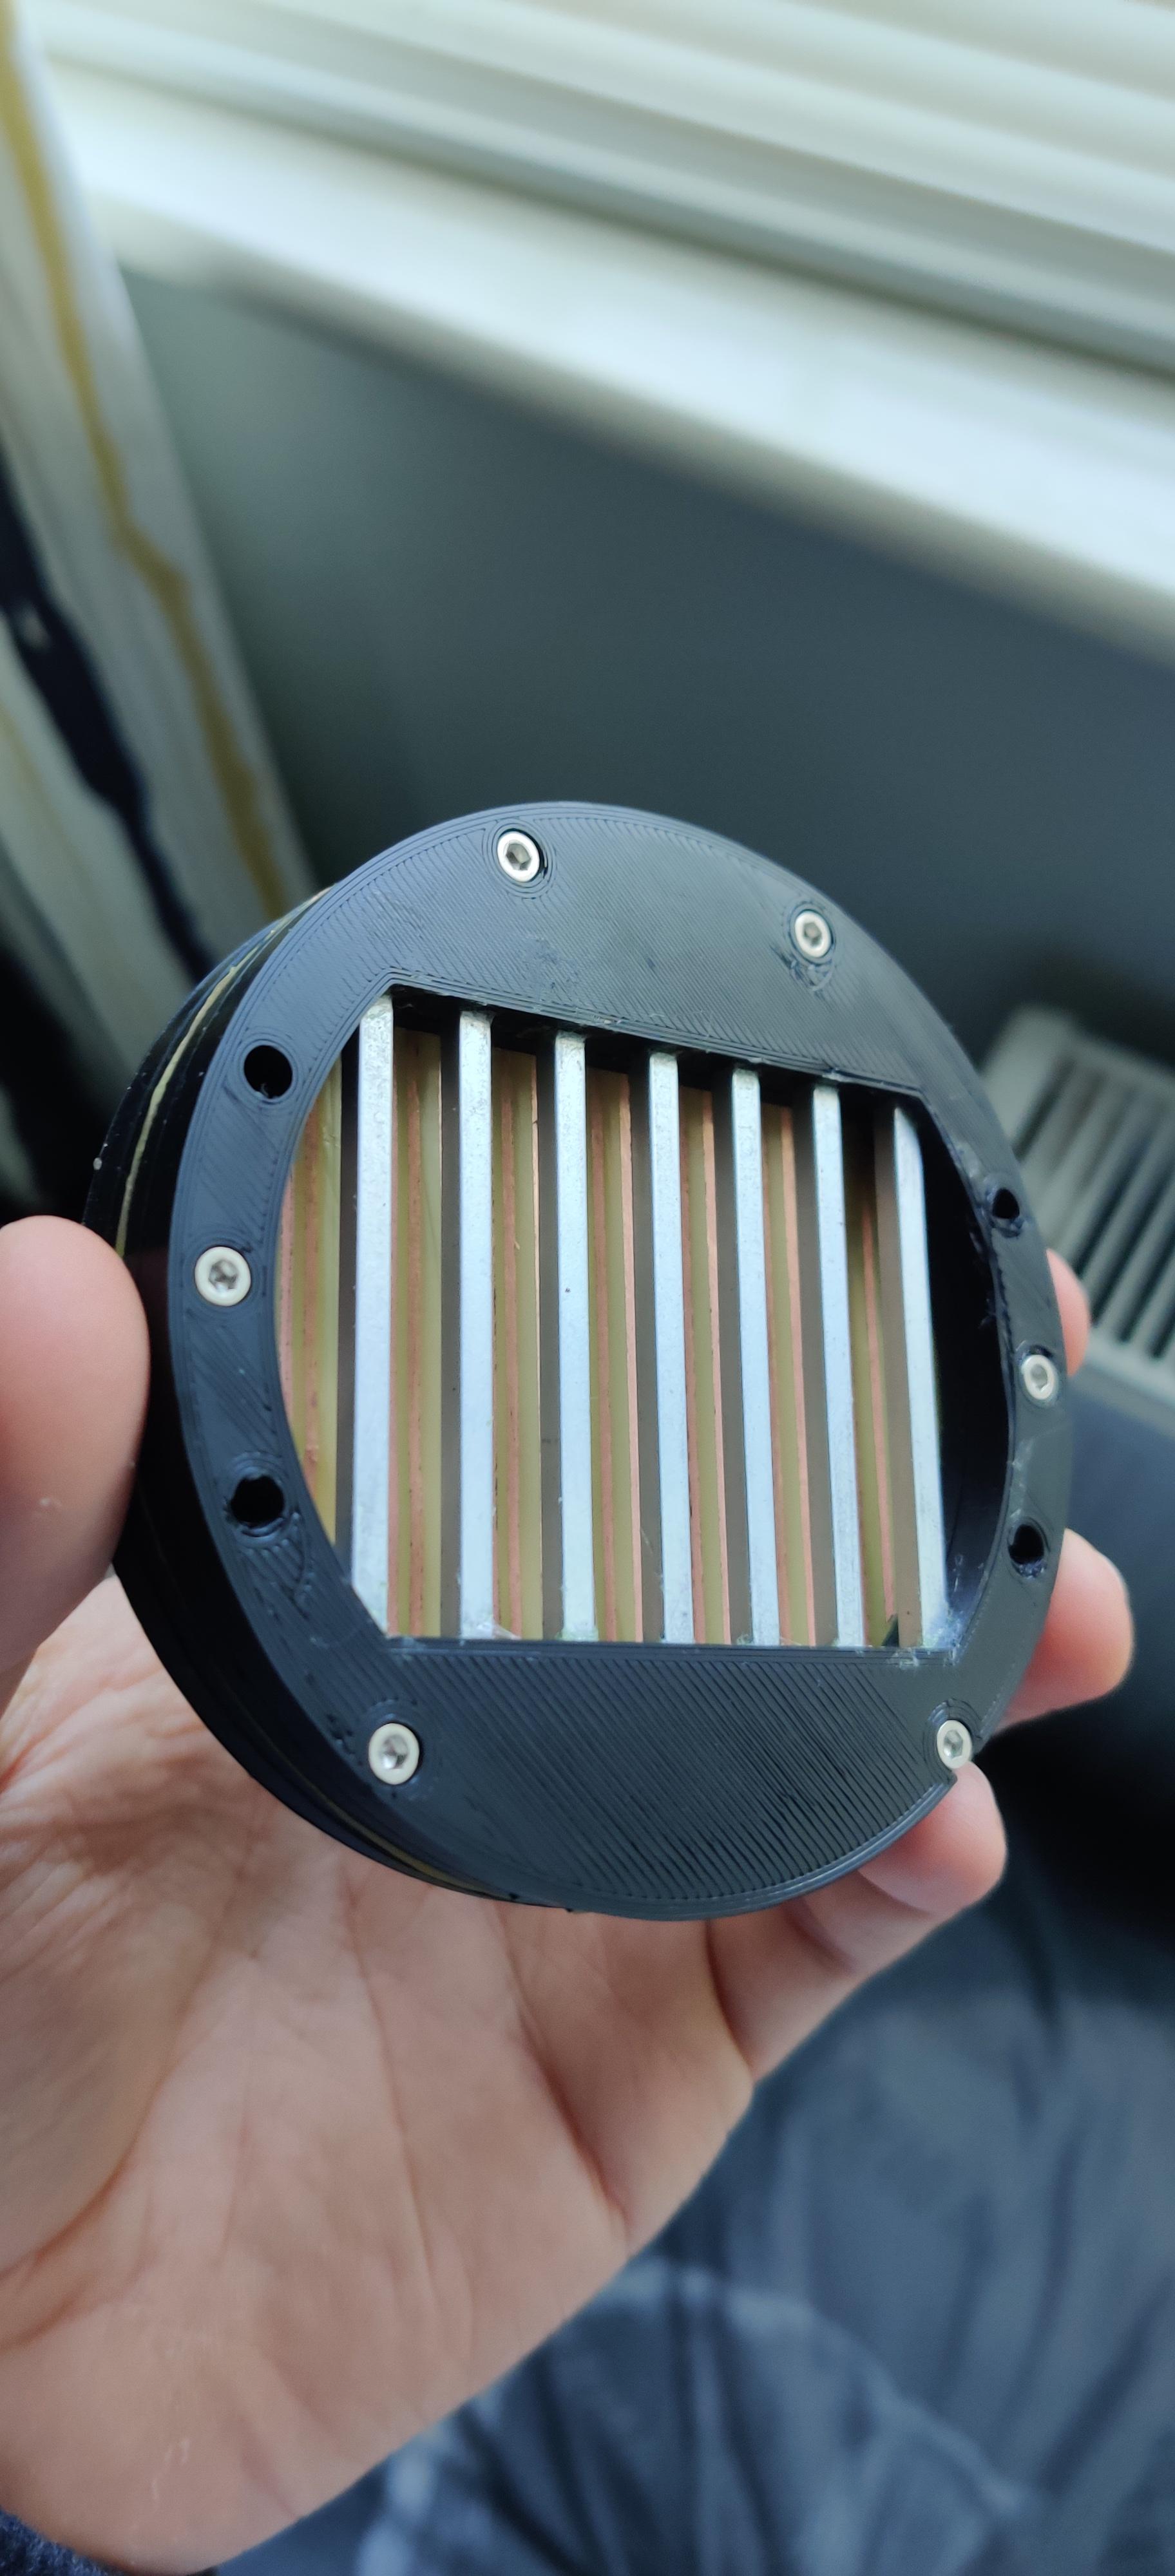
Been working on this project for a few months now and thought it would be nice to share. I have been working on making my own self designed and constructed Planar drivers. My intent is to eventually try and sell them for diyiers or anyone who wants to get their hands on a pair to experiment with tuning or transplanting them into existing headphones, whatever they like.
Currently have a working prototype using a 25 micron copper kapton substrate and an active area of 48mmx50mm and a diaphragm size of roughly 70mmx50mm. It is currently single sided but it will have magnets on both sides when my new longer screws arrive.
I hope to find another material that is thinner, lighter and less expensive, but currently I think it sounds pretty nice to me.
I will update this post with progress as I go along. I would have liked to have posted some pictures but this is my first post and I am therefore unable to, I will as soon as I can.
") .
.