John_73
pfm Member
Hi folks
I said to myself I wouldn't let this happen with this project, and it's happened: the dreaded case of...... capacitor paranoia! (Cue B-horror-movie dramatic music crash!).
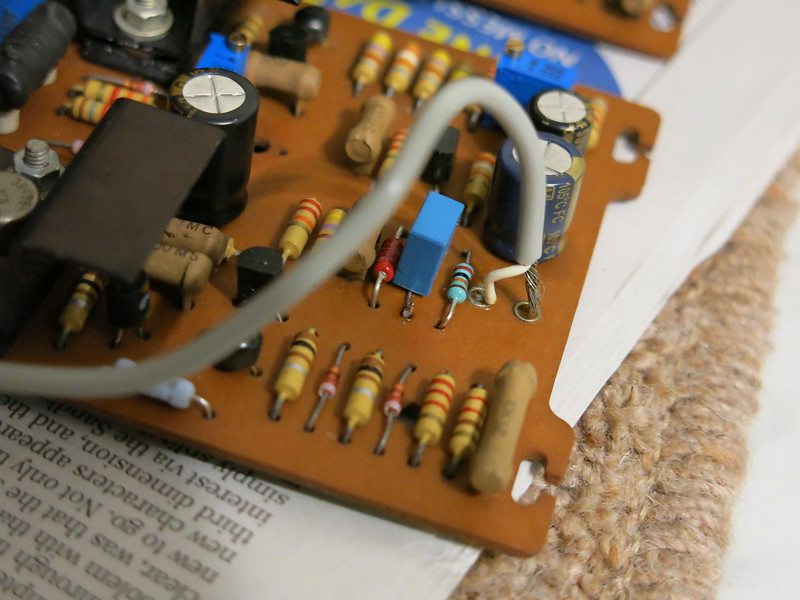
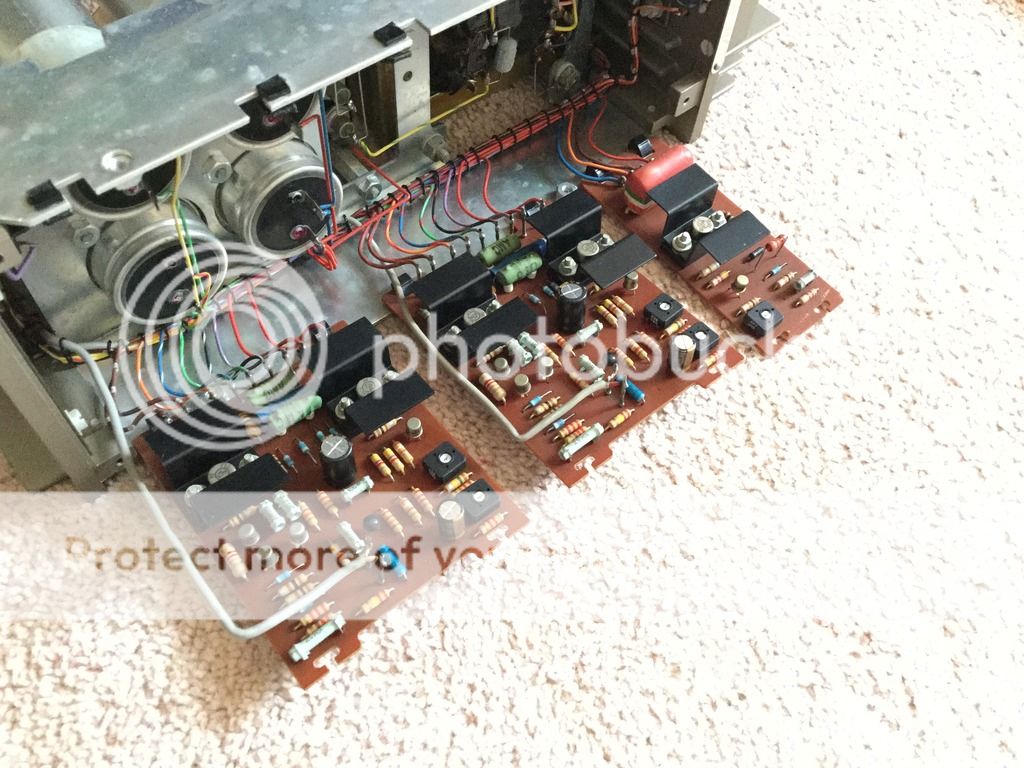
The project is an absolutely mint condition Quad 303. I've already replaced the trim pots, and a pair of carbon comp. resistors that had gone high (the drugged up bounders!). The only other items to be replaced are the large psu and output caps topside, and the three electrolytics on each driver board. It took a lot of care not to lift any tracks, so I want the replacements to last long, and perform well.
Basically, I want to use the correct parts for each capacitor position, but am not sure what roles each of the following perform. Not sure which caps ('audio' or 'industrial') would be best suited for each 'role' - have listed the ones I have to hand, but would buy others if need-be:
C101 = 300uF 10V, changed to 470uF as per Quad's later revisions:
I have 25V Panasonic FC, FM and Nichicon FG (KZ type too big for this position alas) types to hand in this value.
C104 = 12uF 50V, changed to 10uF as per Quad's revisions:
Panasonic 50V FC and Nichicon KZs.
C106 = 50uF 50V, changed to 47uF nearest equivalent value:
Panasonic 50V FC and Nichicon KZs.
The topside pair of psu caps are already taken care of: 2200uF BHC/Kemet ALT22A types, and the pair of output caps are 4700uF BHC/Kemet. Used these types many times and always been happy with them - Bypassed the paranoia with these")
Mine's a circa 1969 era 303, so uses the earlier circuit:
http://www.meridian-audio.info/public/quad303_m12056_iss3[4166].pdf
I'm sure I'm fretting needlessly and any cap will be an improvement on those original 46 year old ones. But I'd like to do this right. Any advice would be appreciated.
Cheers.
John
I said to myself I wouldn't let this happen with this project, and it's happened: the dreaded case of...... capacitor paranoia! (Cue B-horror-movie dramatic music crash!).
The project is an absolutely mint condition Quad 303. I've already replaced the trim pots, and a pair of carbon comp. resistors that had gone high (the drugged up bounders!). The only other items to be replaced are the large psu and output caps topside, and the three electrolytics on each driver board. It took a lot of care not to lift any tracks, so I want the replacements to last long, and perform well.
Basically, I want to use the correct parts for each capacitor position, but am not sure what roles each of the following perform. Not sure which caps ('audio' or 'industrial') would be best suited for each 'role' - have listed the ones I have to hand, but would buy others if need-be:
C101 = 300uF 10V, changed to 470uF as per Quad's later revisions:
I have 25V Panasonic FC, FM and Nichicon FG (KZ type too big for this position alas) types to hand in this value.
C104 = 12uF 50V, changed to 10uF as per Quad's revisions:
Panasonic 50V FC and Nichicon KZs.
C106 = 50uF 50V, changed to 47uF nearest equivalent value:
Panasonic 50V FC and Nichicon KZs.
The topside pair of psu caps are already taken care of: 2200uF BHC/Kemet ALT22A types, and the pair of output caps are 4700uF BHC/Kemet. Used these types many times and always been happy with them - Bypassed the paranoia with these
Mine's a circa 1969 era 303, so uses the earlier circuit:
http://www.meridian-audio.info/public/quad303_m12056_iss3[4166].pdf
I'm sure I'm fretting needlessly and any cap will be an improvement on those original 46 year old ones. But I'd like to do this right. Any advice would be appreciated.
Cheers.
John