
Hi Folks,
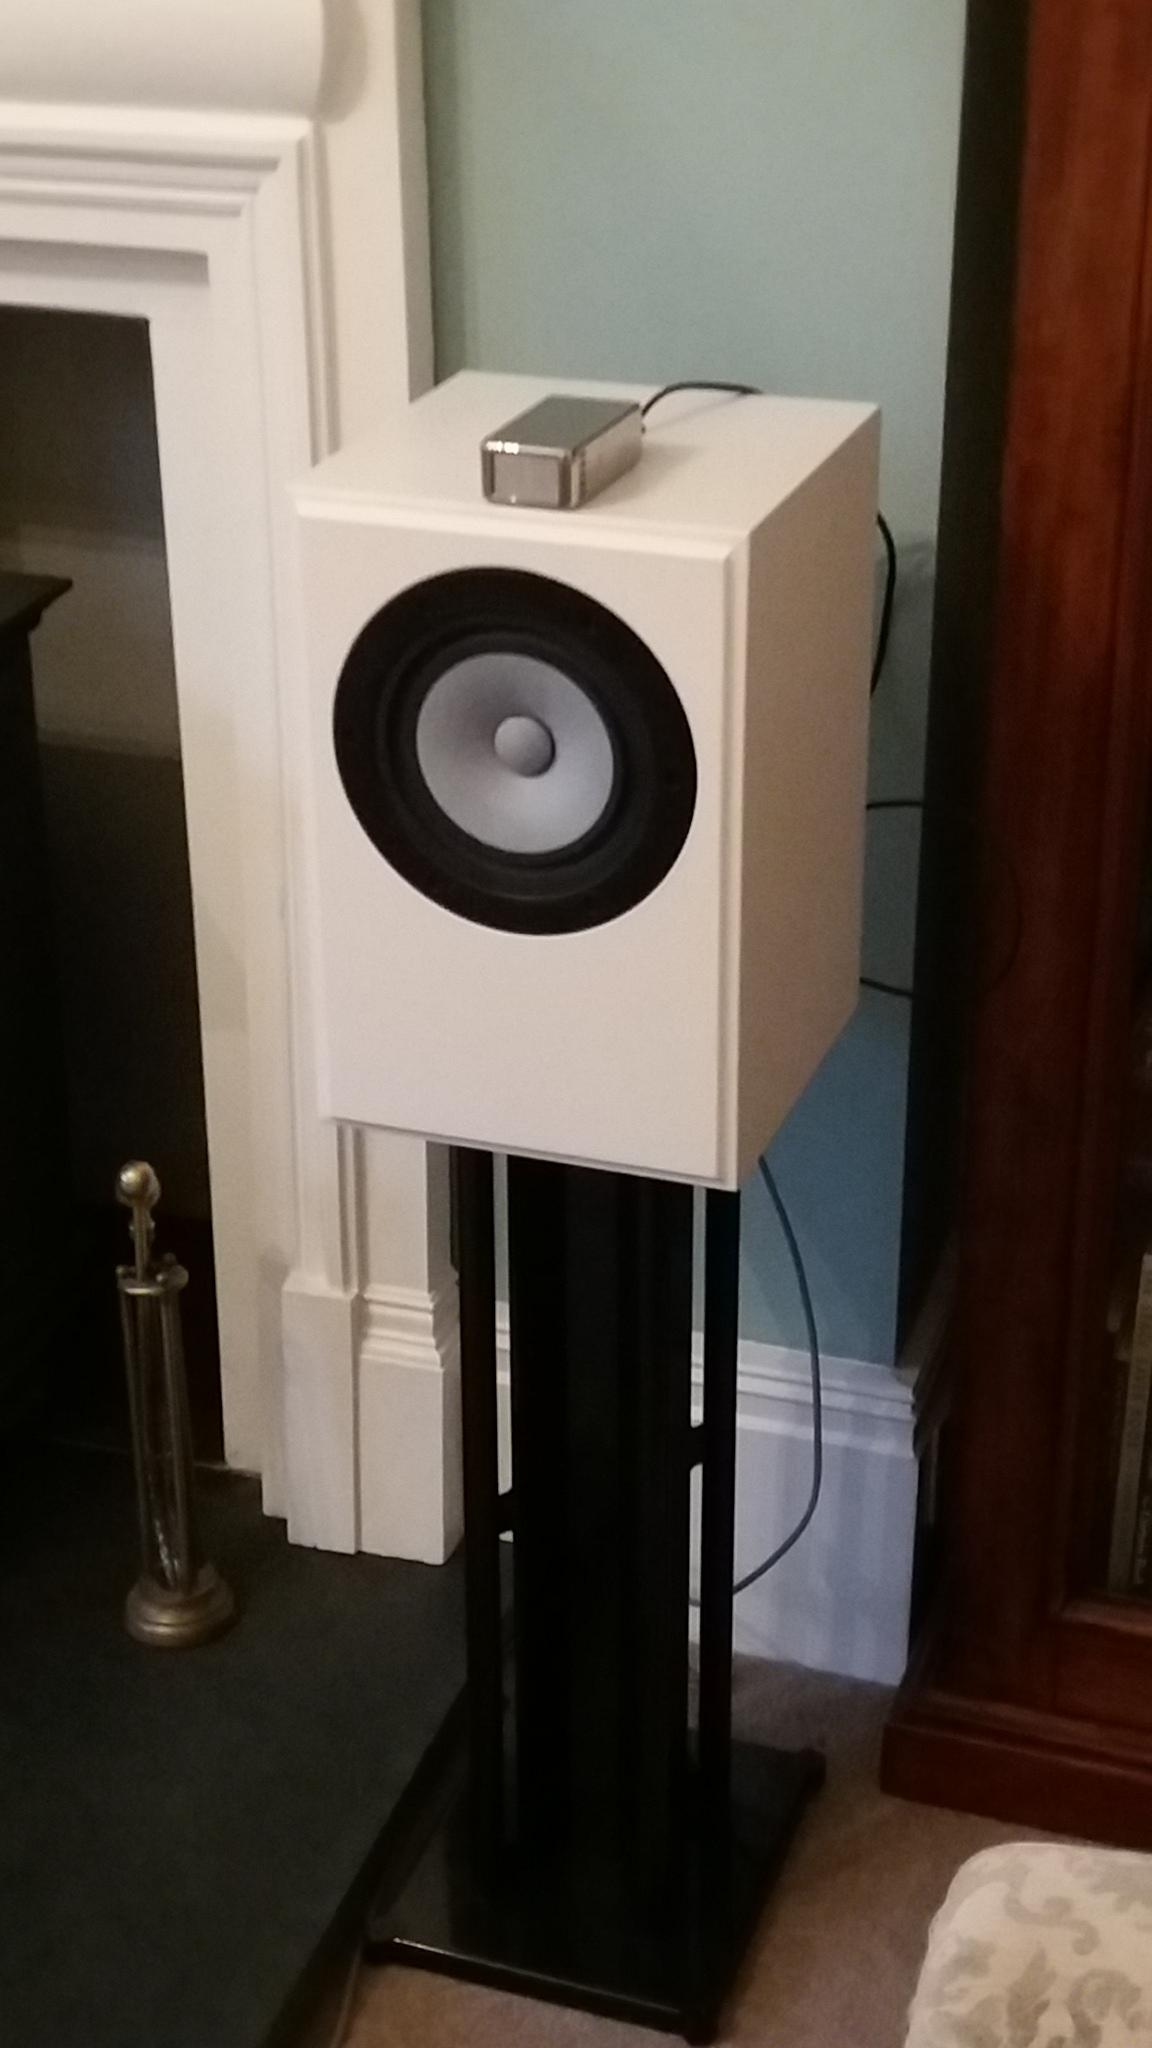
About 5 years ago I bought a pair of Mark Audio 12p full range drivers after reading about them on DIY Audio. I built a pair of Scott Lindgren's simple reflex cabinets as a quick way of getting the drivers up and running and to start the long running-in process. They sounded good, a bit light in the bass but very enjoyable right from the off. I used them for several years before I loaned them to a mate who gave them 12 months more or less constant use. When I got them back they were well run in and I began to look around for another speaker plan for the 12p.
Here are the Simple reflex cabinets that I made first. The super tweeter was an add on that I borrowed from my ESL 57's and not really necessary.
I looked at the Pensil, Frugal Horn Joan and Mar-Ken 12 plans and then I decided to go for another Scott Lindgren design- the Woden Design Avebury. This is a double back loaded horn and stands just over 6 feet high. I bought the plan from Scott, took a deep breath and ordered the material from a local timber supplier.
I decided to use 19mm black Valchromat, a material I had never used before but I wanted a through-colour material with consistent machining properties and easy finishing with wax or lacquer. The last part didn't work out so well but more on that later.
The timber merchant cut the material on a computerised beam saw accurate to fractions of a millimetre and all cuts 90 degrees. Unfortunately, due to an error on the machine they ended up cutting two sets of parts, one set being slightly under/oversize. I wasn't bothered because one set was spot on and they offered me all the scrap for free; so that's the material for my next speaker build sorted.
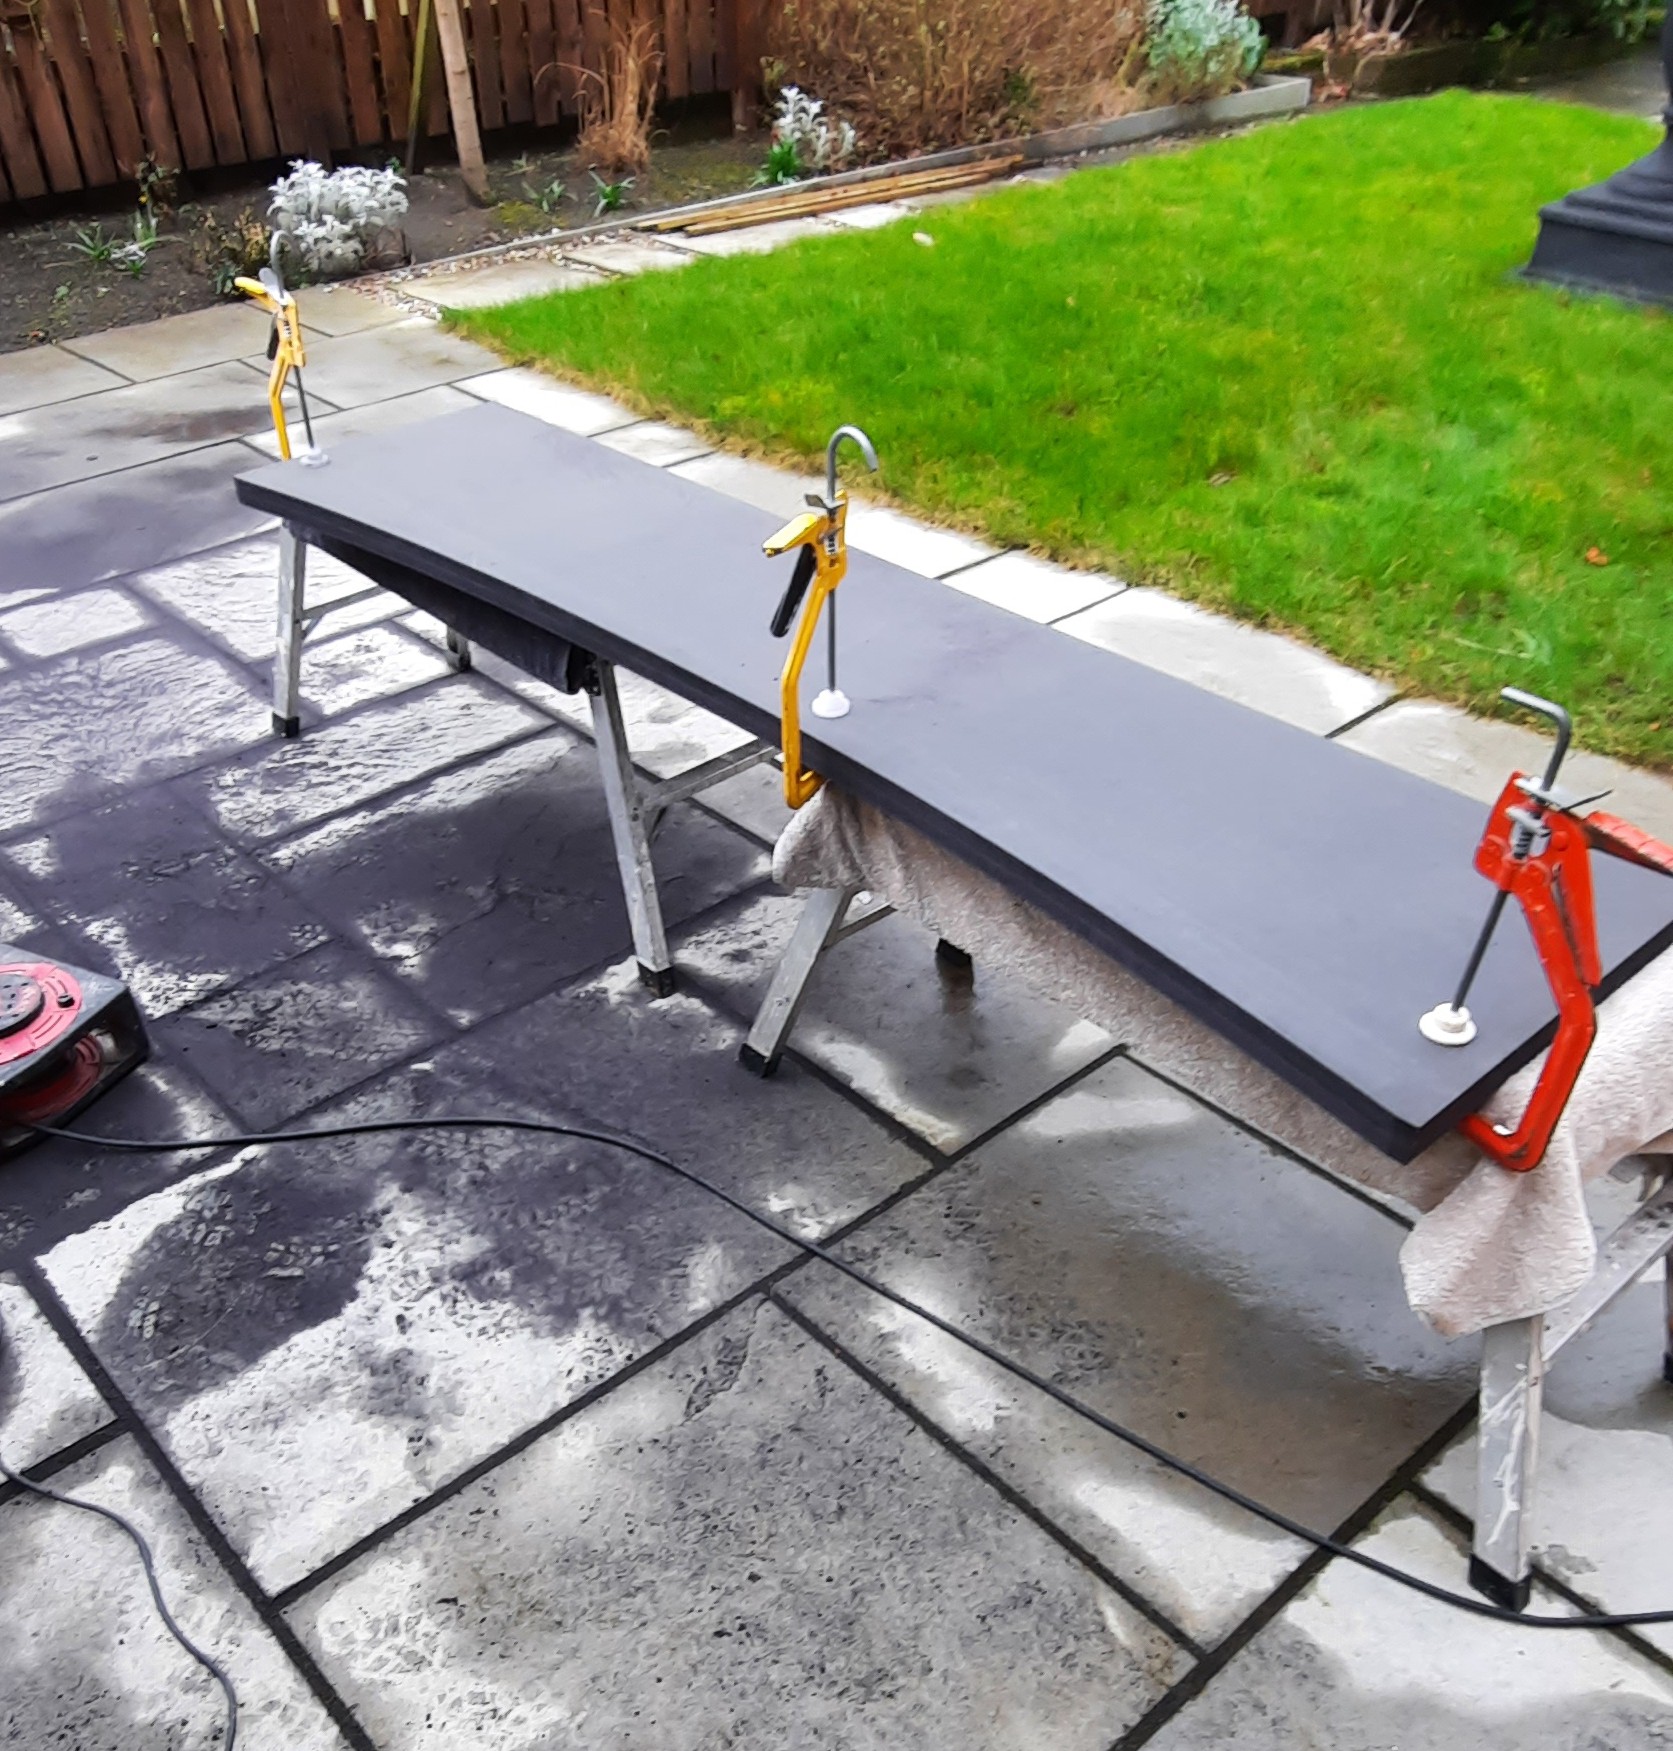
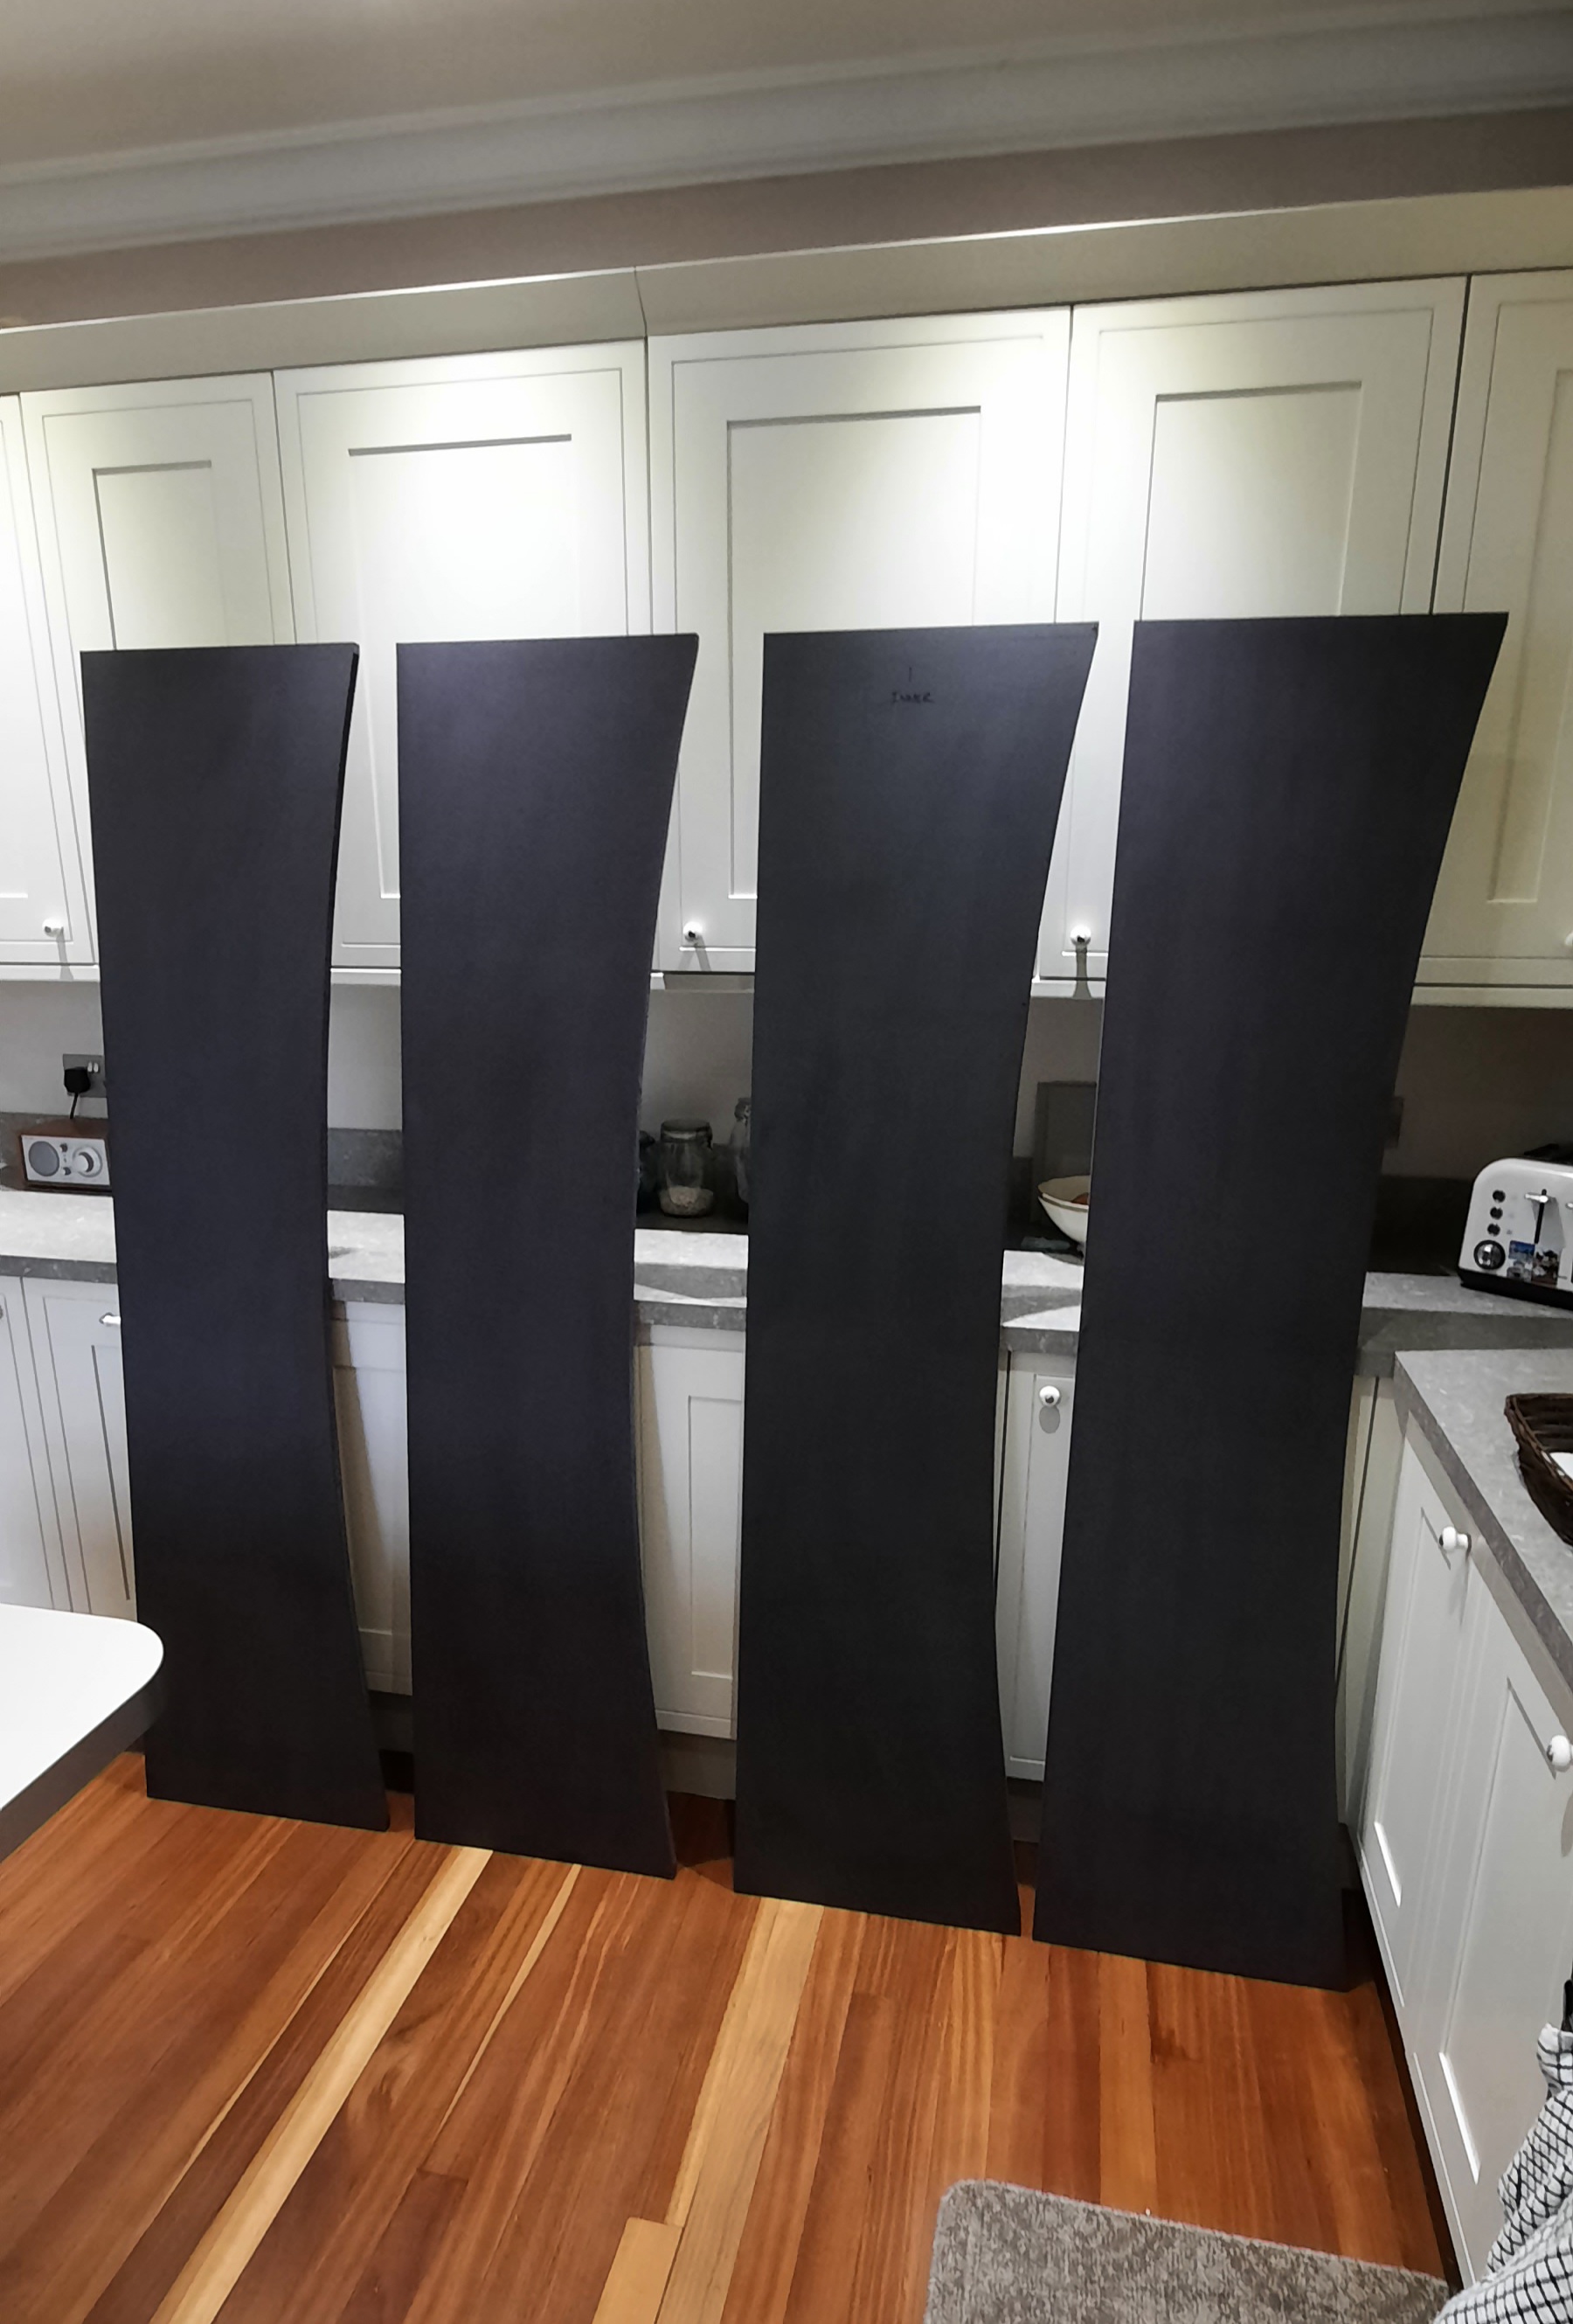
I cut the curve in the sides first:
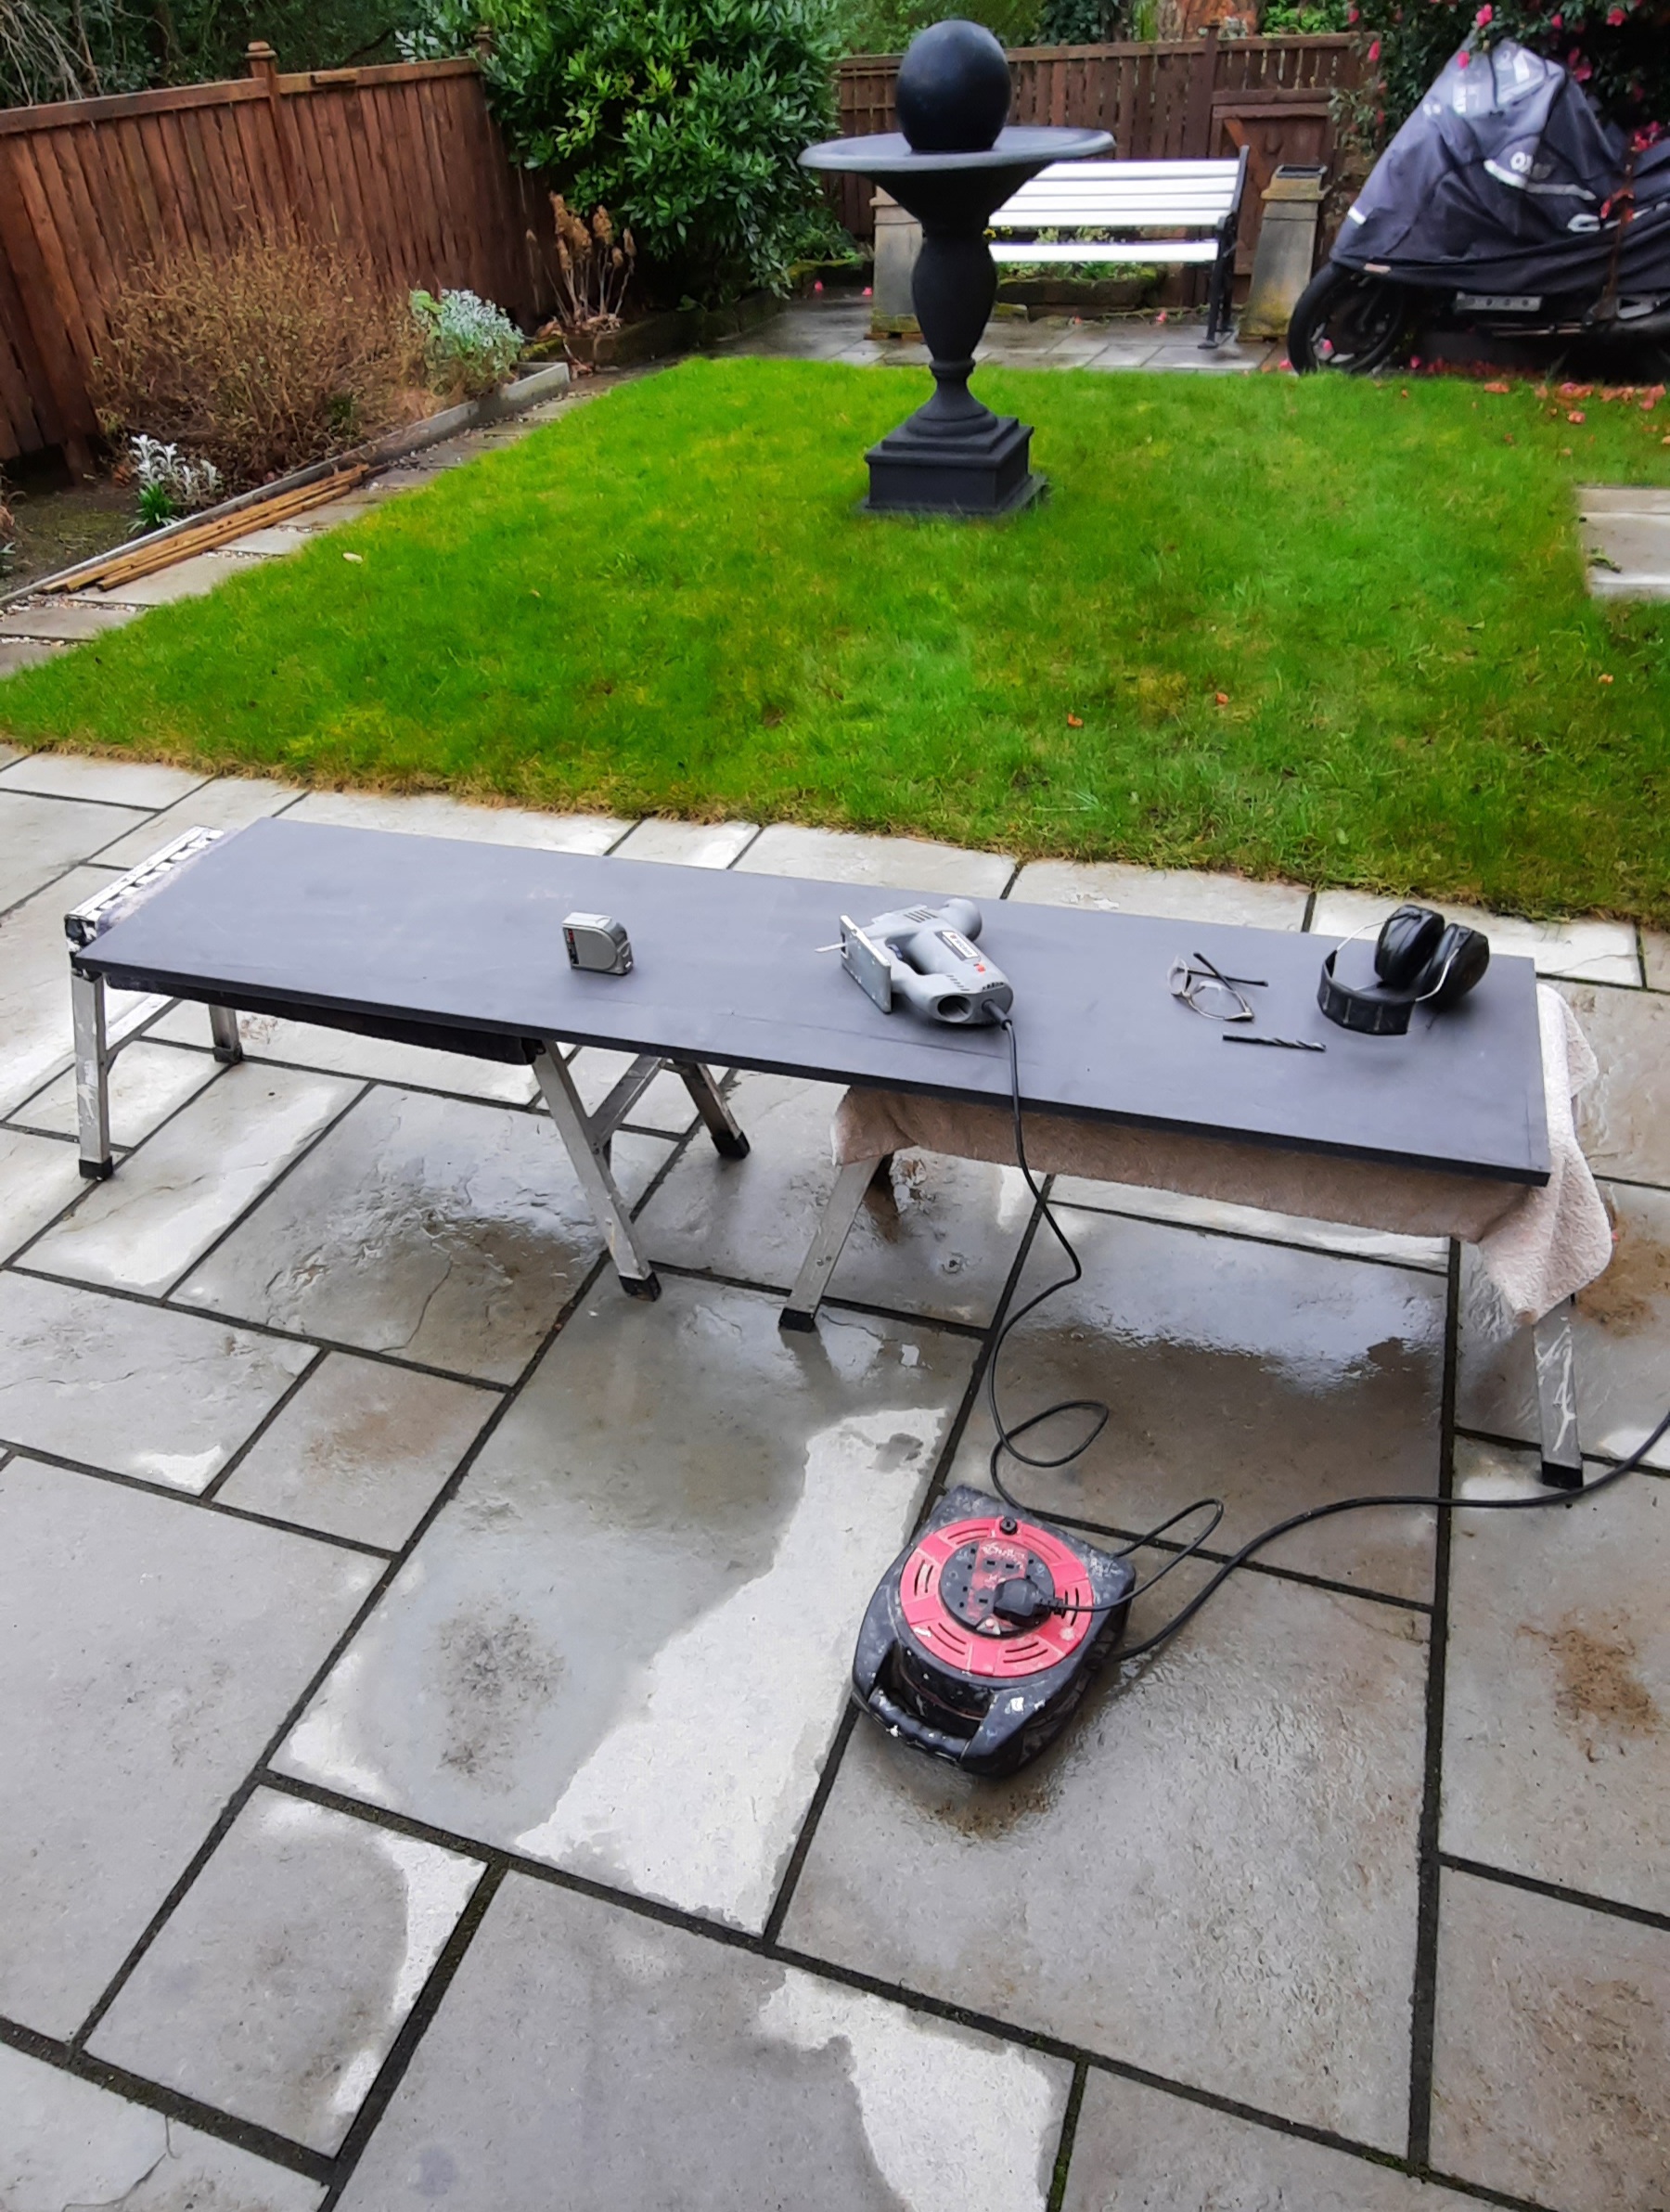
Black Valchromat is a dirty material
I used an Oak veneer for the front baffle. Here it is before I cut the hole for the driver.
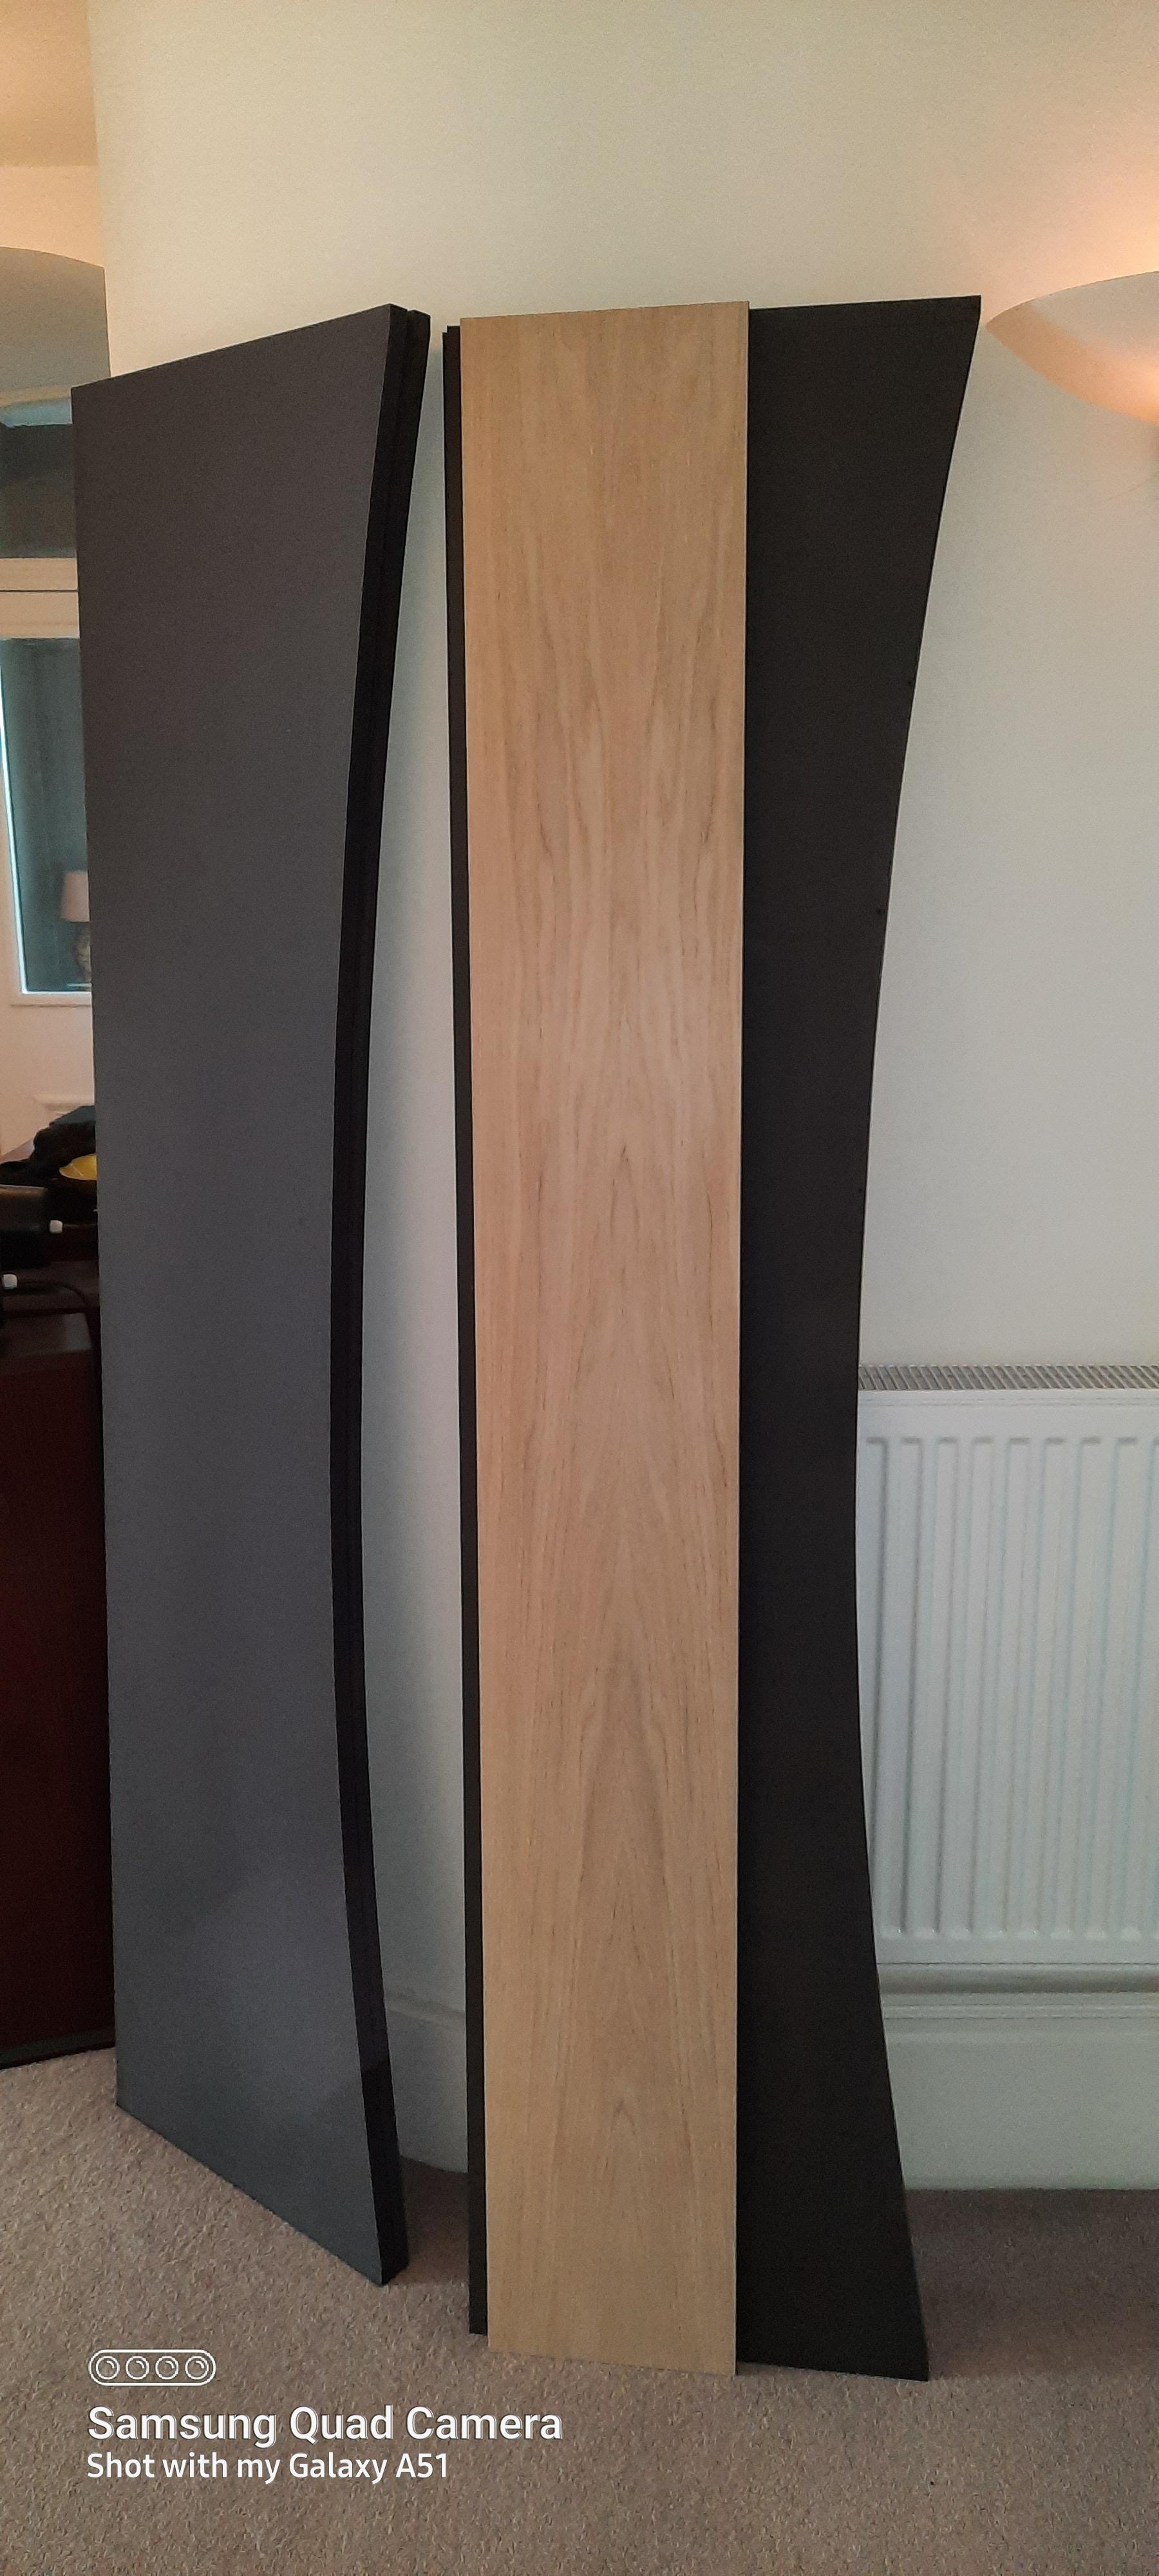
This isn't a difficult speaker to build but the panels are large and any errors in alignment or positioning quickly add up. Having accurately machined parts helped enormously and was worth the £60 cutting charge.
I used my kitchen island as a makeshift work bench to make sure the panels stayed flat.
I wanted to make sure that all the pieces fitted together perfectly and I also wanted to practise the assembly sequence so I did a dry build first before committing any glue.
The centre 'H' section is a sub assembly that I made before the baffle and top/bottom were added.

I decided against finishing the Valchromat with clear wax or lacquer as the panels were slightly different shades and had light and dark patches- I realised that the machine shop had used different batch sheets to make up my corrected order. I also thought the sight of two 6 foot black monoliths might look a bit much in my listening room.
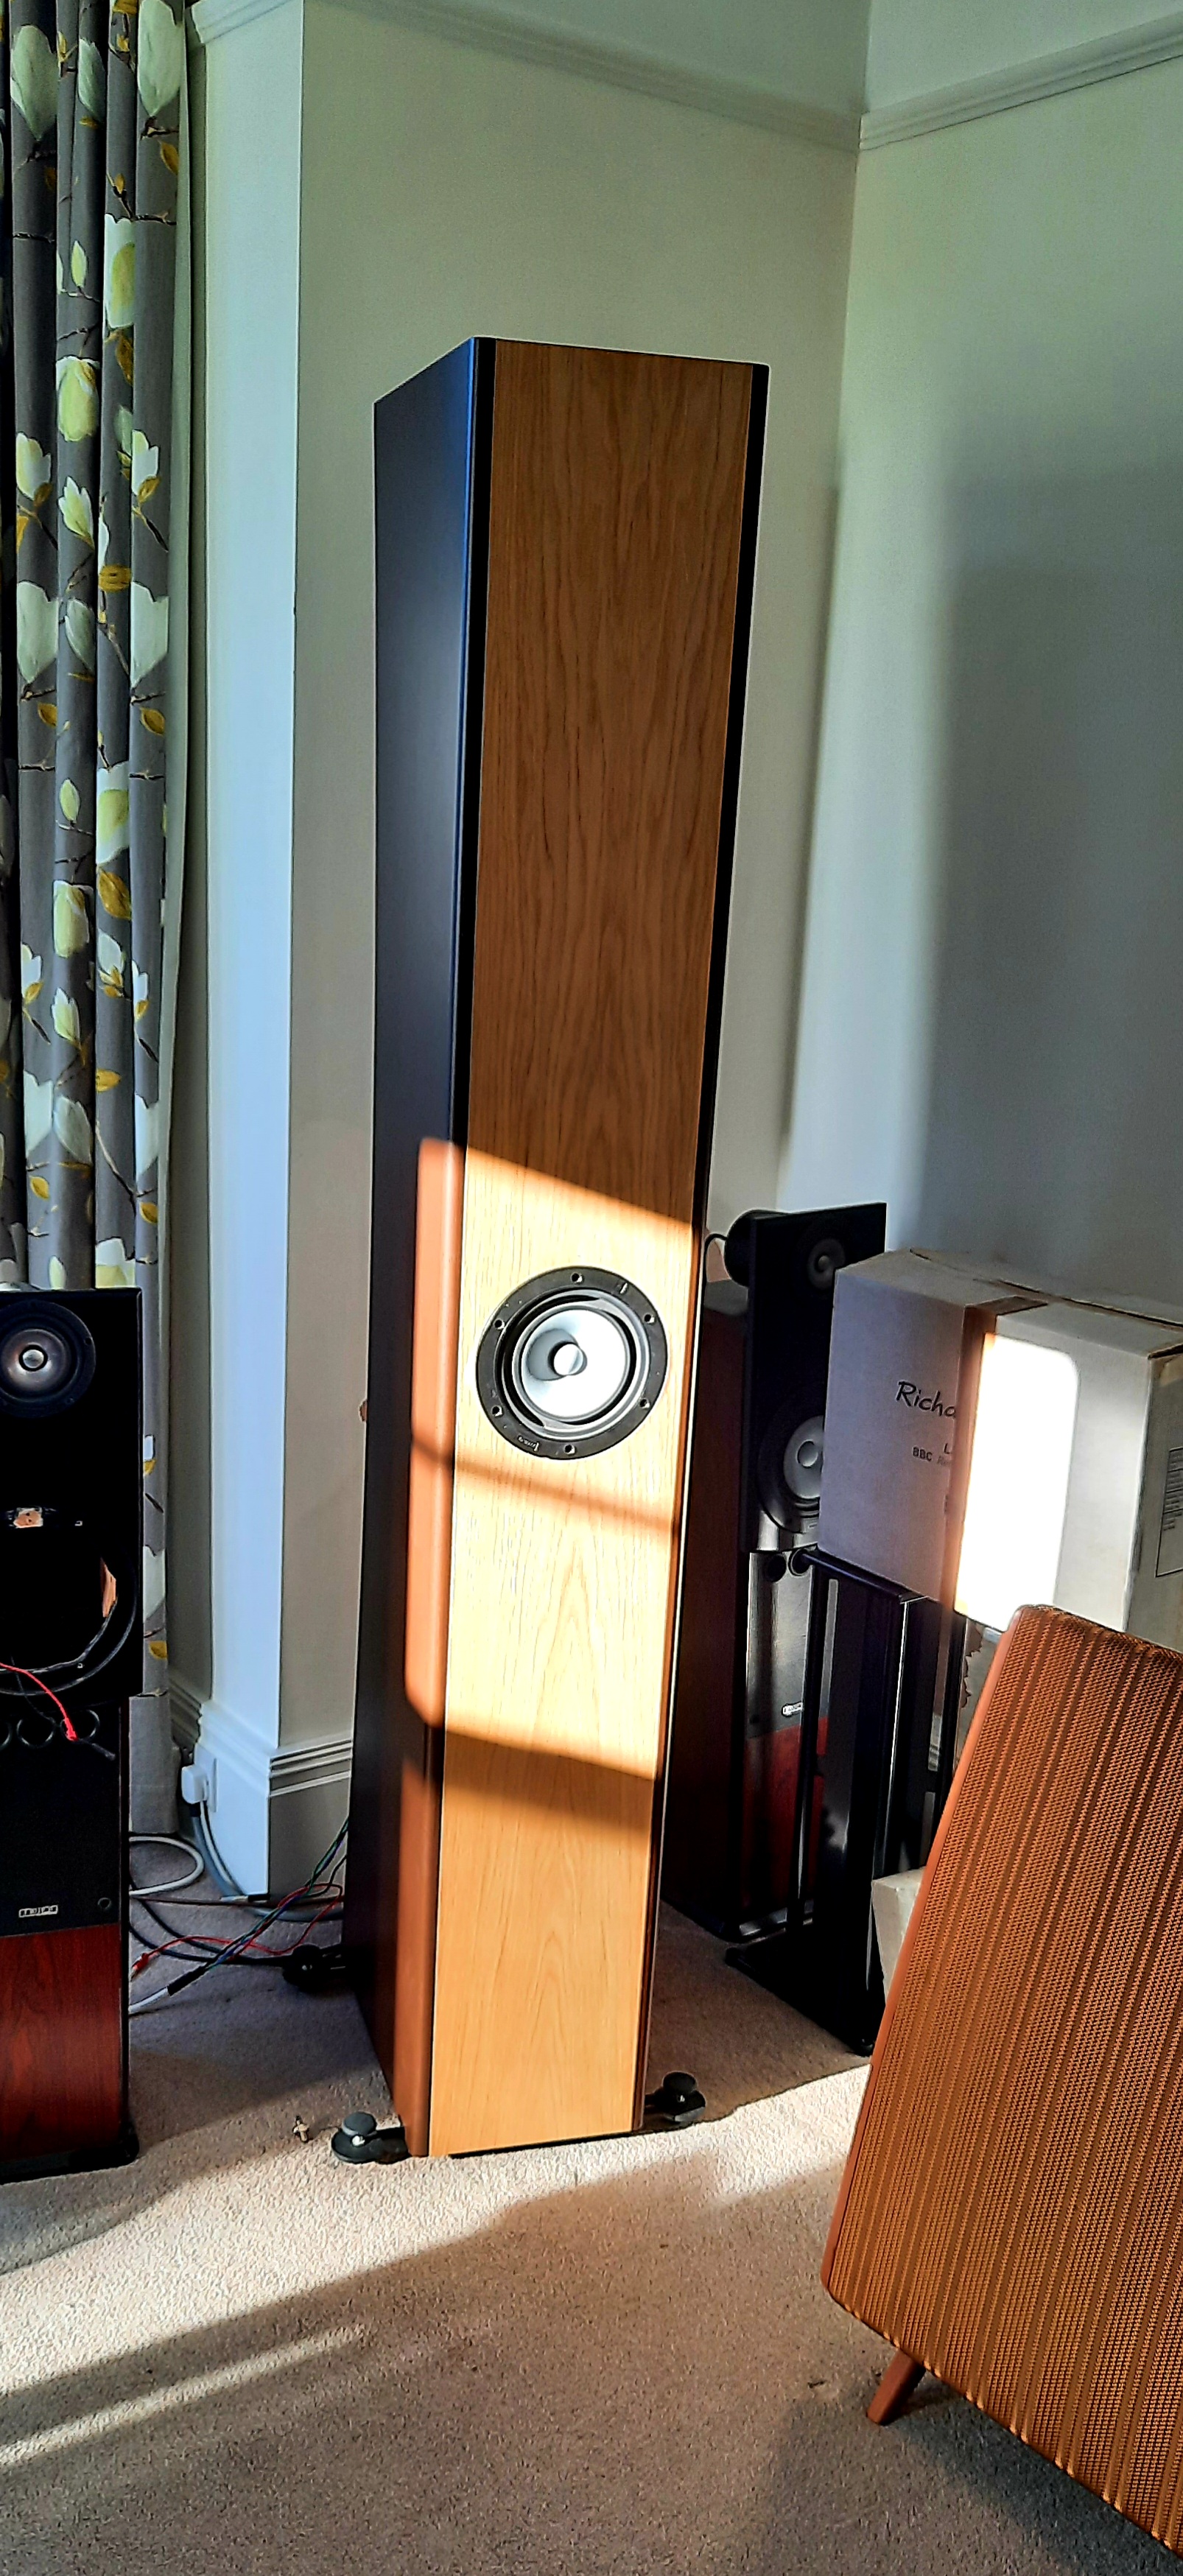
I decided to paint the panels with a water based paint and chose Valspar Chestnut brown eggshell sprayed on with a HVLP sprayer. I waited for a fine day with little breeze and sprayed all the panels in one mammoth session. The panels were put in my summer house to dry and the warm temperatures dried the paint quickly leaving a perfectly smooth eggshell finish that contrasts nicely with the oak front baffle.
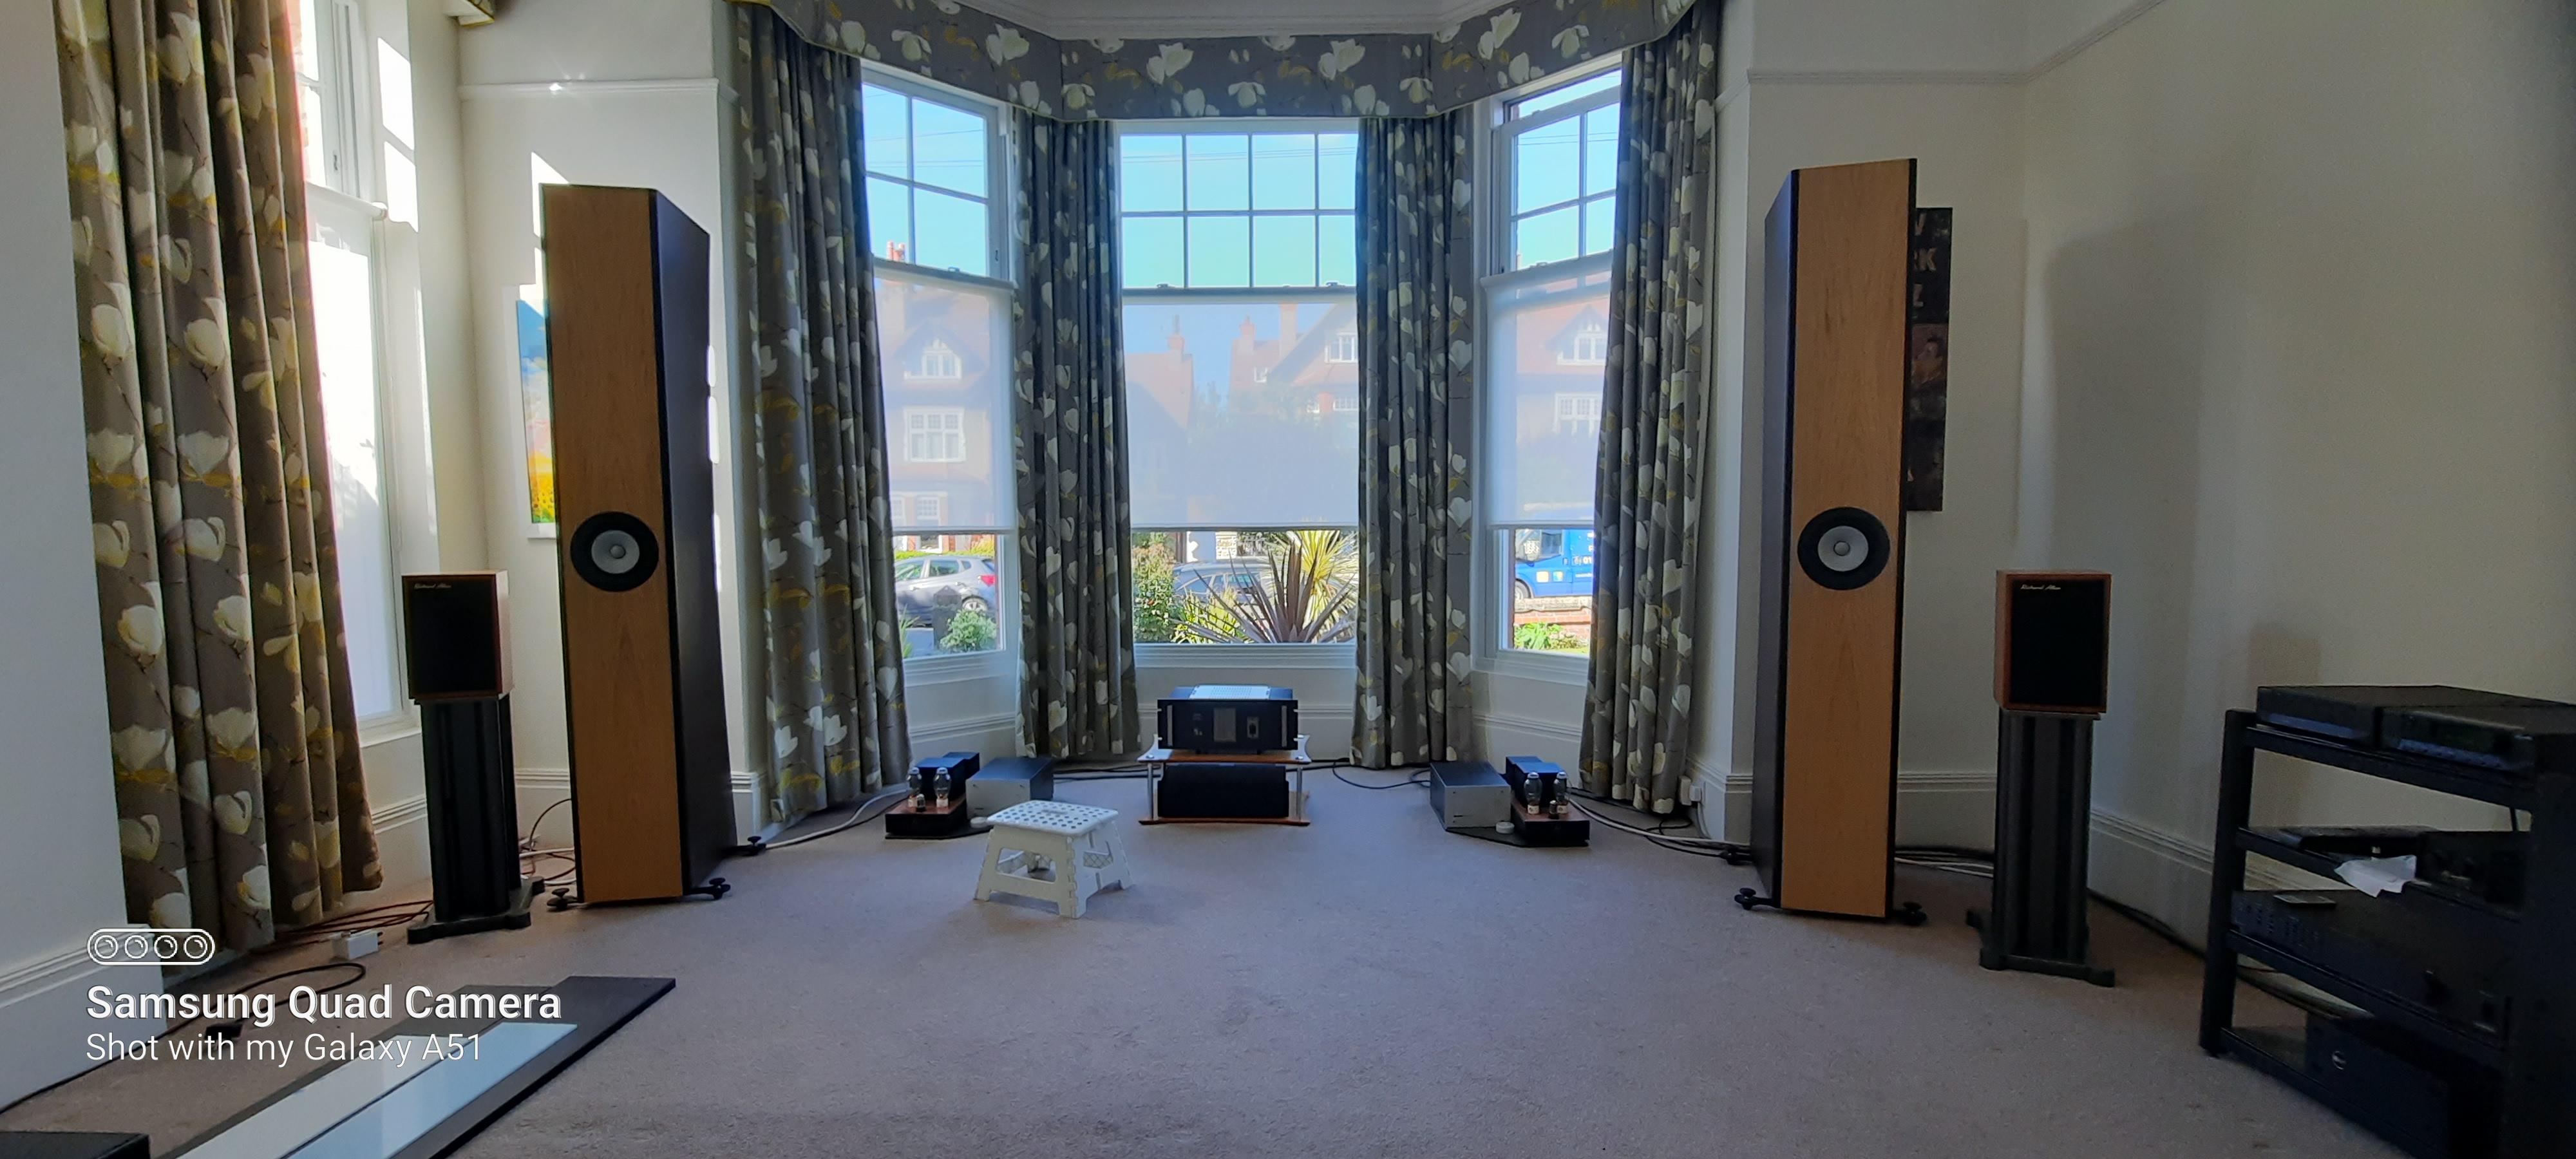
Here are a couple of pictures of the finished speakers in my listening room
I hope this project is of some interest to the DIY speaker builders on the forum.
Dave
About 5 years ago I bought a pair of Mark Audio 12p full range drivers after reading about them on DIY Audio. I built a pair of Scott Lindgren's simple reflex cabinets as a quick way of getting the drivers up and running and to start the long running-in process. They sounded good, a bit light in the bass but very enjoyable right from the off. I used them for several years before I loaned them to a mate who gave them 12 months more or less constant use. When I got them back they were well run in and I began to look around for another speaker plan for the 12p.
Here are the Simple reflex cabinets that I made first. The super tweeter was an add on that I borrowed from my ESL 57's and not really necessary.
I looked at the Pensil, Frugal Horn Joan and Mar-Ken 12 plans and then I decided to go for another Scott Lindgren design- the Woden Design Avebury. This is a double back loaded horn and stands just over 6 feet high. I bought the plan from Scott, took a deep breath and ordered the material from a local timber supplier.
I decided to use 19mm black Valchromat, a material I had never used before but I wanted a through-colour material with consistent machining properties and easy finishing with wax or lacquer. The last part didn't work out so well but more on that later.
The timber merchant cut the material on a computerised beam saw accurate to fractions of a millimetre and all cuts 90 degrees. Unfortunately, due to an error on the machine they ended up cutting two sets of parts, one set being slightly under/oversize. I wasn't bothered because one set was spot on and they offered me all the scrap for free; so that's the material for my next speaker build sorted.
I cut the curve in the sides first:
Black Valchromat is a dirty material
I used an Oak veneer for the front baffle. Here it is before I cut the hole for the driver.
This isn't a difficult speaker to build but the panels are large and any errors in alignment or positioning quickly add up. Having accurately machined parts helped enormously and was worth the £60 cutting charge.
I used my kitchen island as a makeshift work bench to make sure the panels stayed flat.
I wanted to make sure that all the pieces fitted together perfectly and I also wanted to practise the assembly sequence so I did a dry build first before committing any glue.
The centre 'H' section is a sub assembly that I made before the baffle and top/bottom were added.
I decided against finishing the Valchromat with clear wax or lacquer as the panels were slightly different shades and had light and dark patches- I realised that the machine shop had used different batch sheets to make up my corrected order. I also thought the sight of two 6 foot black monoliths might look a bit much in my listening room.
I decided to paint the panels with a water based paint and chose Valspar Chestnut brown eggshell sprayed on with a HVLP sprayer. I waited for a fine day with little breeze and sprayed all the panels in one mammoth session. The panels were put in my summer house to dry and the warm temperatures dried the paint quickly leaving a perfectly smooth eggshell finish that contrasts nicely with the oak front baffle.
Here are a couple of pictures of the finished speakers in my listening room
I hope this project is of some interest to the DIY speaker builders on the forum.
Dave