
You are using an out of date browser. It may not display this or other websites correctly.
You should upgrade or use an alternative browser.
You should upgrade or use an alternative browser.
And so it begins...
- Thread starter paulski
- Start date
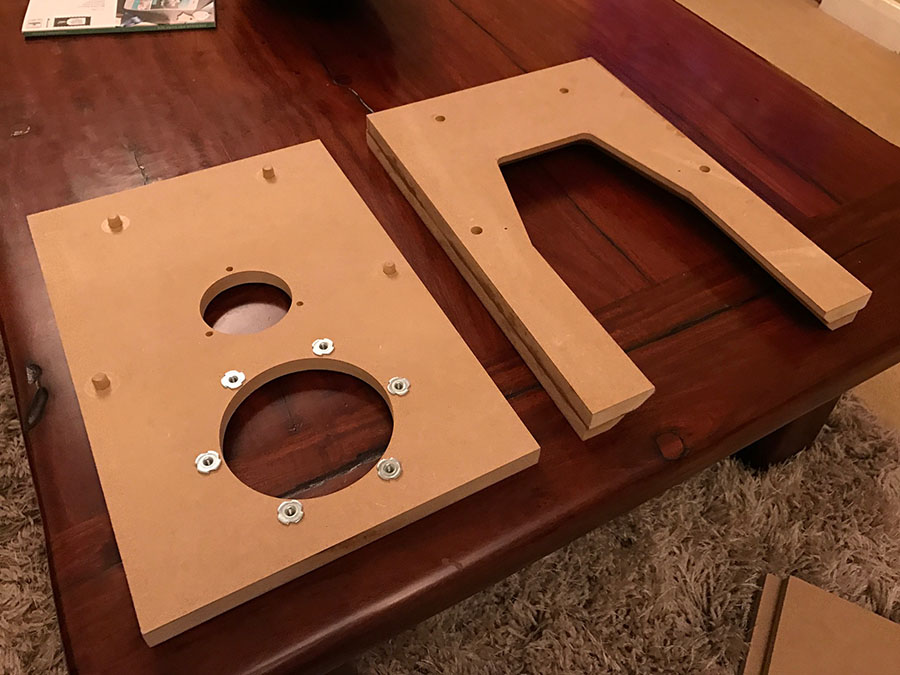
I didn't take any pictures whilst I was shaping the top baffles, this was a job I'd really feared but actually, once I got into it with the plane and sandpaper I realised that I'd always enjoyed working wood by hand and just using my eyes to judge the progress. Here's a shot with the top baffles and one woofer baffle just resting in the cabs:
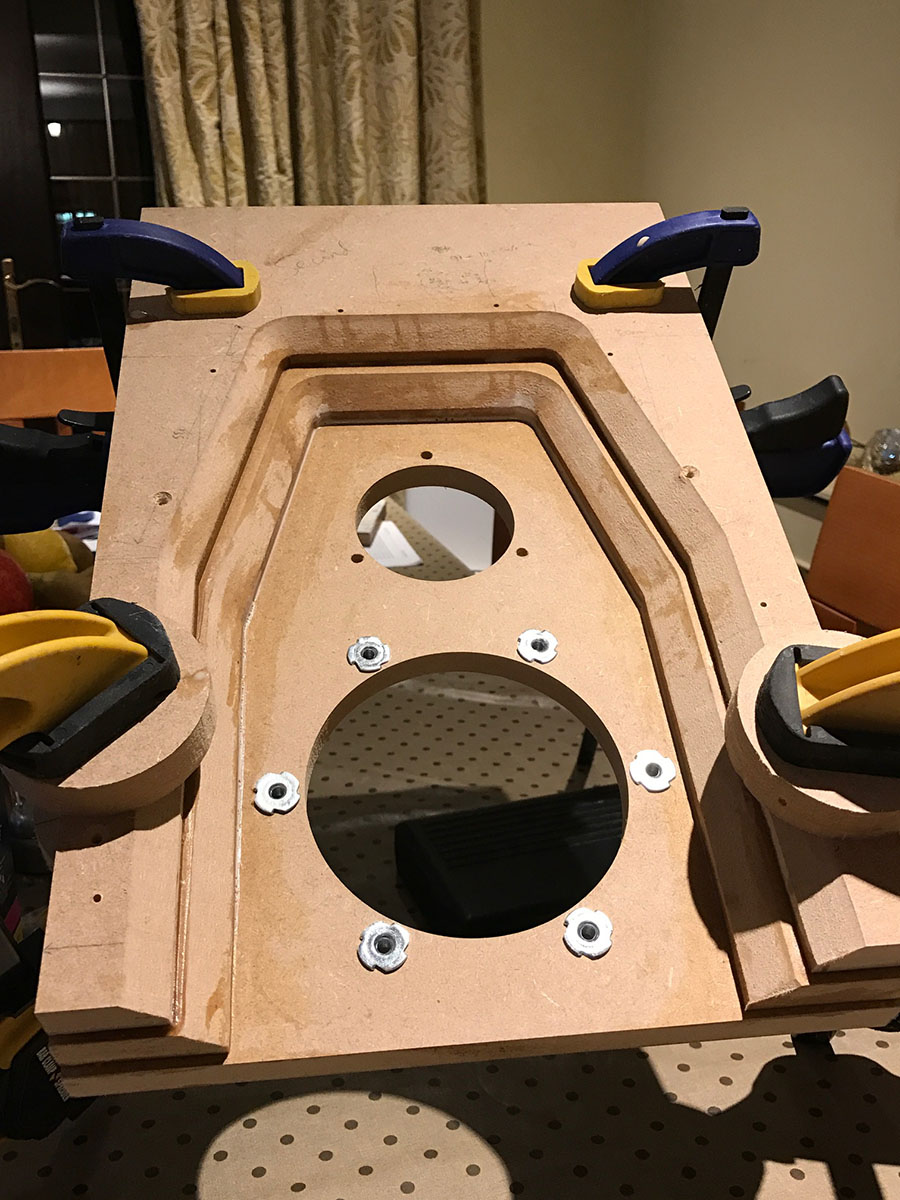
I'm not entirely satisfied with the top baffles and may have been a little conservative with the amount of MDF I removed. I'll revisit these at the weekend before I glue them to the cabs.
I'm not entirely satisfied with the top baffles and may have been a little conservative with the amount of MDF I removed. I'll revisit these at the weekend before I glue them to the cabs.
Thanks, Stefan. Quite a few hours into this so far but I suspect I'm only 50% of the way there yet, if that. Fortunately I'm really enjoying the build and, whilst I'm still a little daunted by the veneering / lipping etc. each little challenge I overcome gives me renewed belief that I can do James' marvellous design justice.
Hmmm ... leather.
Haha! The leather I bought from Gareth's hide was located in amongst my wife's clothes in the wardrobe.....
James
Lord of the Erg\o/s
Here is how I profiled mine. I think you can take a bit more MDF off.I'm not entirely satisfied with the top baffles and may have been a little conservative with the amount of MDF I removed. I'll revisit these at the weekend before I glue them to the cabs.


happychappy
Happy Member
If sanding indoors take a look at this:-
http://www.axminster.co.uk/mirka-sanding-blocks-with-extraction-ax851921
Excellent piece of kit, highly recommended.
They make a larger one as well.
http://www.axminster.co.uk/mirka-sanding-blocks-with-extraction-ax851921
Excellent piece of kit, highly recommended.
They make a larger one as well.
If sanding indoors take a look at this:-
http://www.axminster.co.uk/mirka-sanding-blocks-with-extraction-ax851921
Excellent piece of kit, highly recommended.
They make a larger one as well.
I actually have one of those but it's the smaller one and sanding the baffles really needs a larger flat area of sandpaper to keep the result consistent. Once I was done with the plane I switched to 60 grit fitted to an approx 12X4 piece of MDF.
'scuse for butting in, but I've taken to using Decoflex and ironing it on using aliphatic glue (Titebond III).
Easy to do and works a treat for me... here are some little uFonkens I made last Christmas http://www.audio-talk.co.uk/phpBB3/viewtopic.php?f=4&t=5997&start=60#p130592...
Comes in 8x4 sheets - lovely stuff to work with.
That just seems like cheating
") Besides, I've already got a stack of veneer leaves waiting to be used.
Besides, I've already got a stack of veneer leaves waiting to be used.A little progress this weekend, I've profiles the upper baffles some more and am almost happy with them now. I should qualify that by saying that i'm never entirely happy with anything...
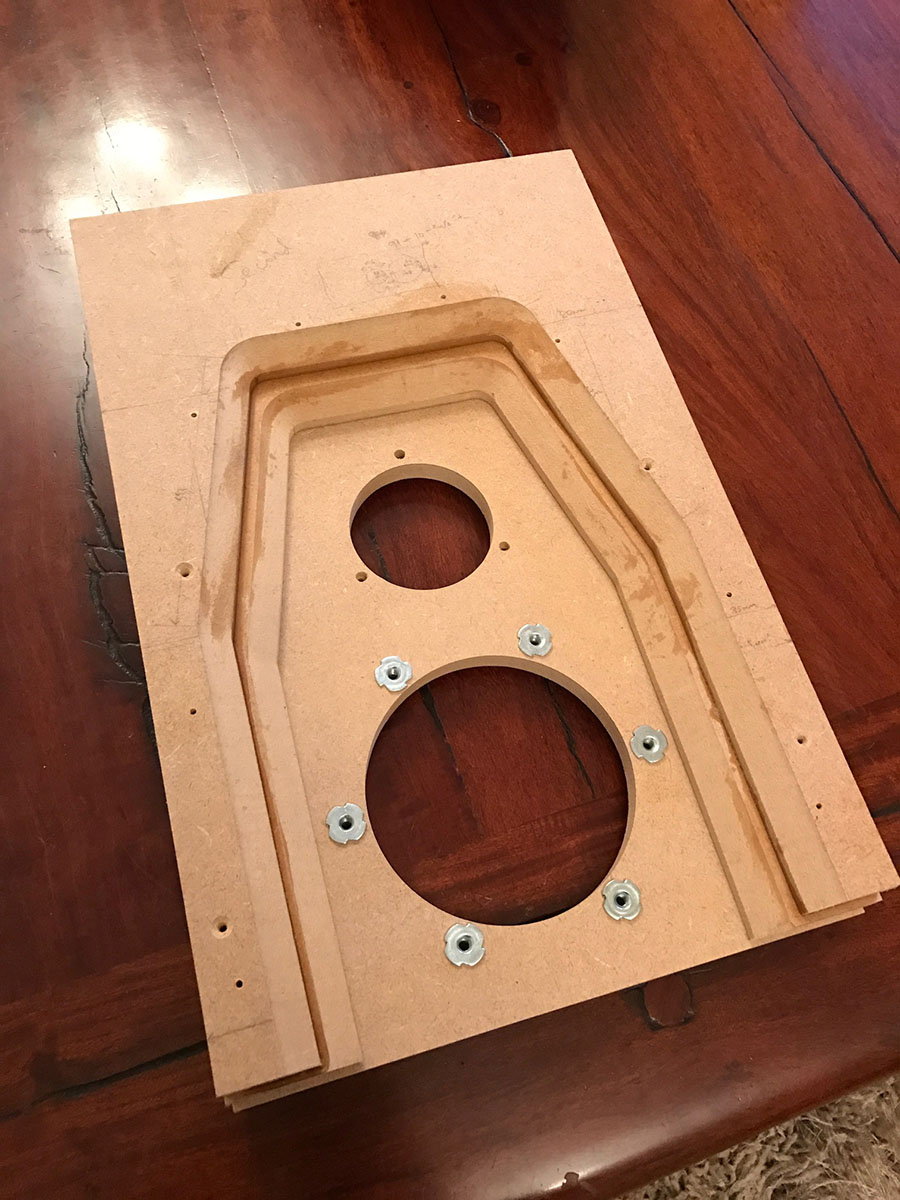
I actually glued the baffles to the cabinets first before planing and sanding more MDF, a little risky perhaps but I was never going to make new baffles! I bought them in the house as it was a little too cold for the Titebond III to cure outside.

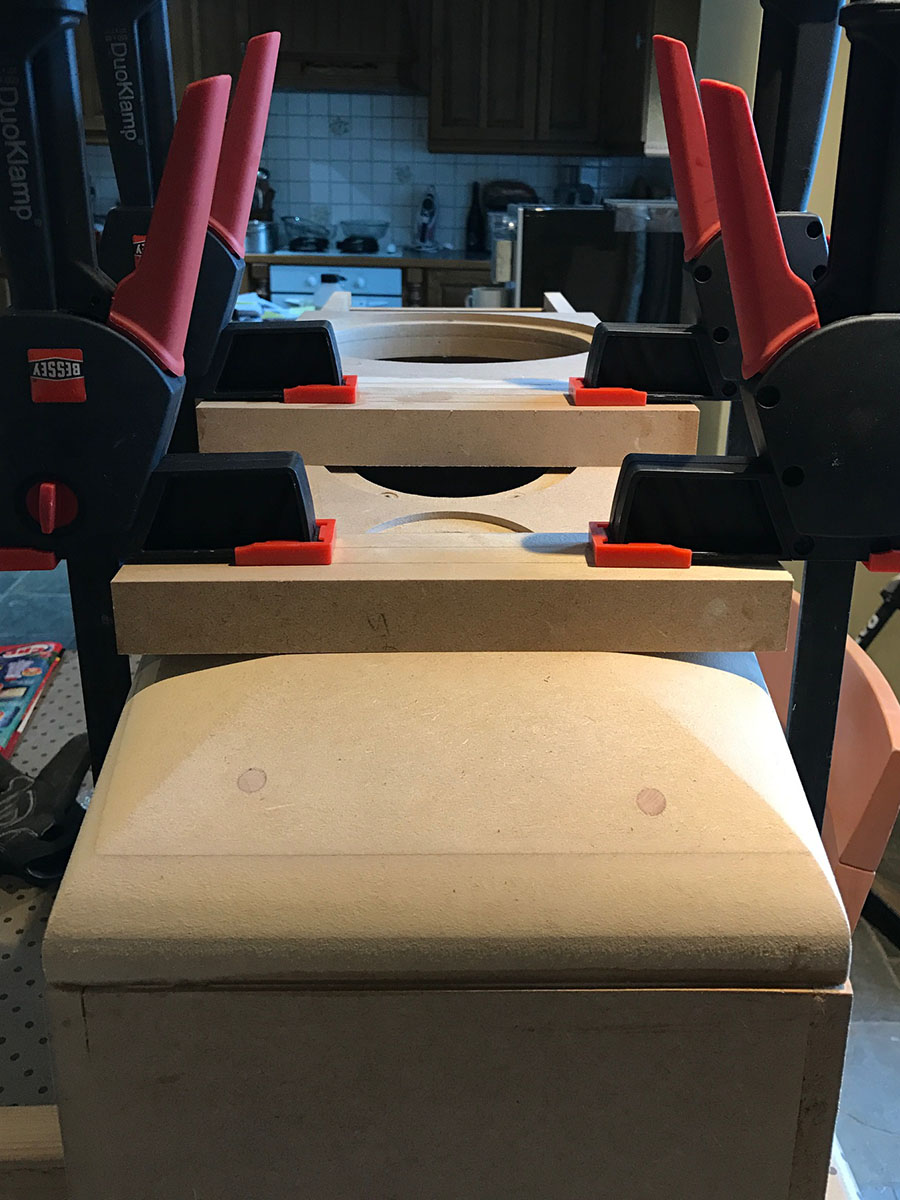
Some purpose made clamping pieces.
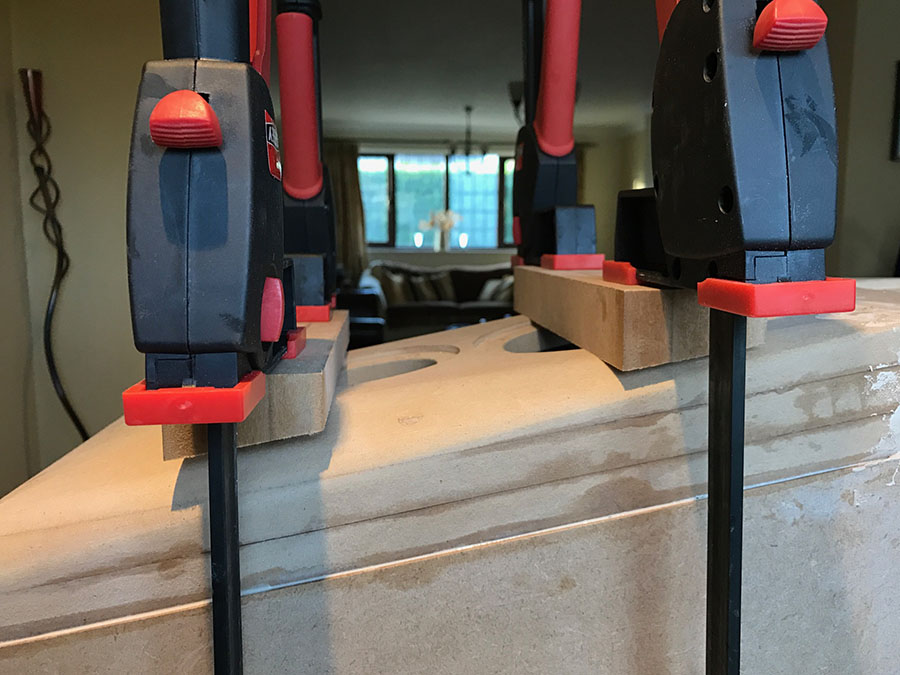
The cabs are really in warts 'n all condition in these pics with unsanded filler etc.
I actually glued the baffles to the cabinets first before planing and sanding more MDF, a little risky perhaps but I was never going to make new baffles! I bought them in the house as it was a little too cold for the Titebond III to cure outside.
Some purpose made clamping pieces.
The cabs are really in warts 'n all condition in these pics with unsanded filler etc.
After some more profiling:

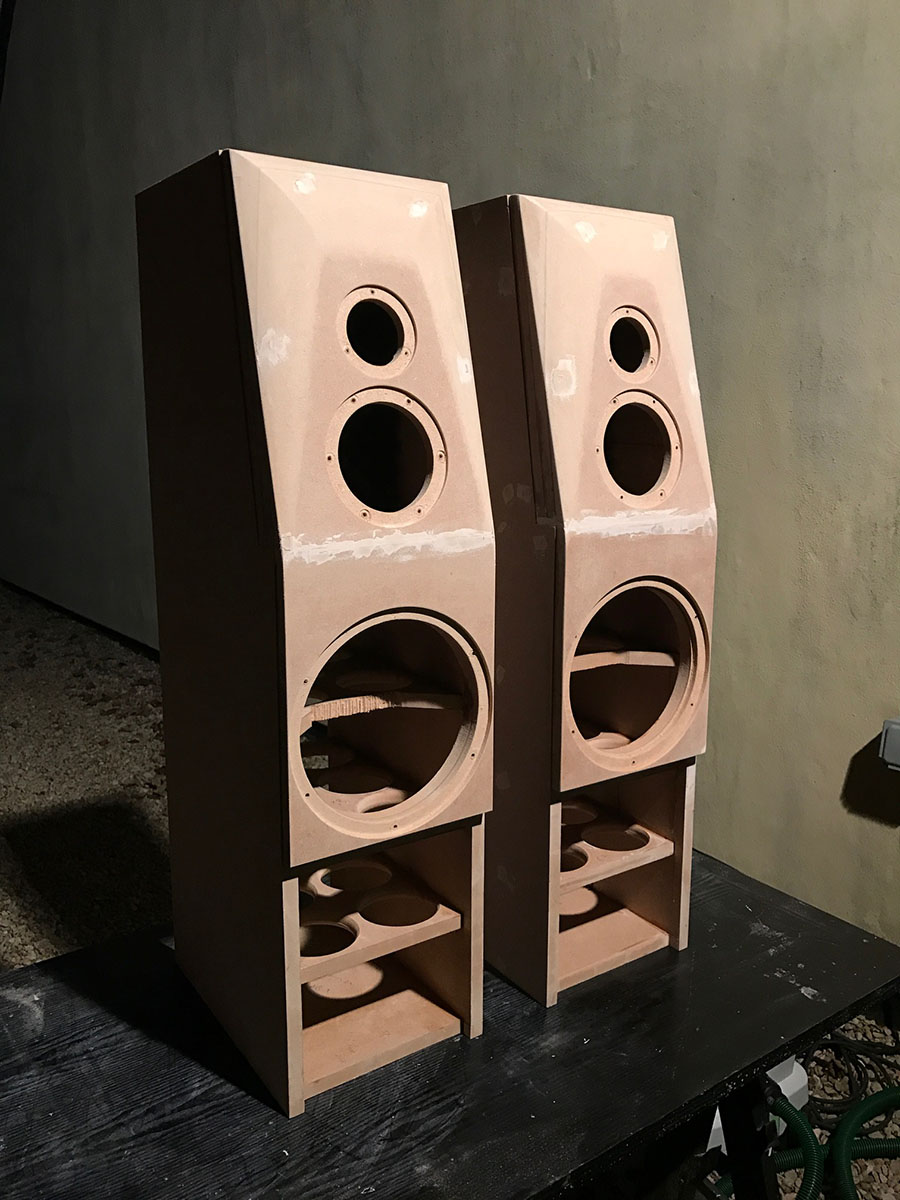
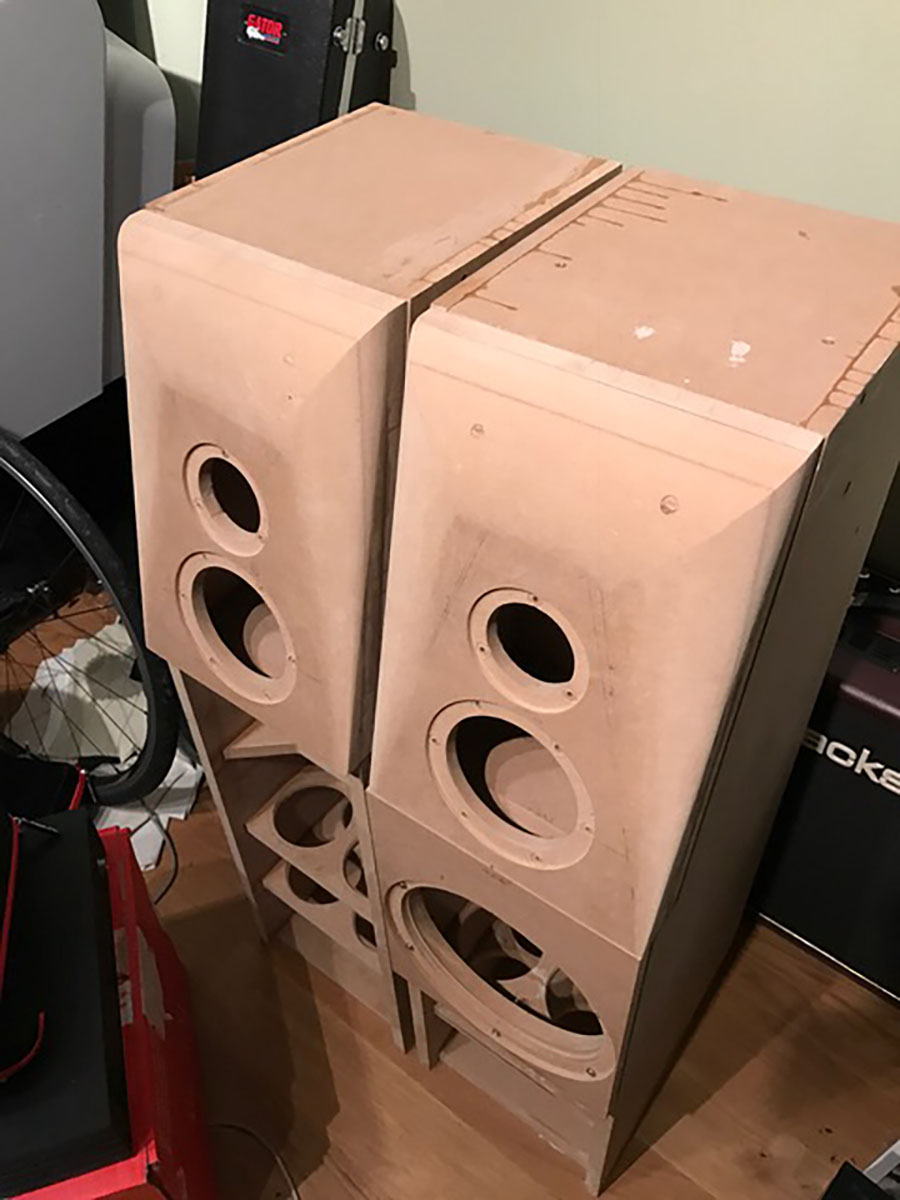
Now resting up awaiting the next phase, I'll be looking to get the leather on once I've done final sanding and applied some sealer.
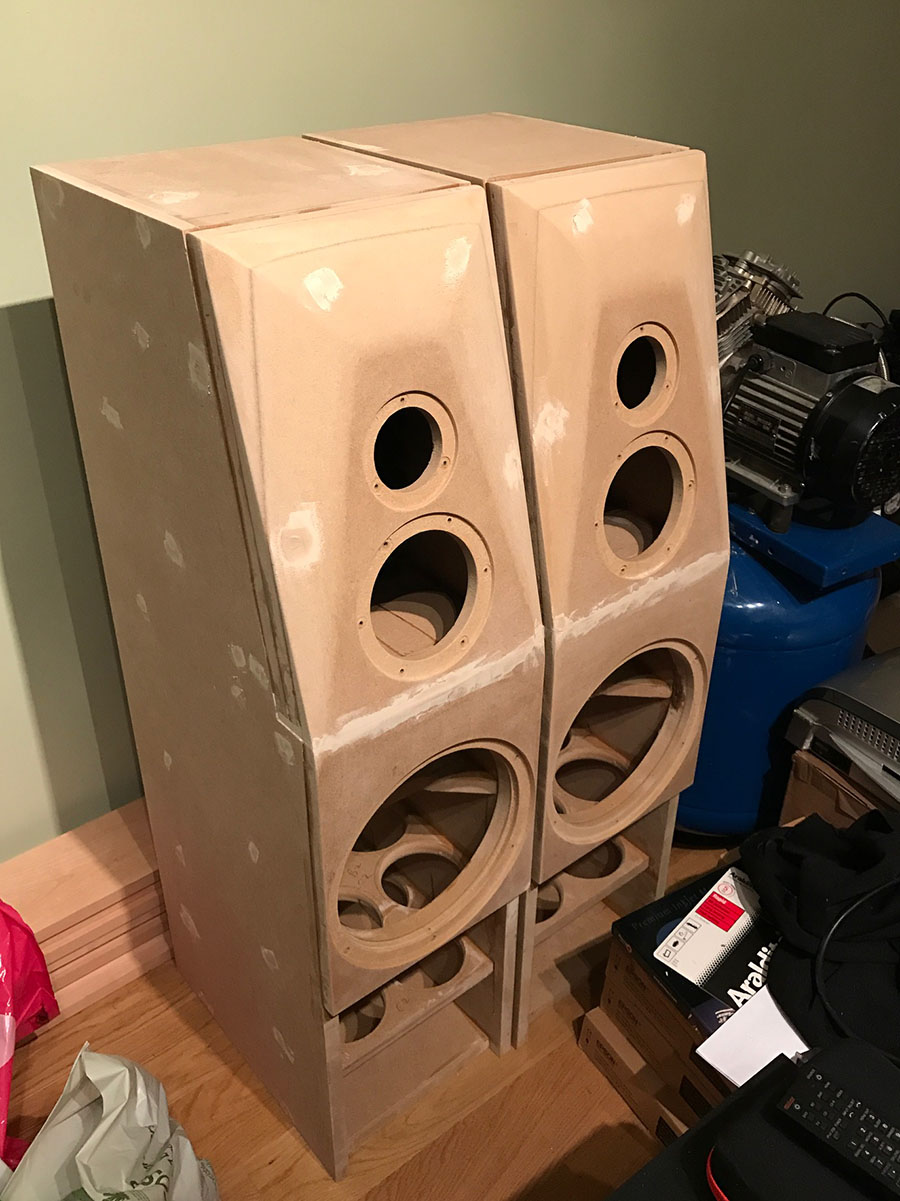
I really want to get that done so I can move on to what I see as phase 2, the outer part of the cabinets. This requires a higher level of skill to do properly, it's really going to test my abilities as it's got to be done to as professional a standard as I can manage.
Now resting up awaiting the next phase, I'll be looking to get the leather on once I've done final sanding and applied some sealer.
I really want to get that done so I can move on to what I see as phase 2, the outer part of the cabinets. This requires a higher level of skill to do properly, it's really going to test my abilities as it's got to be done to as professional a standard as I can manage.
So here's something that's bugging me, I have some ideas about the lipping of the front of the side panels but on re-reading Gareth's most excellent thread on his build I came across this and for the life of me I don't know how he got from (the second picture in the post with the lipping glued on) this to the super sharp scarf joint. Gareth, how did you do it please? My only thought was to fix a straight edge in line with the angled part pf the side extending over the lipping and use a bearing guided router bit to trim.
My lack of skills may already be starting to be exposed....
My lack of skills may already be starting to be exposed....
Pete MB&D
Pete Maddex, the one and only!
As you are going to veneer them after lipping an angled butt joint between the too front pieces will be best, it you cut them to the approximate angle and them run a saw between them (kerfing in) a couple of times you will get a tight joint just like these trivets I made.
 24 October by Pete Maddex, on Flickr
Pete
24 October by Pete Maddex, on FlickrPete
cutting42
Arrived at B4 Hacker Ergo
So here's something that's bugging me, I have some ideas about the lipping of the front of the side panels but on re-reading Gareth's most excellent thread on his build I came across this and for the life of me I don't know how he got from (the second picture in the post with the lipping glued on) this to the super sharp scarf joint. Gareth, how did you do it please? My only thought was to fix a straight edge in line with the angled part pf the side extending over the lipping and use a bearing guided router bit to trim.
My lack of skills may already be starting to be exposed....
Hi Paul
You mostly got it! I marked out the line and trimmed within a couple of mm with a hand saw to take the meat off and then used a dead straight chunk of mdf clamped to the side panel and finished off with a bearing guided router cutter. Make sure the chunk is wide enough so the router can sit on it without tipping.
Do watch grain directions and bear in mind that you will need a top bearing cutter and a bottom bearing cutter to avoid cutting against the grain on each of the sides. Let me know if this makes sense, if not I can draw pictures ;-)