advertisement


Naim spares: CB 135 power switch and fascia, CB HiCap dial, Aro finger lift

hifiaf

pfm Member
In the past I've started these kinds of posts, "Long shot, but you never know..." Then I end up finding exactly what I'm looking for within minutes (shoebox cases for my Paradise built, Armageddon blanking switch for my LP12).

Hmm, actually, for good luck I better stick with the formula.

Longs shot, but you never know...

IMG_4732.jpeg


I recently picked up some CB 135s ^^ that need a few bits replaced.

a5e948_7f53f797469d4c0da180d6095a59fbe2~mv2.jpg


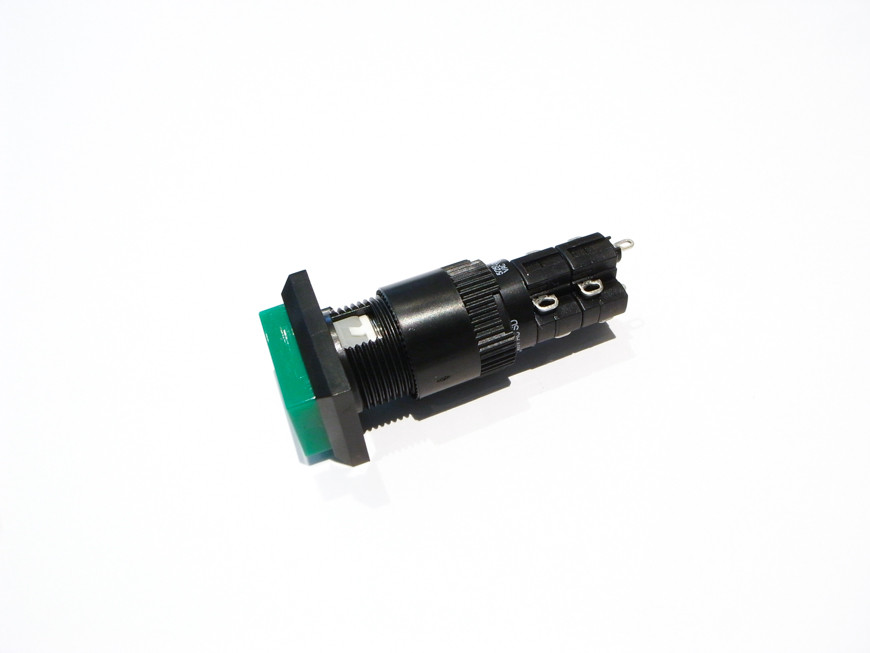
Most notably, their power switches are really "sticky" and don't like to turn off. I know LOK hifi offer replacements for £60, but wondered if anyone had spares to sell. I need two full assemblies (the switch, the lamp, and the lens).

fascia.jpg


The fascia are in decent shape (gold logos, wrinkles in the corners), but I thought I'd ask about replacements. I know Class A have some, but they don't sell them unless you bring your 135 in for service (not possible since I'm in Canada.) Google brings me to this page, but it seems extraordinarily sketchy: https://www.gbitattoo.com/index.php?main_page=product_info&products_id=217840

a5e948_23aca0409dc248a0ac5d1c4ddd4e5002~mv2.jpg


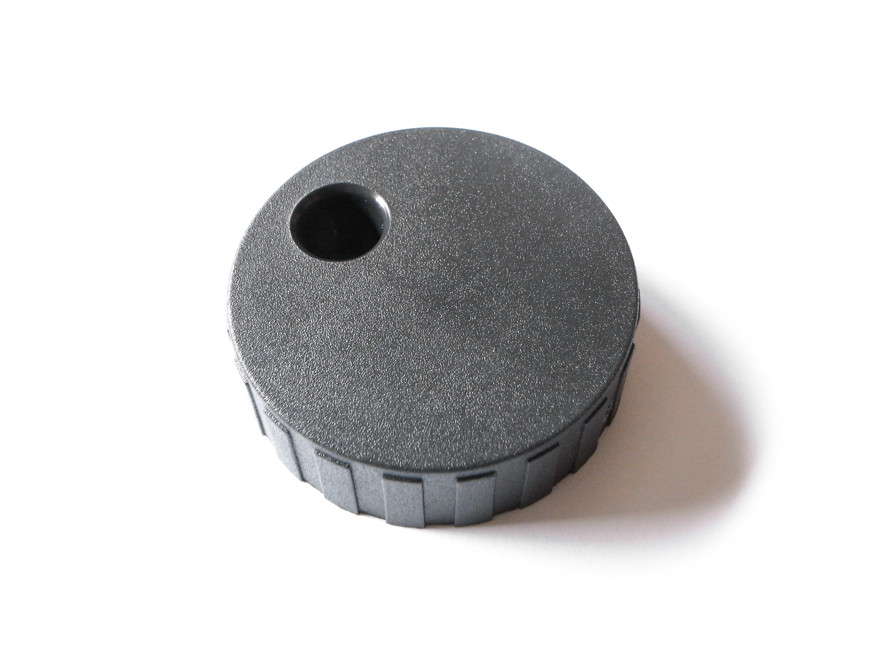
For another project, I'd love to track down two CB HiCap control dials. Again, I know LOK have these for £60 but wondered if anyone had spares.

DSC02966.jpeg


Finally, I've decided to stick with a Tiger Paw Javelin tonearm on my LP12 and sell my Aro (for sale in the classifieds). But the finger lift on the Javelin isn't anywhere near as elegant as the one on the Aro. So if anyone has an Aro finger lift, or knows where I could find one, please let me know!

Thanks!
Adam
 
Can you disassemble the power switches at all? Seems like something that might be able to be fixed instead of replaced.
 
I haven't tried -- but a very good point, and would save me a lot of $$! Has anyone else had lucky repairing/cleaning sticky power switches on 250/135s?
 
I did with good success on my NAP 160 BD. The switch was just a little sticky, really not that much. I simply removed the green cap and the light bulb and sprayed everything with my silicone contact cleaner all throughout making sure to put a big rag to avoid spillage in the amp. I then pushed it on and off several times and problem solved.
It really seems to me these switches are high quality and built to last so I would try this before replacing it.
You may also get similar results with some Deoxit but I prefer the other stuff as it also lubricate for a very long period of time thanks to the silicone I guess.
 
Great to know -- thank you! I've got some freshly ordered Deoxit fader lube and contact cleaner -- maybe the fader lube would work well in this application too...
 
The Deoxit F5 Fader Lube seems to have done the trick with the power switches -- thank you for the tip @Gervais Cote !

Sold my Aro today so had to say goodbye to its lovely finger lift :(
 
I needed a new fascia for my CB HiCap, logo had gone yellow and the corners were cracked. I took a close up high as possible res photo of one of my perfect NAP110 fronts, less knob of course, messed about with a photo editing app and printed it onto inkjet self adhesive white matte vinyl sheet, using photo black ink, at the printers highest quality. Spray the dried out print with a matte sealing aerosol gives the required slightly stippled effect. This was 2 years ago and its still fine. I guess the ink will gradually succomb to environmental issues, but I've still got the file so printing another will be easy. As an aside, my amps have alloy fascias not plastic, and they still look like new. My 32.5 is a very late one with phono/aux/tuner/tape1/2 and is very dark grey and this has never faded or discoloured.
 
Very interesting, @Pine Marten -- I may give this a shot. I'm also going to be making some CB-like fascia for my 4-box Paradise in Naim shoebox cases, and was planning on a die-cut sticker used as a mask.

And will do, @Gervais Cote! Now that the power switches are sorted, and I've got the XLR sockets cleaned up with some D5, the next step is a recap. Thankfully they came to me with a full recap kit (minus fan board). Good thing as these 3K3 1W resistors are totally fried and show these babies have maybe had a hard life the last little while!

IMG_4764.jpeg
 
A trick to lengthen the life of these resistors : install them higher on the board or, if you prefer, with a bigger gap between the bottom of the resistor and the top of the board. This will allow more air to circulate around the resistor and run cooler.
I also sometimes go to the next higher wattage of resistor on some that tend to run hot to help dissipate the heat thanks to their bigger body and greater power capacity.
 
Thanks for the tip! I hear the 2W versions are quite large and may not fit very well on the board -- but I'll definitely run mine with some air around them.

I have another question about the recap. I see that in the feedback position on the amp boards, Naim now recommend two 47uF 6V tants wired in parallel. This is what they look like on my boards:

IMG_4761.jpeg


The recap kit that came to me with the 135s includes single 100uF 6V tants for this position rather than two of the 47uFs. I've heard that Naim prefer the two tants in parallel because the 100uF have a tendency to leak. Does anyone have experience with this? I don't have any of the 47uF tants on hand, but worth ordering some?
 
On my NAP 110, I replaced the 47 uf tantalum with a large AVX FFB44E0476K in the feedback position and it really made a huge improvement.
I’m not saying you should do this modification but for me, the results are well worth it.
It didn’t change the signature of the sound but opened the human voices, treble became softer yet detailed and it is less fatiguing to my fragile ears for long listening sessions.
The prat, boogie factor and the powerful bass of this small amplifier are very important for me and I didn’t lose any of it so quite happy.


advertisement


Back
Top