
You are using an out of date browser. It may not display this or other websites correctly.
You should upgrade or use an alternative browser.
You should upgrade or use an alternative browser.
Goldring Lenco GL-75
- Thread starter TonyScarlett
- Start date
Nic Robinson
Moderator
I have also added a Joly-on bearing,
I've known Jolyon De Fossard for nearly 20 years. He is a top man and his bearings are stunning. It was a fantastic upgrade to my deck.
TonyScarlett
pfm Member
Ordered a PEEK bearing & idler upgrade kit off Werner on the LencoHeaven site, could take a while to arrive, I think he makes them in batches. Have plenty of other things to keep me busy in the meantime, starting to think about plinths, do I restore & improve what I've got, buy one off the shelf, or design & build my own? Designing & building my own would be my preferred route, never done it before but I have no doubt I have the necessary skills to make a reasonable job, unfortunately, what I don't have is a practical work space which may rule this option out. Will have to give it some thought, getting some great inspiration looking at some of the builds in this thread & on LencoHeaven.
TS
TS
Chops54
pfm Member
I only make plinths if I have enough salvaged plywood. On the two occasions when I had no ply and no time I bought my plinths from a chap named Carl. He's on LH as Carl's Workshop and he sells on eBay too. I was working on a United Utilities site one time and I found a load of birch ply packing cases. I took my circular saw into work and cut them up into sheets and more or less filled my County Station Wagon. Happy days.


Chops54
pfm Member
I've had to fit an IEC mains outlet because this deck is going to Poland and requires a shuko plug which aren't fused. They're not polarised either which beggars belief in this day and age.


Because the deck is a hybrid and has the 16 rpm mod I've installed an on/off switch in the bottom left hand corner.

Because the deck is a hybrid and has the 16 rpm mod I've installed an on/off switch in the bottom left hand corner.


RichShortland
pfm Member
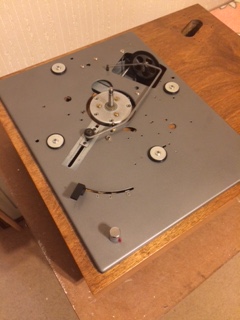
Thank you so much Nic. It took me a long time to work it out. I had to modify the motor so it would fit in a slightly smaller hole so that there was enough plywood left to bolt the bearing housing into. The bearing housing is fully enclosed within the plinth so is structurally solid and fully supported. It was difficult to achieve. I'm just about to put the other Lenco back together so I'll post some pics of the rebuild later today with a bit of luck. The pics will show the modified motor, bearing housing and top plate mounting.
Hi @Chops54 I'm trying to understand if there is option for me to take some of your learnings into my current plinth. At the moment my bearing has an extra 6mm alloy bracing plate on top and is braced at the bottom (it's a Joly-on bearing), but the top plate is rigidly connected to the plinth in several places, plus the motor is in the usual place, attached to the top plate.
What I quite like the idea of, is mounting the motor from the bottom of the plinth, 'sinking' motor vibes into the plinth itself, rather than decoupling the top plate (and motor) from the rest of the plinth and bearing as you have done.
Is it asking a lot of the decoupled top plate to manage the motor vibration how you have done it? I'd be interested in how you find it
")
Chops54
pfm Member
Obviously you understand that I split the turntable bearing from the top plate to keep motor noise out of the plinth as far as was practical. I don't think you can ever get complete decoupling but I hoped the O rings would afford some reasonable decoupling. The best place for the tonearm imo has always been on the plinth so I thought why not put the bearing on it too. That left just the motor, idler and speed control on the top plate so I thought why not try and decouple the top plate. It was just an experiment really and now I've done it I don't think it's asking too much for the top plate to damp the motor vibrations especially with some extra damping. It goes without saying that you need a really quiet motor. I've had a few that no matter what I did I could never get them acceptably quiet. The two turntables I've shown here both sound very good indeed. The one I've just rebuilt is truly excellent. If it wasn't for this damned virus anyone who wanted to would be welcome to come and listen to it.
I did start work on another Lenco where the motor sat in the plinth just as you are suggesting with the bearing and arm on another sub assembly but I never finished it. I had issues getting it all to line up properly and I just lost interest. Sticking with the top plate does keep everything where it wants to be.
I did start work on another Lenco where the motor sat in the plinth just as you are suggesting with the bearing and arm on another sub assembly but I never finished it. I had issues getting it all to line up properly and I just lost interest. Sticking with the top plate does keep everything where it wants to be.
TonyScarlett
pfm Member
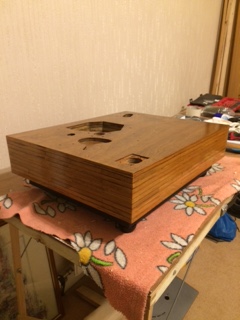
Finally finished building the plinth for my Lenco yesterday, couldn't sleep last night so spent the early hours reassembling the deck.
In order to preempt any questions people may have, the plinth was built using 4 layers of Birch ply, 3 layers 18mm & top layer 12mm thick. I bought the ply pre cut to the external dimensions & made the cut outs myself with a jig saw. One of my objectives with this plinth was to make it as compact as possible both in height as well as width & depth. Whilst I admire the designs & workmanship of the decks in this thread I simply don't have the room for a bulky plinth.
Thanks are due to all the contributers to this thread for there advice & inspiration, to dowser for selling me his AS-212 for a great price & to Ian from LencoHeaven for invaluable advice & a great cup of coffee.
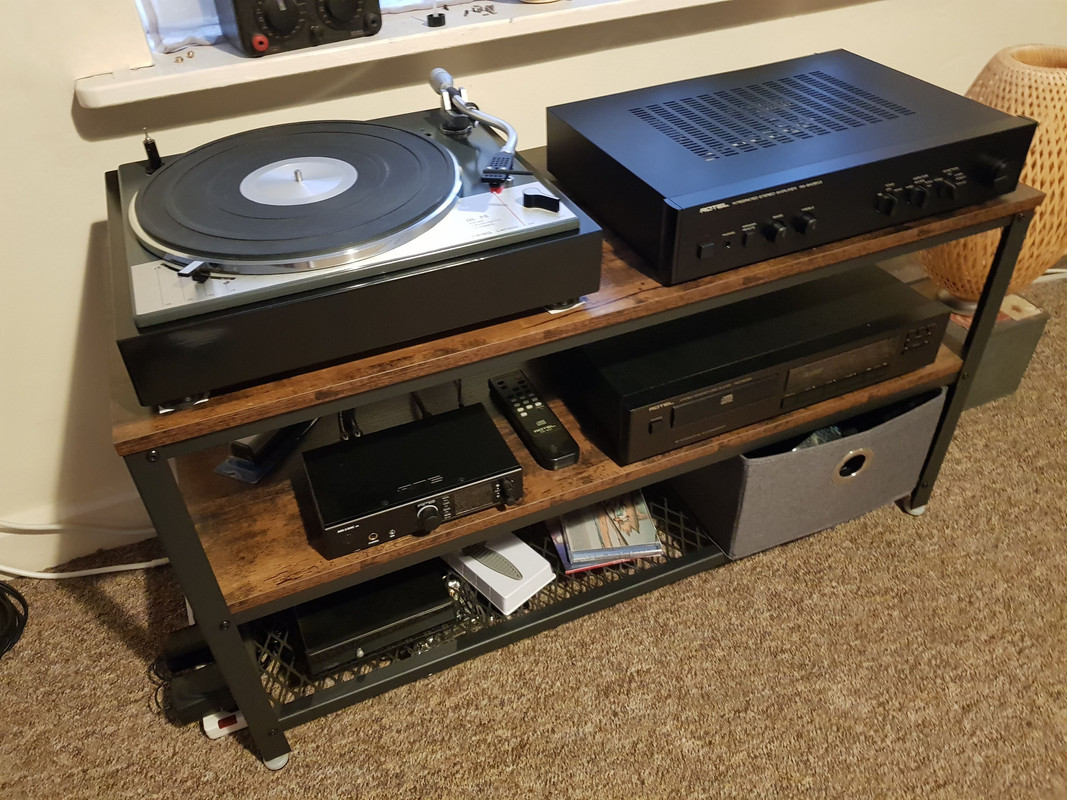
I think the deck sits quite nicely next to another one of my recent acquisitions, a mint Rotel RA-840BX3 which incidentally has a superb phono stage.
Judge for yourself...
In order to preempt any questions people may have, the plinth was built using 4 layers of Birch ply, 3 layers 18mm & top layer 12mm thick. I bought the ply pre cut to the external dimensions & made the cut outs myself with a jig saw. One of my objectives with this plinth was to make it as compact as possible both in height as well as width & depth. Whilst I admire the designs & workmanship of the decks in this thread I simply don't have the room for a bulky plinth.
Thanks are due to all the contributers to this thread for there advice & inspiration, to dowser for selling me his AS-212 for a great price & to Ian from LencoHeaven for invaluable advice & a great cup of coffee.
I think the deck sits quite nicely next to another one of my recent acquisitions, a mint Rotel RA-840BX3 which incidentally has a superb phono stage.
Judge for yourself...
TonyScarlett
pfm Member
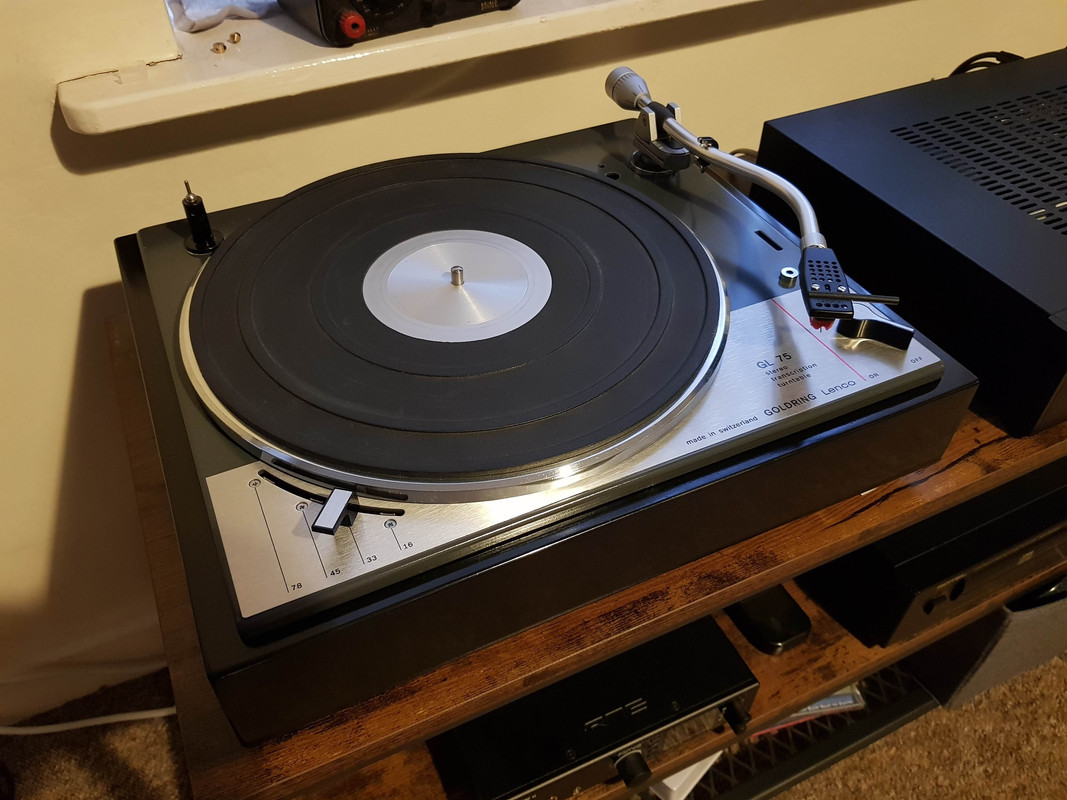
Thanks Chops, I took a little inspiration from one of your builds, I made up some plastic washers to lift up the top plate so the lip is not not sitting on the plinth then cut up an eraser into four pieces & placed them between the corners of the top plate & plinth to provide some damping.I'm impressed Tony
The deck is sounding superb, the best way I can describe it is that it sounds far more accurate than before, the music is more precise without any blurring between the notes. I am also constantly surprised how much information the relatively lowly AT-VM95ML digs out of the grooves, I'm hearing things I wasn't even getting from my Planar 6 with its Ania cart.
TS
Helen Bach
if it ain't Baroque ...
Thanks Chops, I took a little inspiration from one of your builds, I made up some plastic washers to lift up the top plate so the lip is not not sitting on the plinth then cut up an eraser into four pieces & placed them between the corners of the top plate & plinth to provide some damping...
TS
If I am reading this correctly, you have put some erasure rubber between top plate and plinth (and called it damping). But what you have done is isolate the top plate (et al) from the plinth, and unless you have added some kind of damping to the top plate, then you may have made things worse. The top plate is not known for its damping ability.
TonyScarlett
pfm Member
The top plate is still screwed to the plinth by four screws in the bowl of the top plate, I have just used plastic washers to lift the top plate slightly so that the lip is not quite contacting the plinth as shown in Chops54s pics further upthread, I have placed the erasers in the corners of the top plate to prevent any potential ringing. I am new to this & realise I may not have done things entirely by the book but it seems to work just fine.If I am reading this correctly, you have put some erasure rubber between top plate and plinth (and called it damping). But what you have done is isolate the top plate (et al) from the plinth, and unless you have added some kind of damping to the top plate, then you may have made things worse. The top plate is not known for its damping ability.
One of the things I was concerned about was if the lip of the top plate is in contact with the plinth before the screws in the bowl are tightened down, then the top plate will distort when you tighten down the screws with entirely unpredictable results. I may of course be wrong about this & will be happy to do some experimentation down the line but for the moment would just like to sit back & enjoy the fruits of my labour.
TS
Chops54
pfm Member
If I am reading this correctly, you have put some erasure rubber between top plate and plinth (and called it damping). But what you have done is isolate the top plate (et al) from the plinth, and unless you have added some kind of damping to the top plate, then you may have made things worse. The top plate is not known for its damping ability.
Come on now Bryan, let's not piss on the parade
We can discuss the finer points later but for now I think Tony has done a nice job and it obviously works for him. I have to say I'm rather envious of that AS212 TonyScarlett
pfm Member
Thought I would share a couple of pics of the build, you can see my "workshop" & "workbench". Not sure my landlord would approve!


