advertisement


Restoring a Thorens TD124 Mk II SME3009 Shure V15 Type III

Just be careful about oil choice - IIRC the Thorens has plastic bushings, and if they are anything like the white LP12 plastic bushings some types of oil might just penetrate and swell them up to the point they be useless (someone trashed an LP12 bearing here recently). This is just guesswork on my behalf, but it is something I'd want to research had I a beautiful TD-124. I know nothing about oil.

The TD124 has oil-impregnated (self-lubricating) sintered bronze bushings :)
A good page on TD124 lube here and 10W 40 seems to be suitable.

Aha. A retip / service. Do you have definitive plans?
Congratulations on the simply stunning deck and the beautiful cartridge.

Thanks.

I'll examine it under the microscope when it arrives (so impending nude and hard core Koetsu porn to follow) and decide but after 19 years it'll in all likelihood need more than just a retip and that means Koetsu (whom replace all the innards and keep the outer shell). Buying a Koetsu this way is the most cost-effective way to get on the Koetsu rebuild loop and much cheaper than buying new.

I am glad I have one of these older Urushis... I have never seen this sort of laquer job before.
 
I dunno, won't Expert Styli do?

That 124's going to look fabulous. I'm green.......
 
Buying a Koetsu this way is the most cost-effective way to get on the Koetsu rebuild loop and much cheaper than buying new.

I am glad I have one of these older Urushis... I have never seen this sort of lacquer job before.
I think that may be Tsugaru-nuri lacquer. Amazing thing to do on such a small object.

You'll need to be wearing the correct apparel when you use the Koetsu.

4925-w500.jpg
 
Cartridge for the Thorens arrived today... I have already shipped it out to be restored ...this poor old thing has been traveling from the USA to me and now its off again!

2565351646_9d9e430635.jpg


I have always enjoyed the little details about these cartridges. A simple sandalwood box with calligraphy.

2564526241_0f7a50f78c.jpg


The older Koetsu Urushi models such as this one have a distinctive pattern -- quite different to the modern ones made from various layers of laquer over an alloy body weighing in at around 10g. The different layers are abraded and polished to reveal a distinctive and unique pattern... Like a wooden body having its own grain structure or a stone body having its own markings, the laquer is unique to every Urushi cartridge..

2564524809_87b77d6b4c.jpg


An aerial view with a good line of the cantilever which is straight. All Koetsu models are high compliance and a quick home suspension test using a 2g loaded leaf shows the suspension to be working and responsive -- after 19 years the suspension could be rather saggy and even start to perish, but I have a feeling this was broken within 4 years of its life and and languished in a drawer ever since -- we shall see when the report comes back...

2564524513_401a7f409b_b.jpg


The cantilever under a loop with a macro lens + x2 adapter looking down on it. Here is where I breathe a sigh of relief! Here you can clearly see the separation between cantilever and yoke (the Y shape at the end) which is where the diamond is pressed into place and that's a clean gap where it has popped out and not broken the yoke -- meaning a new diamond and stub can go back in easily enough. The cantilevers on this model are Boron incidentally quite ahead of its time...

More later as it happens.
 
I was quoted £235 for an ESco retip or $1550 (£780) from Koetsu SE Asia.

So it's getting checked by Expert first for retip suitability. If it only needs a new diamond pressed in and a bath to clean the coils of muck I'll let ESco do it. Any more work needed (suspension etc) then it goes off to Koetsu.
 
I was quoted £235 for an ESco retip or $1550 (£780) from Koetsu SE Asia.
There is no way you'll hear a difference between it and a decent sub-£200 cartridge - not if you can't hear the difference between a Benchmark DAC and real music :)

So I suppose it's £180 for the cartridge and £600 for the fancy lacquer then!
 
So I suppose it's £180 for the cartridge and £600 for the fancy lacquer then!

Thinking about it -- even if that was true I'd not have a problem with it.
 
Okay, today we flip her over and fiddle about with her bearing thrust plate.

2567509538_85fc20a59c.jpg


With all the flushing and bearing cleaning obviously the gasket at the thrust bearing plate was somehow compromised as small amounts of oil were seen building up around the screws holding the plate on. One of the more popular modifications to these decks is removal of the thrust plate and replacing it with a thicker one -- this allows for far more mechanical stability between the bearing, the dimpled bearing plate and the thrust plate isn't allowed to flex.

2567508688_ea8c2188a2.jpg


With the short screws removed the gasket (with the bearing support stuck to it with oil) and the thrust plate sit next to the new stub end. A 10mm block of brass purchased from a guy who'd machined a load of them in Australia -- he also does them for Garrads. The loop is used to check for fractures in the gasket and to check the shape of the bearing "nest" dimple.

2567507762_ffa6aa6663.jpg


The gasket is more closely examined in light for any light breaks or splits. Its in good shape. Often people replace the gasket with a new piece of plastic sheet cut to form a new seal, but I deemed it good for a few more decades yet!

2567506886_e7612bf2e4.jpg


To assist the gasket I put some red Hermatite on the gasket seal which will create a good bond between the bearing shaft base and the thrust plate. You have to be very careful here as you don't want gasket sealant inside the bearing shaft so favour the outside edge rather then the inner! A tip when putting the gasket back is to twist it a quarter turn so the Hermatite is smeared making a good seal.

2566683053_8b3cca0e7e.jpg


The thrust plate is screwed in. These are supplied longer screws. I'd prefer hex heads as I can ratchet each head to an even torque -- but as the screws were originally pan head I doubt they were torqued to begin with. A final check of the gasket sealant, a clean at the edges for any squished out and a check inside the bearing housing for any contamination and we're good to go! Feel and listen for any sound or clicking and then run her at 78RPM for a half hour.

Oh, and just one more thing...

2566681943_59262a7e00.jpg


The Rosewood arm board arrived today from Taiwan, so its time to get it measured and drilled and the tonearm fitted. Progress.
 
2566852143_af779846bc.jpg


Unlike the Orbe which came with a predrilled arm board all precision machined from metal and was just a bot-on job (one of the reasons why I liked the Orbe so much), the Thorens needed a custom arm board drilled with a Ø20mm hole along an arc of 212 mm. Fortunately I had a Mørch protractor printed and was able to exactly measure where the 212 and cross-section to the centre line of the arm board was. This is all old skool stuff. Not done this in like 20 years in the days before decks came with precut arm boards to order.

2567676460_f5943076cf.jpg


All measured and so drilling commences. If I screw it up now I screw it up bad. I actually had to buy a 20mm flat bit for this as I was without a sharp enough one which was 40 years old and blunted! Breathe deep... here goes.

2566854375_f14bcde861.jpg


After that assembling the Mørch UP4 as per instructions. Collet is bolted on underside, pillar mechanism threaded into collet, adjust VTA and nip-up the tiny allen nuts to maintain VTA. This will change when I get the cart obviously. The hardest bit was threading the anti-skate nylon wire through the clock spring used to tension the anti skate bias... phew!

2566855879_cc6a48398e.jpg


Arm rest Ø10mm hole (coo not had one of those for years!) drilled into place 155mm below pivot point of arm. All I need now is a cartridge!

Now for some lunch and tidy up.
 
I'm honoured my ex Morch arm is sitting on this deck - looks a great job.

Re oil - just a thought - but when messing around with these decks late 70's Molyslip was reccomended to me by Tom Fletcher of NAS - don't know whether anyone else has tried this on a 124, I seem to recall it worked rather well?
 
yes if you look back a page I was going to add the 5% slip additive at the last lube which, now the thicker bearing thrust plate is in (and sealed) I can start to address that tomorrow.

Glad you like the way your ex-tonearm has been implemented.

thanks all
 
I'm sure you must have another cartridge to try - come on, we all want to hear how good it sounds.

I wish my Dad had had something that nice for us to play our records on when we were kids.
 
Patrick

Stop hassling!

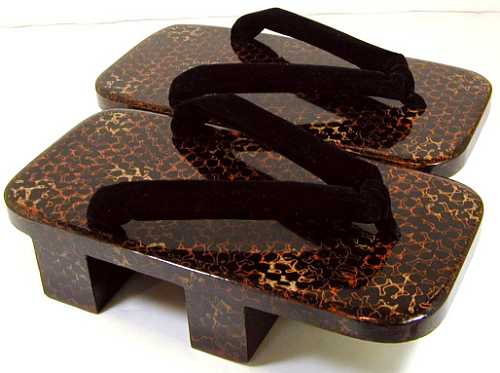
fox-san will retire to a shady glade in his kimono and write haiku exposing the frivolity of modern life whilst the Koetsu is made just so. Thus a perfect zen state for cartridge alignment and contemplative listening will be reached just in time for McPat the postie to bring enameled glory to fox-san's glade.

Without the contemplation, fox-san may listen to the SOUNDS instead of the MUSIC.

It is like a finger pointing to the moon. Don't look at the finger, else you will miss all of the heavenly glory.

Jonathan

(student of fox-do)
 
I think he'd be better off buying a cheap cartridge and sending it to Alex S for the lacquer.

Life's too short to wait for postman McPat.
 
... but it's not so short as to rush things to an unsatisfactory conclusion. I still have a few things to tidy up.

I've a DL103 and will compare the Koetsu upon its repair/return.


advertisement


Back
Top